
- Value: Online optimizers offer convenience and speed for quick web image compression.
- Comparison: They excel for casual use but fall short for professional, high-volume, or sensitive tasks.
- Decision: Choose online tools for simple needs; desktop software like UniConverter for control, privacy, and batch processing.
- Risk: Be aware of privacy issues, quality degradation, and upload limits with free online services.
In this article
- Part 1: What is Online Image Optimizer & Image Compressor?
- Part 2: Online Image Optimizer & Image Compressor: Core Features, Pros & Cons
- Part 3: Online Image Optimizer & Image Compressor: Target Audience & Use Cases
- Part 4: Online Image Optimizer & Image Compressor vs. Leading Alternatives
- Part 5: Risks & Pitfalls
- Part 6: How to Use UniConverter for Efficient Audio and Video Compression
- Part 7: Conclusion
- Part 8: FAQs
Online Image Optimizer & Image Compressor Review: A Comprehensive Comparison
When I first started blogging, I quickly realized that large image files were slowing down my website, frustrating visitors, and hurting my search engine rankings. This led me down a rabbit hole of exploring various online image optimization tools. This Online Image Optimizer & Image Compressor review aims to cut through the noise, offering a user-centric perspective on how these tools perform in real-world scenarios. I'll delve into their core features, highlight their pros and cons, and compare them against leading alternatives to help you make an informed decision about which solution best fits your needs.
Part 1: What is Online Image Optimizer & Image Compressor?
Online Image Optimizers and Image Compressors are web-based tools designed to reduce the file size of digital images without significantly compromising their visual quality. For anyone working with digital content, these tools are indispensable for improving website performance, saving storage space, and facilitating faster sharing. My journey with these tools began out of necessity, as I struggled with slow loading times and oversized image libraries.
The Growing Need for Efficient Image Compression
* Website Performance: Large images are a primary culprit behind slow website loading speeds, directly impacting user experience and SEO.
* Storage & Bandwidth: Efficient compression reduces the amount of storage needed for image libraries and lowers bandwidth consumption for both hosts and users.
* Mobile Responsiveness: Optimized images are crucial for fast loading on mobile devices, where internet speeds can be inconsistent.
* Email & Social Media: Smaller file sizes make images easier to attach to emails and upload to social media platforms without quality loss.
Part 2: Online Image Optimizer & Image Compressor: Core Features, Pros & Cons
From my experience, the typical online image optimizer offers a straightforward interface focused on getting the job done quickly. They usually support common image formats like JPEG, PNG, and GIF, and some even handle WebP.
Core Features:
* Drag-and-Drop Interface: Simplifies the upload process.
* Automatic Compression: Applies default optimization settings.
* Format Conversion: Often allows converting images between different formats.
* Quality Preview: Shows a side-by-side comparison of original and compressed images.
* Download Options: Provides easy download of optimized files.
Pros:
* Accessibility & Convenience: Being web-based, I can access these tools from any device with an internet connection, without needing to install any software. This is a huge time-saver when I'm on the go.
* Ease of Use: Most online optimizers have incredibly intuitive interfaces. I just drag my images, click a button, and I'm done. No steep learning curve involved.
* Cost-Effectiveness: Many offer generous free tiers, which is perfect for my personal blog and small projects where I don't want to invest in expensive software.
Cons:
* Dependency on Internet Connection: If my internet is flaky, I'm out of luck. This can be frustrating when I have a deadline and need to optimize images quickly.
* Potential Security & Privacy Concerns: Uploading my images to third-party servers always makes me a little nervous, especially if they contain sensitive information. I always check their privacy policies carefully.
Part 3: Online Image Optimizer & Image Compressor: Target Audience & Use Cases
I've found that online image optimizers are incredibly versatile, but they definitely shine in specific scenarios while falling short in others.
Best Use Case: Quick Optimization for Web Uploads
* Scenario: As a blogger, I constantly need to quickly optimize several images for my latest blog post. My goal is to improve page load speed without the hassle of installing desktop software. I just open my browser, drag my images to an online tool like TinyPNG, and within seconds, I have perfectly optimized images ready for upload. It's fast, efficient, and requires minimal effort, allowing me to focus on my content.
Limited Use Case: Batch Processing Large Volumes of High-Resolution Images
* Scenario: Imagine I'm a professional photographer who needs to compress hundreds of high-resolution RAW images for client delivery. I need to maintain maximum quality and metadata, but online tools often impose strict upload limits and processing time constraints. Trying to upload hundreds of large RAW files one by one, or even in small batches, becomes an incredibly tedious and time-consuming process. The risk of quality degradation with aggressive online compression also makes me hesitant to use them for my professional work.
Part 4: Online Image Optimizer & Image Compressor vs. Leading Alternatives
When I compare online image optimizers, I look beyond just file size reduction. Factors like batch processing, privacy, and advanced features are crucial.
Comparison Table: Online Image Optimizer & Image Compressor vs. Leading Alternatives
| Feature/Tool | Online Image Optimizer & Image Compressor | TinyPNG | Compressor.io | Squoosh |
| Compression Type | Lossy/Lossless | Lossy | Lossy/Lossless | Lossy/Lossless |
| Batch Processing | Limited/Paid | Yes | Yes | No |
| File Size Limit | Varies | 5MB/image | 10MB/image | 16MB/image |
| Privacy Policy | Varies | Clear | Clear | Open Source |
| Advanced Features | Basic | Smart Lossy | Quality Control | Advanced Codecs |
Key Differentiators:
From my experience, TinyPNG excels in its "smart lossy" compression for PNGs and JPEGs, often achieving impressive reductions with minimal visual impact. Compressor.io offers a good balance of lossy and lossless options with a decent file size limit. Squoosh, being open-source and browser-based, provides excellent control over various codecs and settings, making it a favorite for developers. For general online image optimizers, they often serve as a good starting point but might lack the specific features or higher limits of these specialized alternatives.
Part 5: Risks & Pitfalls
While online image optimizers are convenient, I've learned that they come with their own set of risks and potential pitfalls that I always consider before using them.
Data Privacy and Security Concerns
This is my biggest concern. When I upload images to a third-party server, I'm essentially trusting them with my data. I always worry about whether my images are stored securely, who has access to them, and if they might be used for purposes I haven't consented to. For sensitive personal photos or proprietary business graphics, this is a deal-breaker. I always scrutinize their privacy policy, but even then, there's an inherent risk.
Quality Degradation and Irreversible Changes
It's a delicate balance. While the goal is to reduce file size, aggressive compression, especially lossy compression, can lead to noticeable quality degradation. I've had instances where images became pixelated, colors shifted, or fine details were lost, and once it's compressed, there's no going back to the original quality. This is particularly problematic for images where visual fidelity is paramount, like product photos or professional artwork.
Upload Limits and Bandwidth Constraints
Many free online tools impose strict limits on the number of images I can upload at once, or the total file size. If I have a large batch of images, this means I have to upload them in multiple sessions, which is incredibly time-consuming and inefficient. Additionally, my own internet bandwidth can become a bottleneck, making the upload and download process slow and frustrating, especially with larger files.
Intrusive Advertisements and Upsells
I've encountered numerous online optimizers that are riddled with intrusive ads, pop-ups, and constant prompts to upgrade to a paid version. This significantly detracts from the user experience and can make the process feel clunky and unprofessional. Sometimes, these ads even obscure the functionality I need, making it difficult to use the tool effectively.
Lack of Offline Functionality
The complete reliance on an internet connection is a significant drawback for me. If I'm working offline, or in an area with poor connectivity, these tools are completely useless. This limits my flexibility and can interrupt my workflow, especially when I'm traveling or working remotely without a stable connection.
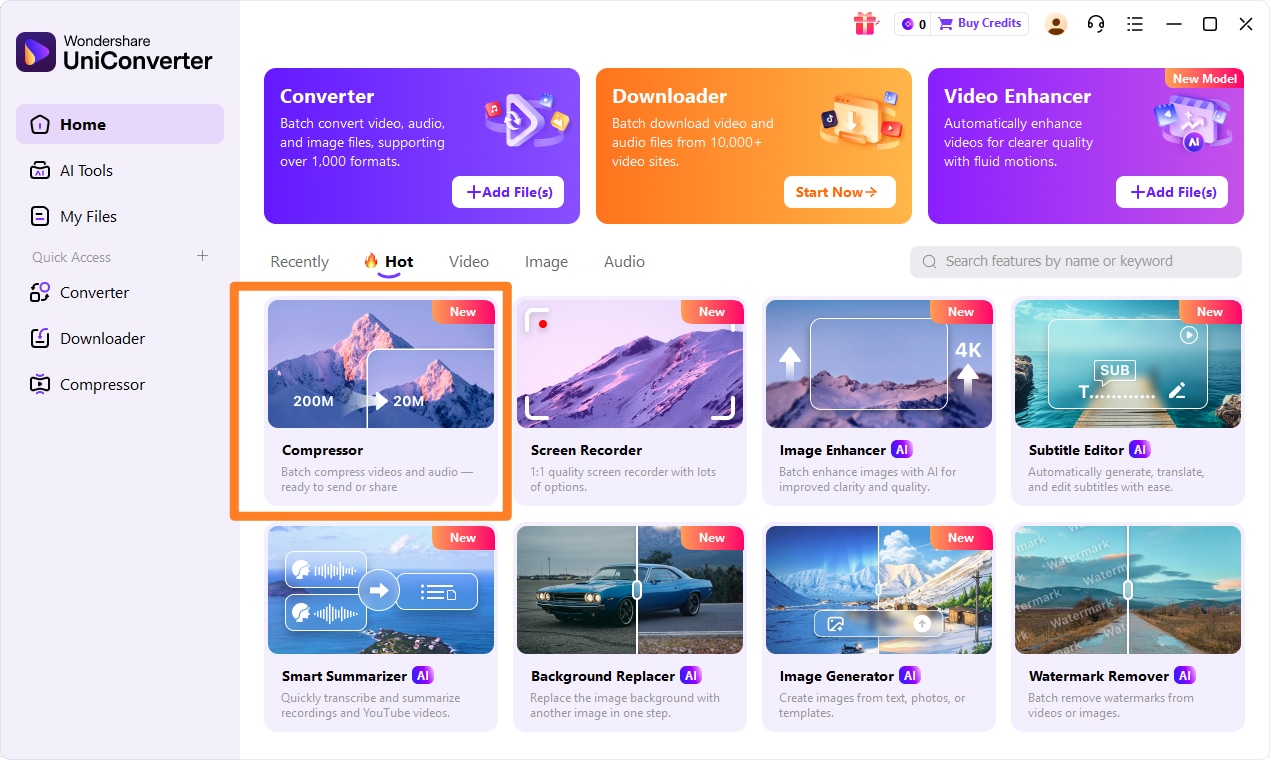
Part 6: How to Use UniConverter for Efficient Audio and Video Compression
For anyone handling large batches of media files, UniConverter is a far more dependable option than most online tools. It gives me a smoother workflow for both audio compression and video compression, without the usual downsides like privacy concerns, watermarks, intrusive ads, or inconsistent output. I also like its broad format support and GPU acceleration, which make processing faster and more efficient. For video files, it can even help compress videos without quality loss as much as possible, so it works well as a practical all-in-one solution for everyday media compression.
Step 1: Open UniConverter and Choose Compressor
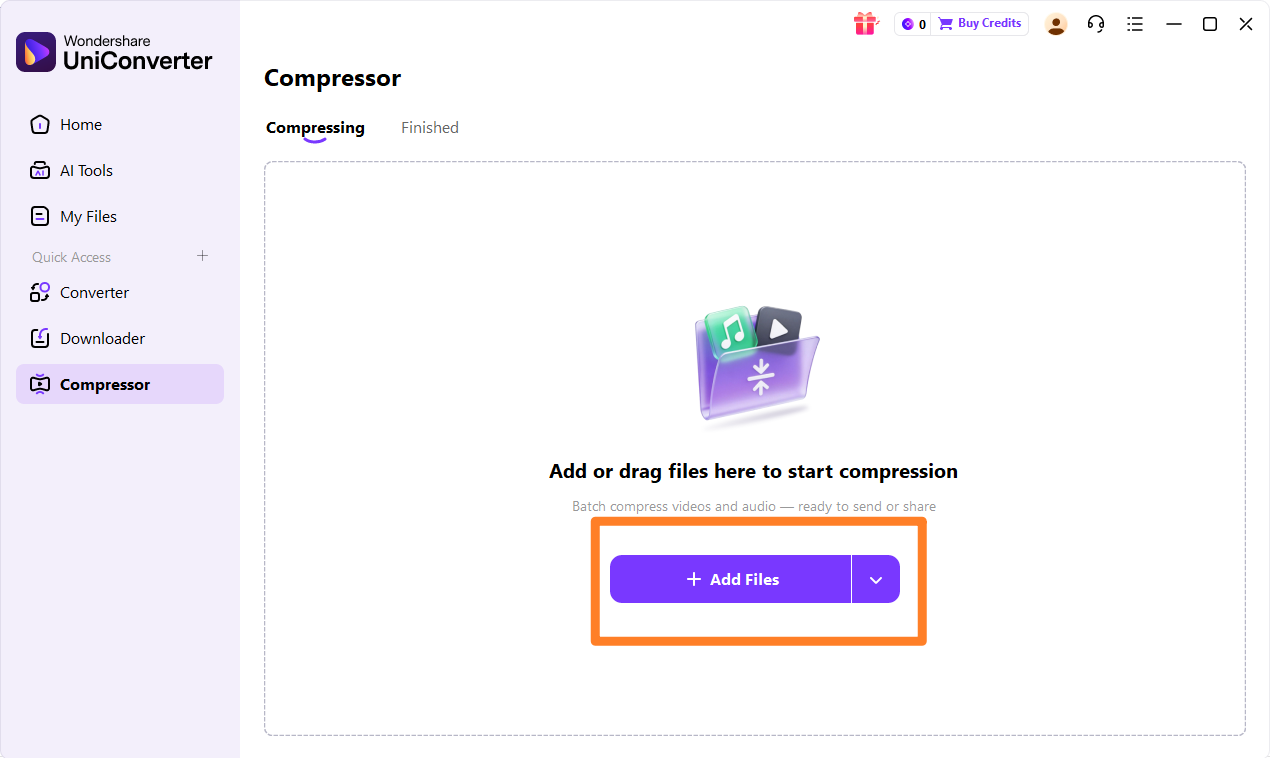
Launch UniConverter on your computer. From the main interface, navigate to the "Toolbox" section and select the "Video Compressor" or "Image Compressor" option.
Step 2: Upload the Video, Audios or Images
Drag and drop your desired video, audio, or image files directly into the UniConverter window. You can also click the "Add Files" button to browse and select them from your computer.
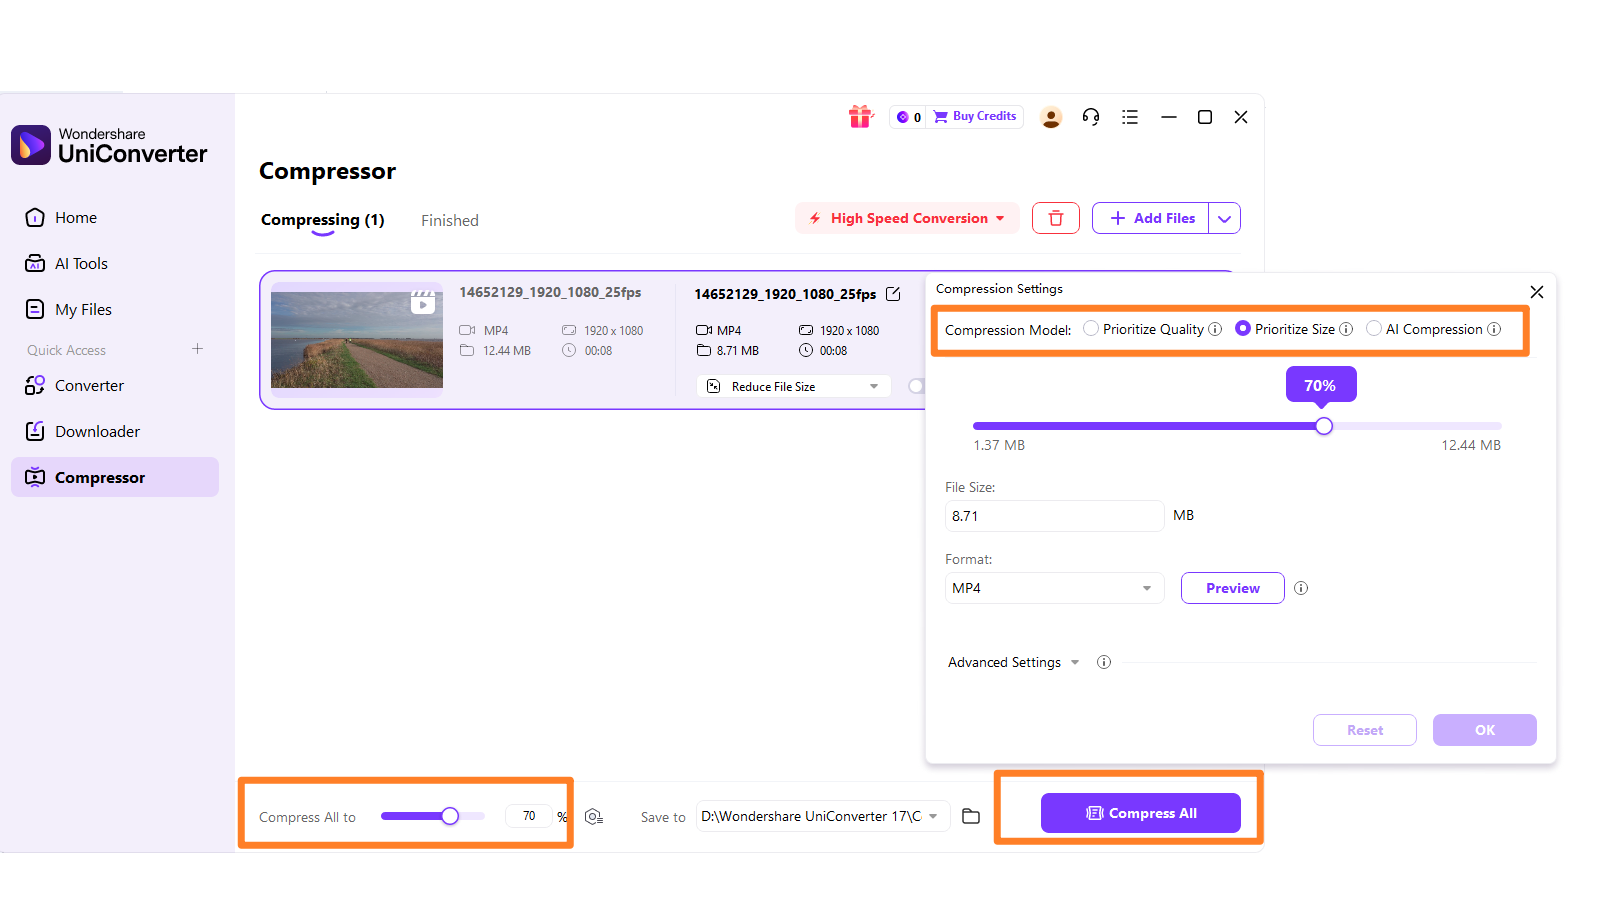
Step 3: Choose Required Parameters
After uploading, you'll see options to adjust compression settings. You can choose the output format, resolution, quality, and file size. UniConverter provides a preview feature so you can see the estimated file size and quality before compression.
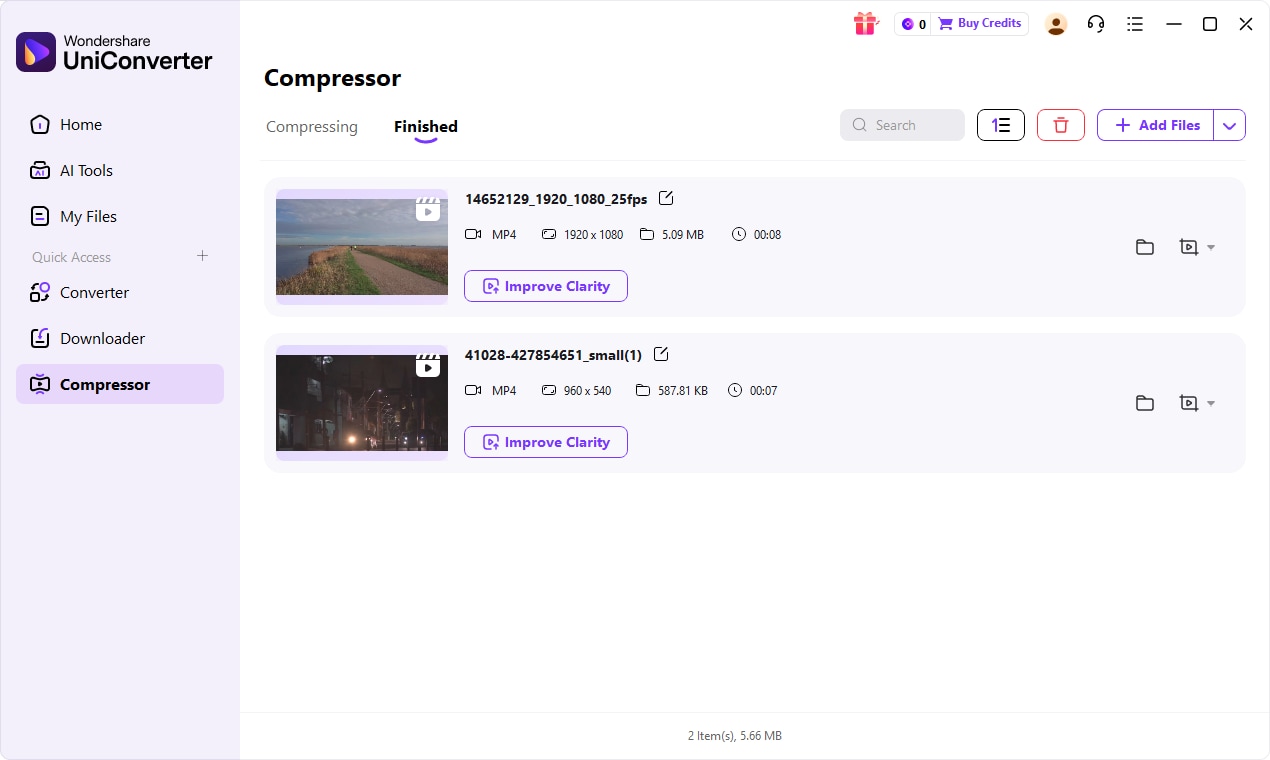
Step 4: Start Compression and Export
Once you're satisfied with the settings, click the "Compress" button. UniConverter will quickly process your files. After compression, you can find your optimized files in the designated output folder.

Need a Better Online Image Optimizer Alternative?
Part 7: Conclusion
After exploring various options, my Online Image Optimizer & Image Compressor review reveals that these tools are incredibly valuable for casual users and bloggers who prioritize convenience and speed for web uploads. They excel at quick, on-the-fly optimizations without the need for software installation. However, for web developers and small businesses requiring more control, batch processing, or specific output formats, dedicated desktop software or more advanced online alternatives like Squoosh offer greater flexibility and better results. Professional photographers and graphic designers, who cannot compromise on image quality or metadata, will find online tools insufficient and should invest in robust desktop applications like UniConverter that provide lossless compression, extensive format support, and secure offline processing. Ultimately, the best tool depends on your specific needs, volume of work, and tolerance for potential quality trade-offs or privacy concerns.
Part 8: FAQs
-
1. What is the difference between lossy and lossless compression?
Lossy compression permanently removes some data to achieve smaller file sizes, which is great for web images but means you can't get the original quality back. Lossless compression reduces file size without discarding any data, allowing for perfect reconstruction of the original image, which is better for archiving or professional work.
-
2. Are online image optimizers safe to use for sensitive images?
It really depends on the specific service's privacy policy and security measures. For highly sensitive images, I personally wouldn't risk it with an online tool. Desktop software or self-hosted solutions are generally much safer as your files never leave your computer.
-
3. How much can I expect to reduce my image file size using an online compressor?
Compression rates vary widely depending on the original image, the algorithm used, and your desired quality. I've seen reductions of 30-80% quite commonly. For example, a large JPEG might shrink significantly, while a complex PNG might have less room for reduction.
-
4. Do online image optimizers affect image quality noticeably?
Lossy compression can introduce artifacts or reduce sharpness, especially if you push the compression levels too high. You might notice banding in gradients or a slight blur. Lossless compression aims to maintain original quality, but it won't achieve the same drastic file size reductions.
-
5. Can I batch process images with most online image compressors?
Many online tools do offer batch processing, but often with limitations on the number of images or total file size in their free tiers. If you need to process hundreds of images regularly without limitations or quality concerns, a dedicated desktop application like UniConverter would be a more efficient and reliable solution.
