
- Value: Logic Pro's compressor offers diverse models, seamless integration, and visual feedback for precise control.
- Comparison: It's a cost-effective, native solution within Logic Pro, unlike versatile cross-platform competitors like FabFilter Pro-C 2.
- Decision: Ideal for professional mixing within Logic Pro; not suitable for standalone use or other DAWs.
- Avoid Pitfalls: Prevent over-compression, understand parameters, don't blindly rely on presets, and ensure proper gain staging.
- Alternative: UniConverter provides quick, stable, and lossless audio/video compression for non-DAW needs.
In this article
- Part 1: What is Logic Pro Audio Compressor?
- Part 2: Logic Pro Audio Compressor: Core Features, Pros, and Cons
- Part 3: Logic Pro Audio Compressor: Ideal Use Cases and Limitations
- Part 4: Logic Pro Audio Compressor vs. Competitors
- Part 5: Risks and Pitfalls to Avoid
- Part 6: How to Use UniConverter to Compress Efficient Audio and Video
- Part 7: Conclusion
- Part 8: FAQs
Logic Pro Audio Compressor: In-Depth Review and Comparison
When I first started producing music, I quickly realized the magic of compression – it's what makes tracks sound polished, punchy, and professional. Logic Pro, Apple's flagship DAW, comes bundled with its own powerful Logic Pro Audio Compressor review, a tool I've come to rely on heavily. This built-in compressor offers a surprising amount of versatility, emulating various classic hardware units, and seamlessly integrates into my workflow. In this comprehensive review, I'll dive deep into its features, compare it against some industry-standard third-party plugins, and help you understand when it's the right tool for your audio production needs. Whether you're a seasoned pro or just starting your journey in audio engineering, understanding this compressor is crucial for achieving a professional sound.
Part 1: What is Logic Pro Audio Compressor?
The Logic Pro Audio Compressor is a native plugin included with Apple's Logic Pro X digital audio workstation. It's not just a single compressor; it's a suite of seven distinct compression models, each designed to emulate the characteristics of classic hardware compressors. This means I get access to a wide range of sonic flavors, from transparent leveling to aggressive, character-adding squish, all within my DAW without needing to purchase additional plugins. My goal with this review is to explore its capabilities, compare it to popular alternatives, and help you decide if it meets your compression needs.
The Role of Compression in Modern Audio Production
* Taming Dynamics: Compression helps to reduce the dynamic range of an audio signal, making loud parts quieter and quiet parts louder, resulting in a more consistent and controlled sound.
* Adding Punch and Sustain: By carefully manipulating attack and release times, I can make drums punch harder or sustain notes longer, giving my mixes more energy and glue.
* Shaping Tone and Character: Different compressor types impart unique sonic characteristics, allowing me to add warmth, aggression, or smoothness to individual tracks or entire mixes.
* Achieving a Professional Polish: Properly applied compression is a cornerstone of professional-sounding mixes, helping tracks sit better together and sound more cohesive.
Part 2: Logic Pro Audio Compressor: Core Features, Pros, and Cons
The Logic Pro Audio Compressor is a robust tool within Logic Pro X, offering a surprising amount of depth for a stock plugin. It provides a comprehensive set of controls, including Threshold, Ratio, Attack, Release, Gain, and a Mix knob for parallel compression. What truly sets it apart are its seven distinct compression models: Platinum Digital, Studio VCA, Studio FET, Studio Opto, Vintage VCA, Vintage FET, and Vintage Opto. Each model brings a unique sonic fingerprint, allowing me to achieve a wide array of compression effects.
Pros:
* Versatile Compression Models for Diverse Sonic Textures: I love having access to so many different compression styles, from the clean and transparent Platinum Digital to the aggressive character of the Studio FET, all in one plugin.
* Seamless Integration within the Logic Pro Ecosystem: Being a native Logic Pro plugin, it runs incredibly efficiently, has zero latency, and integrates perfectly with Logic's automation and sidechaining capabilities.
* Intuitive Visual Feedback for Precise Control: The graphical display showing gain reduction and the input/output levels makes it easy for me to visualize what the compressor is doing to my audio.
Cons:
* Exclusively Available within Logic Pro X: This is a big one – if I'm working in another DAW, I simply can't use this compressor, which can be limiting if I collaborate or switch DAWs often.
* Can Be Overwhelming for Novice Users Without Prior Compression Knowledge: With seven models and a full suite of parameters, it can feel like a lot to grasp for someone just starting out with compression.
Part 3: Logic Pro Audio Compressor: Ideal Use Cases and Limitations
I find myself reaching for Logic Pro's compressor in almost every mixing scenario within Logic Pro. Its versatility means I can use it on individual tracks, buses, and even the master output. For instance, when I'm mixing vocals, I often start with the "Studio VCA" or "Opto" models for a smooth, transparent leveling, then perhaps add a touch of "Vintage FET" for some character and aggression if needed. For drums, the "Studio FET" can add fantastic punch, while the "Vintage VCA" can glue a drum bus together beautifully. It’s my go-to for achieving a polished, professional sound without ever leaving Logic Pro.
Best Use Case: Professional Mixing and Mastering within Logic Pro
If I'm working entirely within Logic Pro X, this compressor is an absolute powerhouse. It's perfect for detailed dynamic control on individual instruments, shaping the punch of drums, controlling vocal dynamics, and even adding subtle glue to my master bus. Its low CPU usage and seamless integration make it ideal for complex projects where efficiency is key.
Limited Use Case: Quick, Standalone Compression for Non-Logic Pro Users
However, if I'm working on a project outside of Logic Pro, or if I just need a quick, simple compression on an audio file without opening a full DAW, this compressor is completely useless to me. It's not a standalone application or a VST/AU plugin that can be used in other software. For those scenarios, I'd need a different tool.
Part 4: Logic Pro Audio Compressor vs. Competitors
When I compare Logic Pro's compressor to other industry standards, I see a clear picture of its strengths and weaknesses.
| Feature/Compressor | Logic Pro Audio Compressor | FabFilter Pro-C 2 | Waves Renaissance Compressor | Universal Audio 1176 |
| Integration | Logic Pro Native | VST/AU/AAX | VST/AU/AAX | UAD Platform |
| Versatility | High (Multiple Models) | High (Advanced Controls) | Medium (Classic Sound) | Medium (Specific Character) |
| CPU Usage | Low-Medium | Medium | Low | Medium-High |
| Price | Included with Logic Pro | $$$ | $$ | $$$$ |
| Learning Curve | Medium | High | Low-Medium | Medium |
Key Differentiators:
Native Integration vs. Cross-Platform Compatibility: Logic Pro's compressor excels within its own DAW, offering unparalleled efficiency. In contrast, plugins like FabFilter Pro-C 2 and Waves Renaissance Compressor provide broad compatibility across various DAWs, which is crucial if I work with different software. Model Variety vs. Signature Sound: Logic Pro provides a range of compression styles, aiming to cover many bases. However, some competitors, like the Universal Audio 1176, are revered for their distinct, iconic sounds that are often sought after for specific sonic characteristics. * Cost-Effectiveness: For me, as a Logic Pro user, its compressor is a "free" addition, making it incredibly cost-effective. Premium third-party plugins like FabFilter Pro-C 2 and Universal Audio's offerings require significant investment.
Part 5: Risks and Pitfalls to Avoid
Using any compressor, including Logic Pro's, comes with potential pitfalls that can degrade your audio if not handled carefully. I've learned these lessons the hard way, and I want to share them so you can avoid common mistakes.
Over-Compression Leading to Unnatural Dynamics
One of the biggest risks is simply using too much compression. When I over-compress, my audio can sound squashed, lifeless, and pump unnaturally. This often happens when I'm trying to make everything loud, but instead, I end up sucking the life out of the performance. It's crucial to listen carefully and use my ears, not just my eyes, to determine if the compression is serving the track.
Misunderstanding Compressor Parameters (Threshold, Ratio, Attack, Release)
Each parameter plays a critical role, and misunderstanding them can lead to undesirable results. For example, setting a very fast attack time on drums can kill the initial transient, making them sound weak. Conversely, a very slow attack might let too much of the initial peak through, defeating the purpose of compression. Similarly, an incorrect release time can cause pumping or breathing artifacts. I always make sure I understand what each knob does before I start tweaking.
Relying Solely on Presets Without Understanding Their Impact
While presets can be a good starting point, they are rarely a "set it and forget it" solution. Every audio track is unique, and a preset designed for one vocal might sound terrible on another. If I just blindly apply presets, I often miss out on the opportunity to truly tailor the compression to my specific audio, leading to generic or even detrimental results. It's important to use presets as a guide, then adjust them to fit my track.
Ignoring the Importance of Gain Staging Before Compression
Proper gain staging is fundamental. If my signal going into the compressor is too hot or too quiet, the compressor won't react optimally. Too hot, and it might be constantly compressing, even at a high threshold. Too quiet, and I might need extreme settings to get any compression, which can introduce noise. I always ensure my levels are healthy before the signal hits the compressor to get the best performance out of it.
Part 6: How to Use UniConverter to Compress Efficient Audio and Video
For quick file compression without opening a full DAW or dealing with overly technical settings, UniConverter is often the most practical option. It gives me a straightforward workflow for both audio compression and video compression, which is especially useful when files need to be shared online or reduced to save storage space. I also like that it supports a wide range of formats, runs without ads, and uses GPU acceleration to speed up processing. For video projects, it can also help compress videos without quality loss as much as possible, making it a convenient all-in-one solution for everyday media handling.
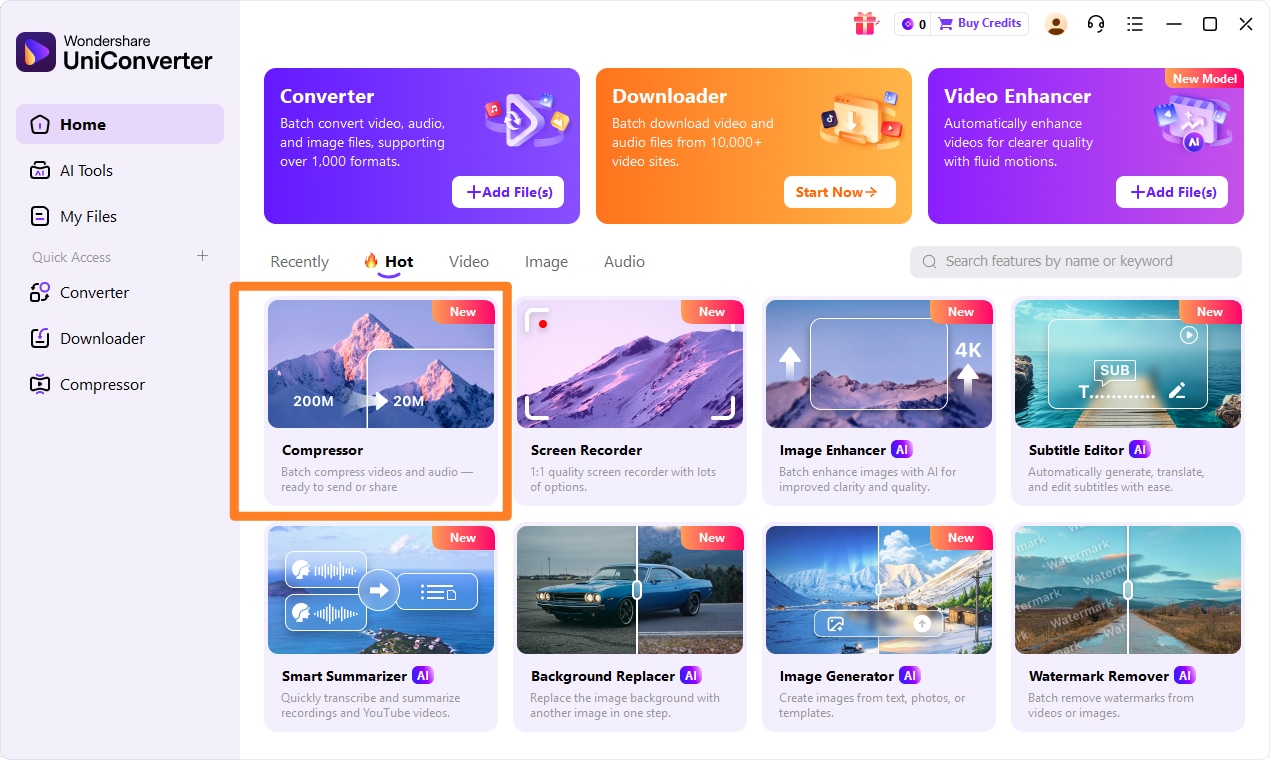
Step 1: Open UniConverter and Choose Compressor
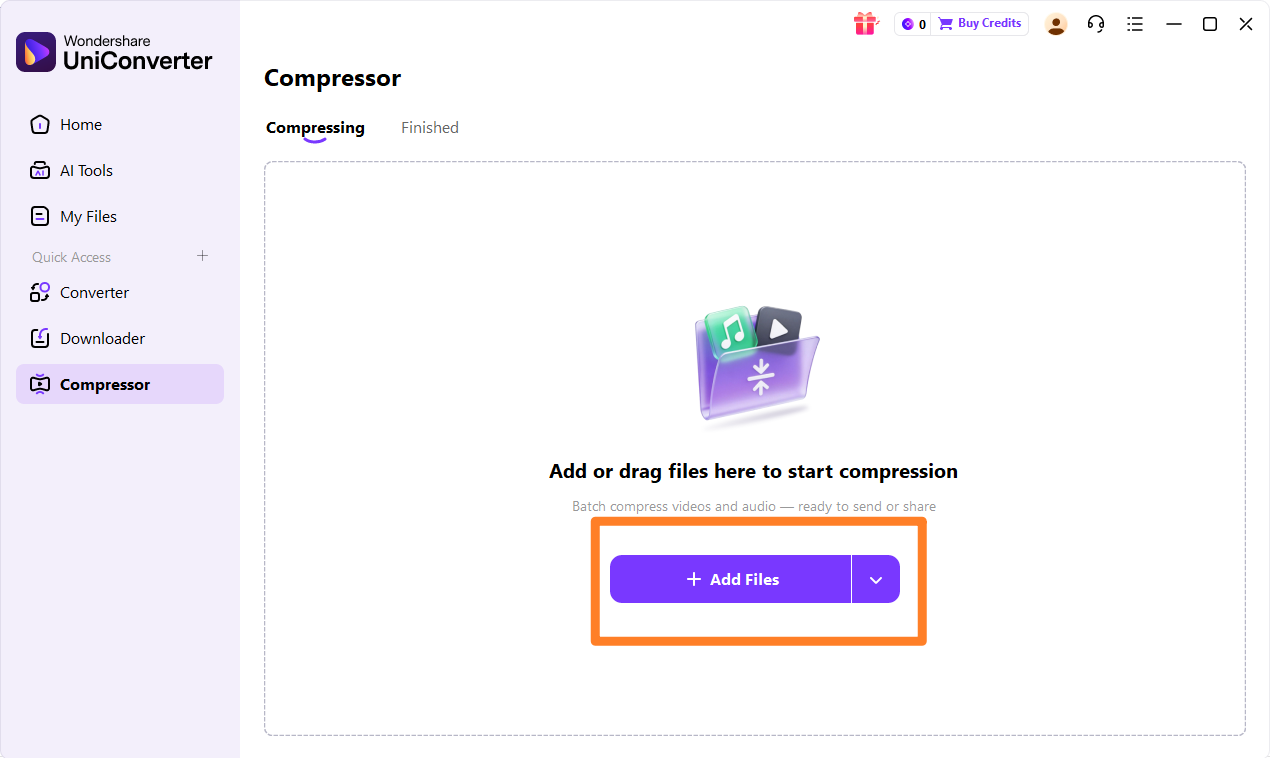
Step 2: Upload the Video, Audios or Images
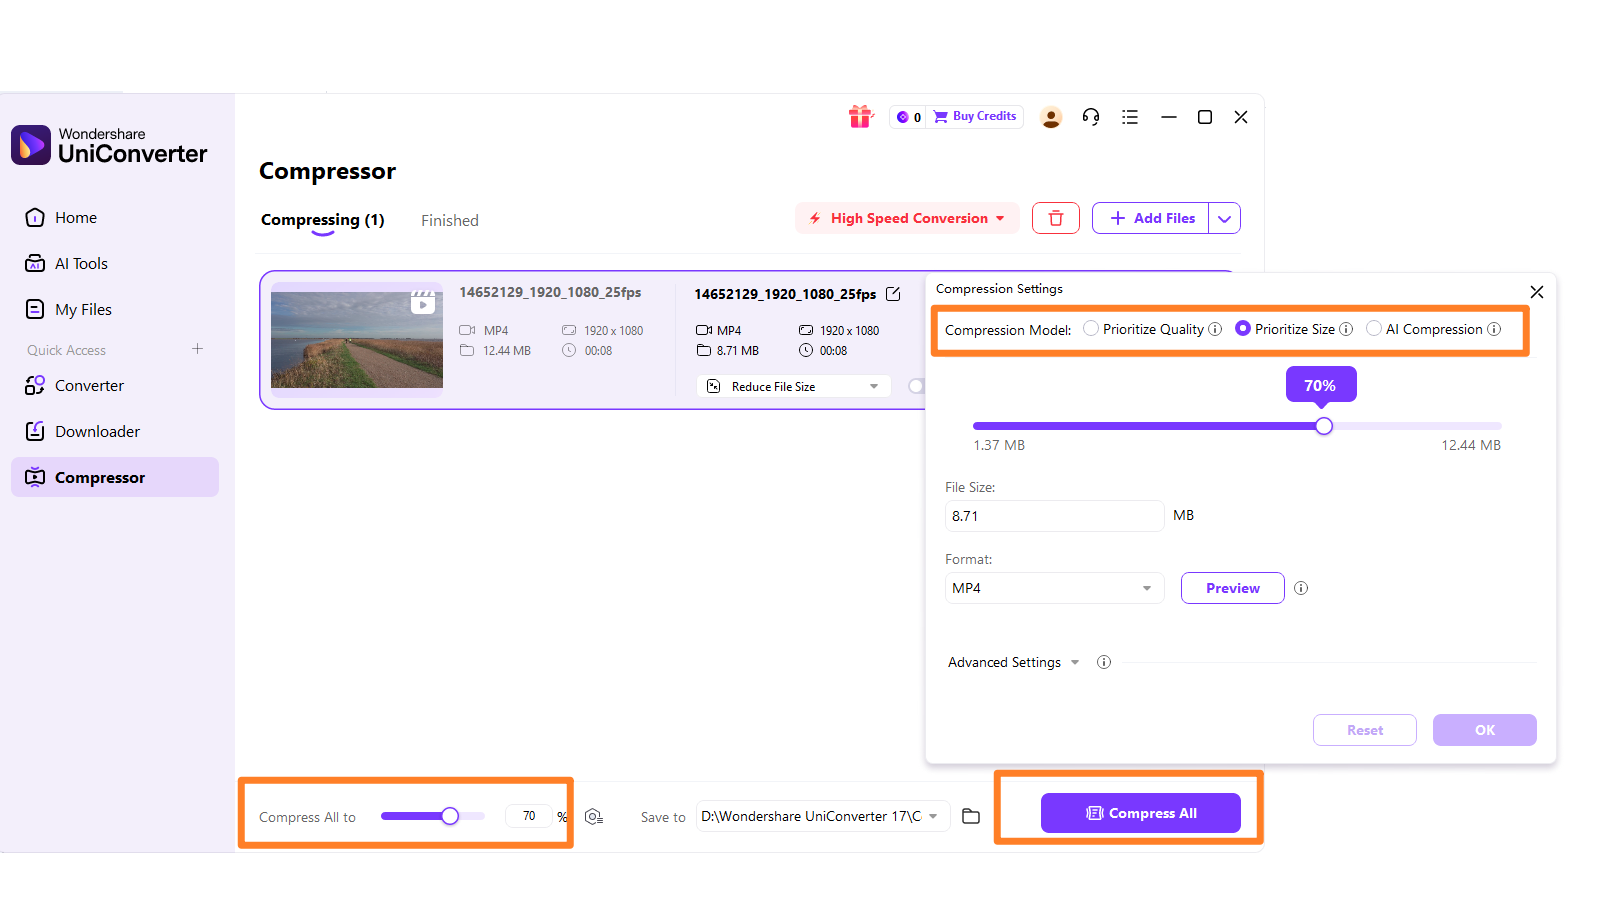
Step 3: Choose Required Parameters
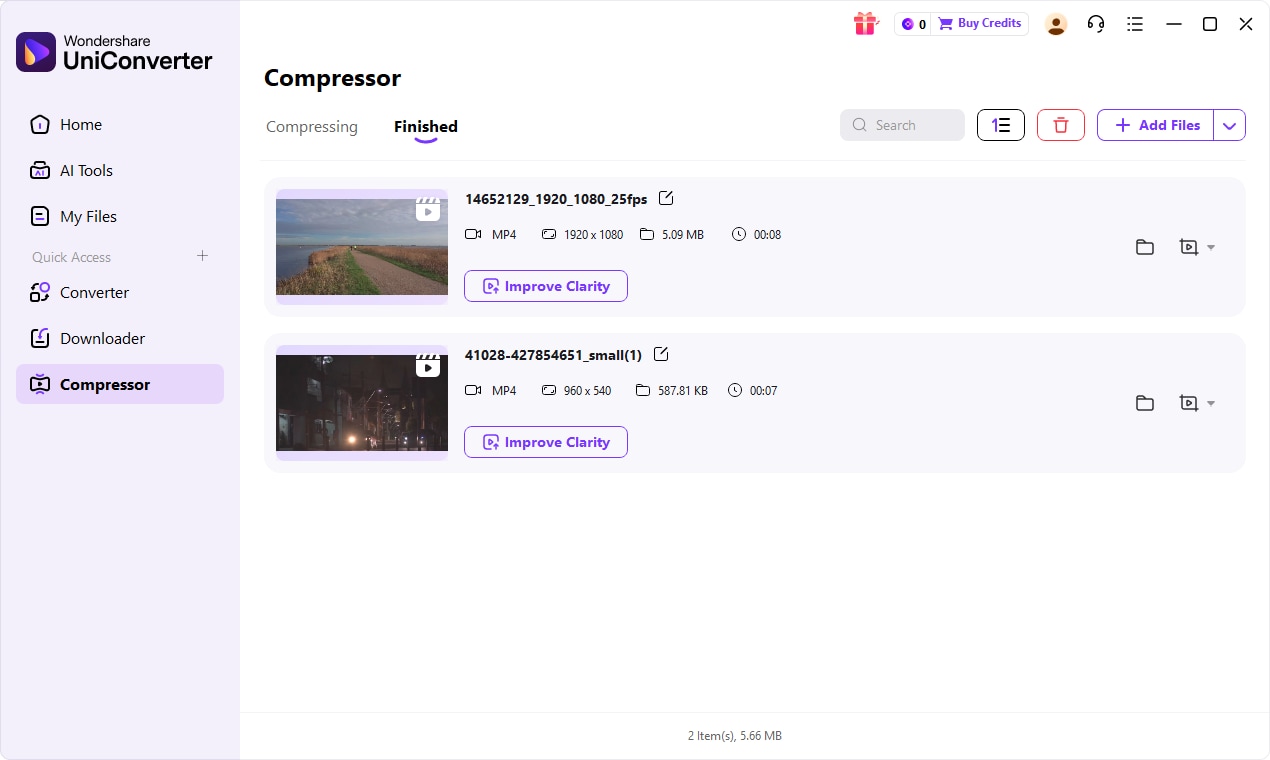
Step 4: Save the Compressed File

Enhance Audio with a Powerful Compressor Alternative
Part 7: Conclusion
The Logic Pro Audio Compressor review reveals it to be an incredibly powerful and versatile tool, especially for those of us deeply embedded in the Logic Pro ecosystem. Its array of compression models, seamless integration, and efficient performance make it a go-to for professional mixing and mastering within the DAW. For dedicated Logic Pro users, it’s an invaluable asset that comes "free" with the software, offering a quality that rivals many paid third-party plugins. However, its exclusivity to Logic Pro means it's not a solution for cross-DAW workflows or standalone compression needs. While it offers immense value, understanding the fundamentals of compression and avoiding common pitfalls like over-compression or misusing parameters is crucial for achieving optimal results. For specialized compression needs or when working outside Logic Pro, exploring premium third-party plugins like FabFilter Pro-C 2 or Universal Audio's offerings might be beneficial. Ultimately, the best compressor is the one you understand and can wield effectively to serve your music.
Part 8: FAQs
-
1. Can I use Logic Pro's Audio Compressor as a standalone plugin?
No, Logic Pro's Audio Compressor is an integrated plugin exclusively available within Logic Pro X. It cannot be used outside of the Logic Pro environment.
-
2. What is the best compression model to use in Logic Pro for vocals?
For vocals, I often find myself gravitating towards the "Studio VCA" or "Opto" models in Logic Pro's compressor. They tend to offer a smoother, more musical compression that works well for maintaining vocal clarity and presence. However, the "Vintage FET" can also be great for adding a more aggressive or characterful sound to certain vocal performances. It really depends on the specific vocal and the desired outcome.
-
3. How does Logic Pro's compressor compare to hardware compressors?
While software compressors have made significant advancements, hardware compressors often offer a unique analog warmth, saturation, and transient response that can be difficult to fully replicate digitally. Logic Pro's models aim to emulate classic hardware units, and they do a commendable job, but a true analog unit can still offer a distinct sonic flavor. For quick and easy compression of audio files outside of a DAW, I sometimes use UniConverter for its straightforward approach.
-
4. Is it necessary to use multiple compressors on a single track?
Often, "serial compression" (using multiple compressors in sequence) can be highly beneficial for achieving more transparent and controlled dynamics. I might use one compressor for gentle leveling and another for adding punch or character, with each handling a different aspect of the dynamic range. This approach can sound more natural than trying to achieve everything with a single, heavily-driven compressor.
-
5. What are the key parameters to understand when using any audio compressor?
The most crucial parameters for me are Threshold (the level at which compression begins), Ratio (how much compression is applied once the threshold is crossed), Attack (how quickly the compressor reacts to signals above the threshold), Release (how quickly the compressor stops compressing once the signal falls below the threshold), and Make-up Gain (to compensate for the volume reduction caused by compression). Understanding these is fundamental to effective compression.
