
- Light Image Resizer: Ideal for Windows users, offering robust batch processing and custom presets for professional image optimization.
- UniConverter: A versatile cross-platform solution for efficient image, video, and audio compression with intuitive UI.
- Online Tools (TinyPNG/Compressor.io): Best for quick, one-off compressions, but lack advanced features and batch capabilities.
- Quality vs. Size: Aggressive compression can degrade image quality; balance is crucial for optimal results.
- Privacy Concerns: Local processing (desktop apps) is safer for sensitive images than cloud-based online compressors.
- Decision Factor: Choose based on OS, frequency of use, desired quality, and need for batch processing or multimedia features.
In this article
- Part 1: What is Light Image Resizer?
- Part 2: Light Image Resizer: Core Features, Pros, and Cons
- Part 3: Light Image Resizer: Ideal Users and Use Cases
- Part 4: Light Image Resizer & Alternatives: A Comparative Analysis
- Part 5: Risks and Pitfalls to Consider
- Part 6: How to Use UniConverter to Compress Efficiently
- Part 7: Conclusion
- Part 8: FAQs
The digital age has made images an indispensable part of our daily lives, from personal memories shared on social media to professional portfolios and e-commerce product listings. However, the ever-increasing resolution of cameras means larger file sizes, which can quickly become a burden on storage, website loading times, and data transfer. This is where image resizing and compression tools become essential. In this Light Image Resizer Image Compressor review, I'll dive deep into two prominent players in this space, Light Image Resizer and a generic Image Compressor, offering a scenario-based comparison to help you navigate your choices. I'll explore their features, ideal use cases, and potential pitfalls, ultimately guiding you toward the best solution for your specific needs.
Part 1: What is Light Image Resizer?
Light Image Resizer is a popular Windows-based software designed to help you organize and optimize your digital pictures. It's been around for a while, establishing itself as a reliable tool for anyone dealing with large volumes of images. My goal with this review is to cut through the marketing jargon and provide an honest assessment of its capabilities, comparing it against more generic image compressor tools that often pop up online or as basic desktop utilities. We'll explore whether its specialized features truly offer an advantage over simpler alternatives, especially when considering different user needs and technical proficiencies.
The Growing Need for Efficient Image Management
* Website Performance: Large image files can significantly slow down website loading times, impacting user experience and SEO.
* Storage Constraints: High-resolution photos quickly consume valuable storage space on devices and cloud services.
* Email and Sharing Limitations: Many platforms impose size limits on image attachments, making compression a necessity.
* Batch Processing Demands: Professionals often need to process hundreds or thousands of images at once, requiring efficient batch capabilities.
Part 2: Light Image Resizer: Core Features, Pros, and Cons
Light Image Resizer is a robust tool that excels in managing and optimizing image collections. Its core strength lies in its ability to handle multiple images efficiently, offering a range of customization options. I've found its integration with the Windows shell particularly convenient, allowing for quick actions directly from file explorer. The software supports various image formats, including JPEG, BMP, GIF, PNG, TIFF, and more, ensuring broad compatibility for most users. It also offers watermarking capabilities, which is a nice bonus for photographers.
Pros:
* Batch Processing for Large Photo Collections: I can easily process hundreds of images simultaneously, saving a significant amount of time.
* Customizable Presets for Diverse Output Needs: I appreciate being able to create and save custom profiles for different purposes, like web, email, or print.
* Integration with Windows Shell for Quick Access: Right-clicking an image or folder in Windows Explorer and selecting "Resize pictures" is incredibly convenient.
Cons:
* Limited Cross-Platform Availability: As a Mac user, I'm out of luck; it's exclusively for Windows, which is a major drawback for me.
* Occasional UI Clutter for Novice Users: The interface, while powerful, can feel a bit overwhelming with all its options if you're new to image editing.
Part 3: Light Image Resizer: Ideal Users and Use Cases
Light Image Resizer truly shines for specific user groups and scenarios where its specialized features are put to good use. From my experience, it's not a one-size-fits-all solution, but rather a powerful tool for those with particular demands.
Best Use Case: Professional Photographers and Web Developers Optimizing Images for Websites
If you're a professional photographer or a web developer, Light Image Resizer is a godsend. I often have hundreds of high-resolution images that need to be resized, watermarked, and compressed for client websites or online galleries. The batch processing and custom preset features allow me to maintain consistent quality and dimensions across an entire project with minimal effort. I can set specific dimensions, resolutions, and compression levels, ensuring my images are web-ready without sacrificing visual integrity. It's an indispensable part of my workflow for preparing images for online platforms where speed and consistency are paramount.
Limited Use Case: Casual Users Needing Quick, One-Off Compressions on Mobile Devices
For someone like my aunt, who just wants to quickly compress a single photo from her phone to email to a friend, Light Image Resizer is overkill. First, it's a desktop application, so it's not accessible on her mobile device. Second, the sheer number of options and settings would likely confuse her. She just needs a simple "compress this image" button, not a suite of advanced features. In this scenario, a basic online image compressor or a built-in phone feature would be far more appropriate and user-friendly for her needs.
Part 4: Light Image Resizer & Alternatives: A Comparative Analysis
When it comes to image optimization, Light Image Resizer stands out for its desktop-centric, batch processing power. However, it's crucial to see how it stacks up against other popular tools like UniConverter, TinyPNG, and Compressor.io, which offer different strengths.
| Feature/Tool | Light Image Resizer | UniConverter | TinyPNG | Compressor.io |
| Batch Processing | Yes | Yes | Limited (up to 20 images) | No |
| Custom Presets | Yes | Yes | No | No |
| Output Quality Control | High (detailed options) | High (adjustable) | Moderate (automatic) | Moderate (automatic) |
| Platform | Windows | Windows/Mac | Web | Web |
| Price | Paid (one-time) | Paid (subscription/one-time) | Free (limited)/Paid API | Free (limited)/Paid |
| Processing Speed | Fast (desktop-based) | Fast (GPU acceleration) | Moderate (web-based) | Moderate (web-based) |
| Ease of Use | Moderate (feature-rich) | High (intuitive UI) | High (simple drag & drop) | High (simple drag & drop) |
| Security | Local processing | Local processing | Cloud processing (check policy) | Cloud processing (check policy) |
Light Image Resizer excels in providing granular control and efficient batch processing for Windows users, making it ideal for professionals. UniConverter offers a more comprehensive multimedia toolkit with excellent image compression and a user-friendly interface across both Windows and Mac, often leveraging GPU acceleration for speed. TinyPNG and Compressor.io are fantastic for quick, high-quality web-based compression, especially for PNG and JPEG files, but they lack advanced features and batch capabilities for large volumes. For me, the choice often comes down to whether I need a dedicated desktop tool with full control or a quick online solution.
Part 5: Risks and Pitfalls to Consider
While image resizing and compression tools are incredibly useful, I've learned that there are several risks and pitfalls to be aware of, especially when relying on free or less reputable options. It's not just about getting a smaller file; it's about protecting your work and your privacy.
Potential Loss of Image Quality with Aggressive Compression
This is probably the most common issue I've encountered. When you push compression settings too far, especially with "lossy" formats like JPEG, you can end up with noticeable artifacts, pixelation, or a general degradation of image quality. What looked fine on a small screen might appear blurry or blocky when viewed larger. It's a delicate balance between file size and visual integrity, and I always recommend testing different compression levels on a sample image before applying it to an entire batch.
Data Privacy Concerns with Online Compressors
Using free online image compressors can be a double-edged sword. While convenient, I'm always wary about uploading sensitive or proprietary images to third-party servers. Many free services don't explicitly state how long they store your images, who has access to them, or how they ensure data security. For professional work or personal photos, this is a significant concern. I always advise checking the privacy policy thoroughly or opting for desktop software where your images remain on your local machine.
Annoying Advertisements in Free Versions
Many free image compression tools, particularly online ones, are supported by advertisements. These can range from subtle banners to intrusive pop-ups that disrupt your workflow and can even lead to accidental clicks on malicious sites. While I understand the need for monetization, a cluttered interface full of ads can make the user experience frustrating and inefficient. It's a trade-off you often make for "free" software.
Software Compatibility Issues on Different Operating Systems
If you're working across different operating systems, like Windows and Mac, relying on a single platform-specific tool can be a headache. Light Image Resizer, for instance, is Windows-only. This means I'd need a separate solution for my Mac, leading to inconsistencies in workflow or output. It's important to consider your entire tech ecosystem when choosing a tool to avoid compatibility frustrations down the line.
Over-reliance on Default Settings Without Understanding Impact
It's easy to just hit "compress" or "resize" using default settings, but this can lead to suboptimal results. I've seen many instances where users unknowingly apply settings that are either too aggressive, ruining image quality, or not aggressive enough, failing to achieve the desired file size reduction. Understanding what each setting (e.g., resolution, quality percentage, resampling filter) does is crucial for achieving the best outcome for your specific needs.
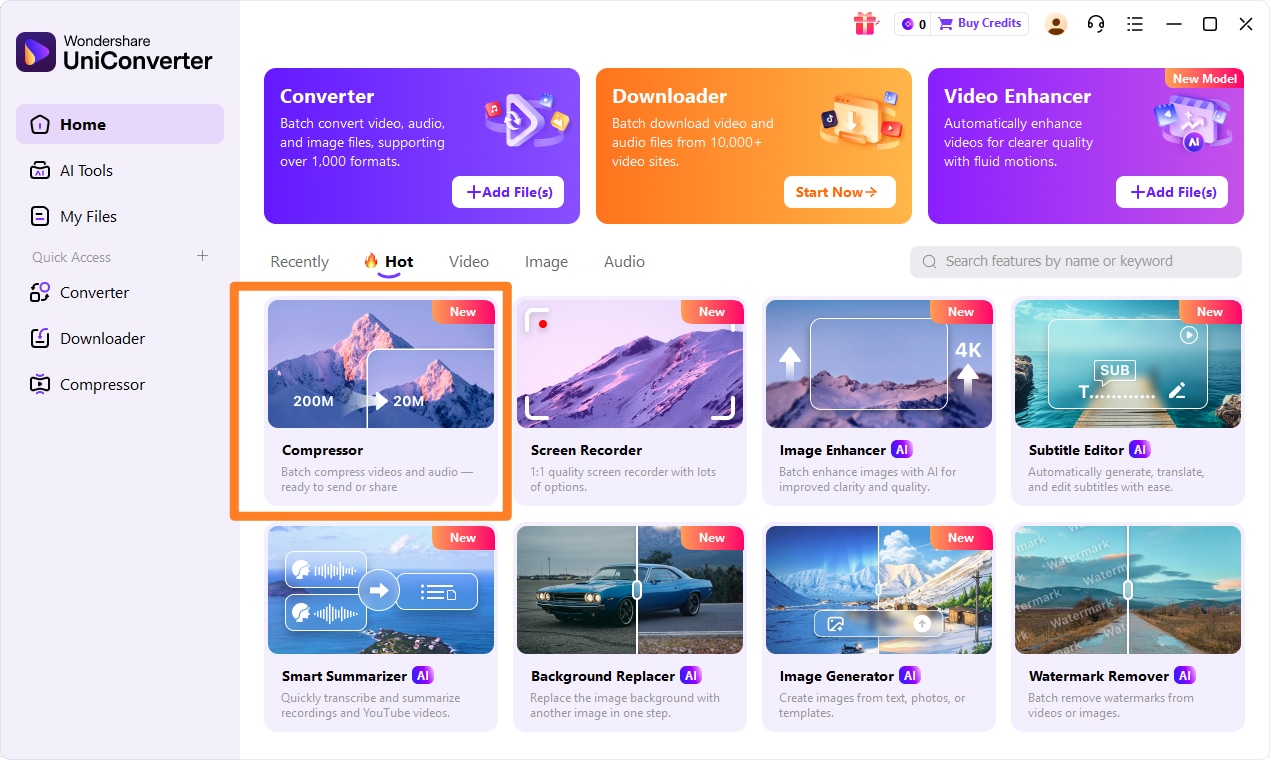
Part 6: How to Use UniConverter to Compress Efficiently
For anyone who needs more than a single-purpose compressor, UniConverter is a practical all-in-one alternative. Instead of focusing on just one file type, it handles video compression, image compression, and audio compression in one place, which makes the workflow much more efficient. It’s especially useful when other tools feel too limited, produce uneven results, or don’t offer solid batch support. With broad format compatibility, GPU acceleration, and a smoother overall experience, it’s a dependable choice for reducing file sizes while keeping quality at a reasonable level.
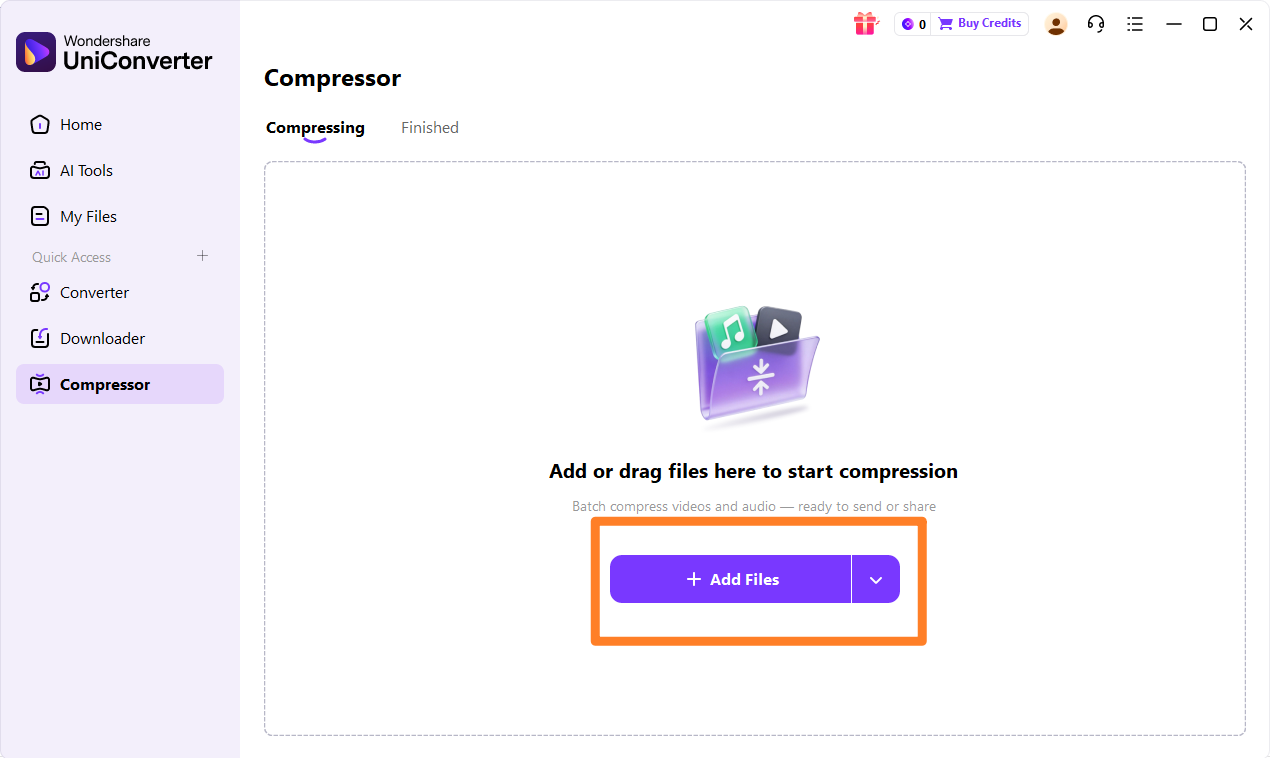
Step 1: Open UniConverter and Choose Compressor
Launch UniConverter on your computer. From the main interface, navigate to the "Toolbox" section and select the "Image Compressor" or "Video Compressor" option, depending on your needs.
Step 2: Upload the Video, Audios or Images
Click the "Add Files" button or simply drag and drop your desired images, videos, or audio files into the program window. You can add multiple files for batch processing.
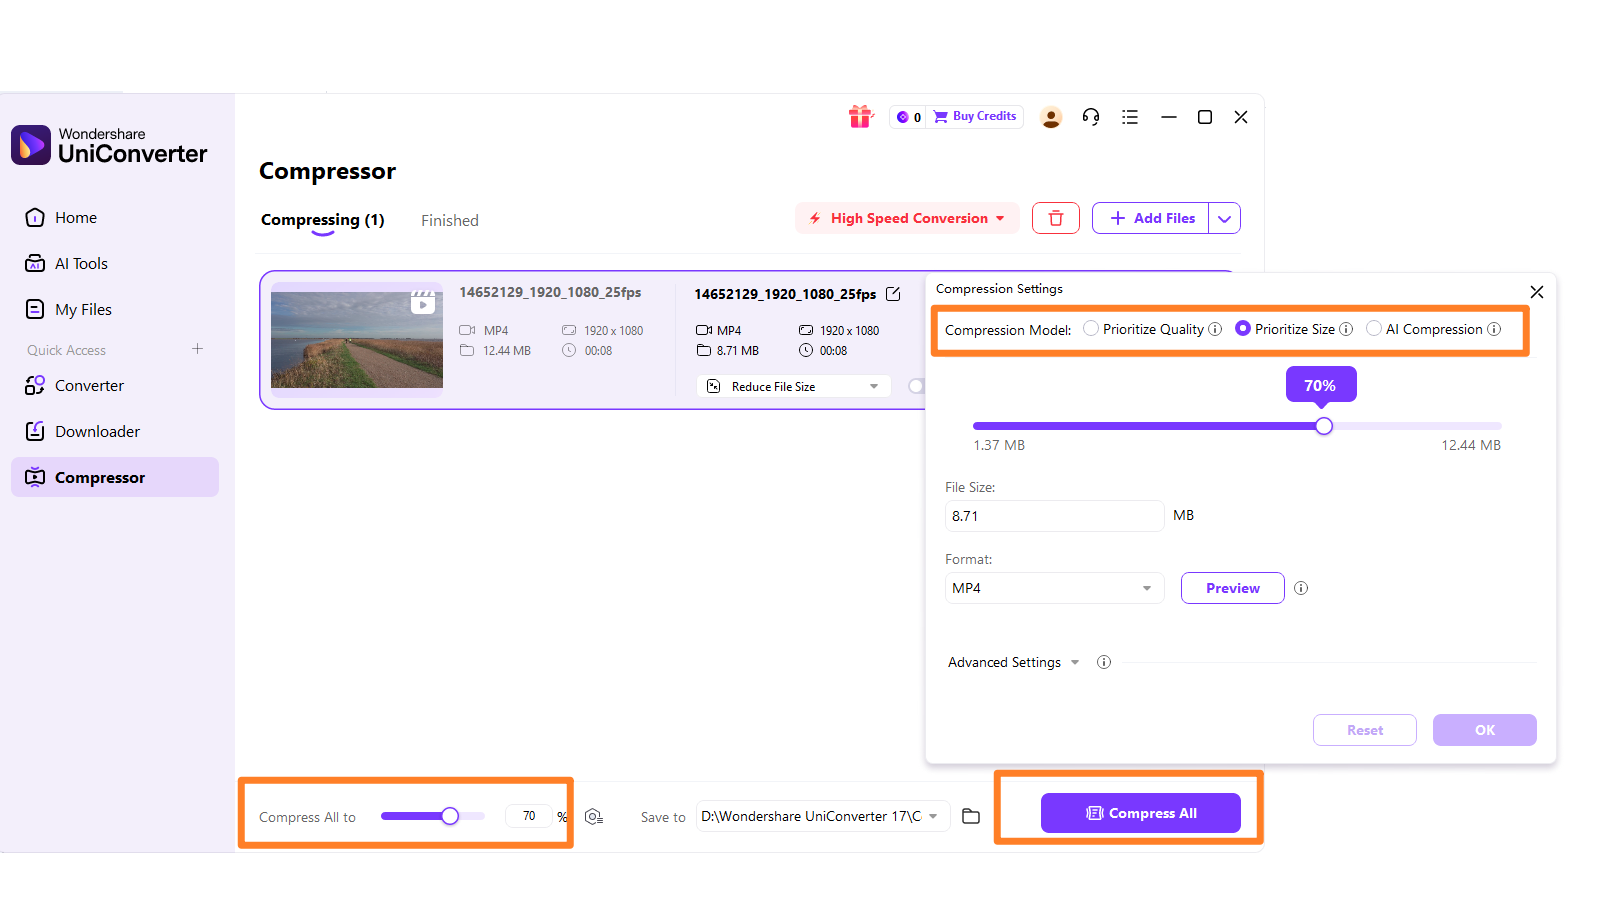
Step 3: Choose Required Parameters
Once your files are loaded, you can adjust the compression settings. For images, you can set the output size, quality, and format. For videos and audios, you can modify resolution, bitrate, and format to achieve the desired file size reduction.
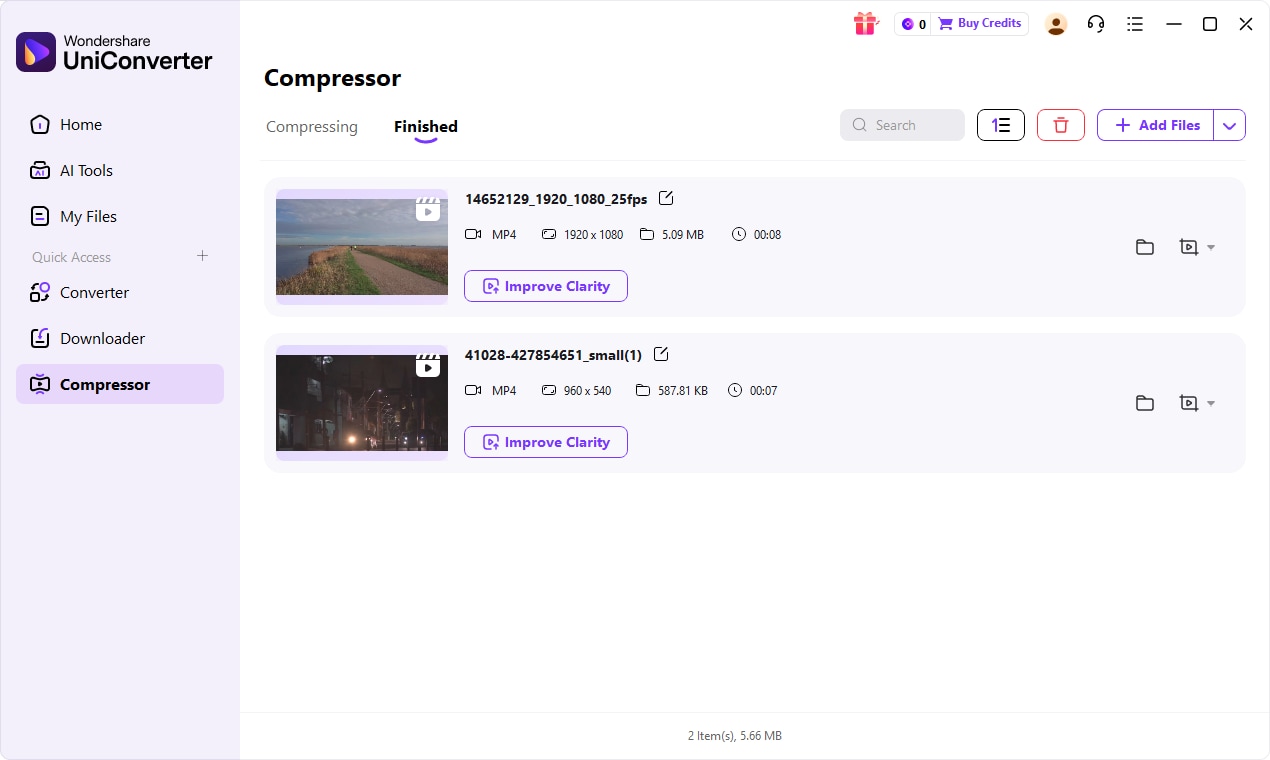
Step 4: Save the Compressed File
After configuring your settings, click the "Compress" button. UniConverter will quickly process your files. Once complete, you can find your optimized files in the designated output folder.

Need a Better Image Resizer & Compressor?
Part 7: Conclusion
In this Light Image Resizer Image Compressor review, I've explored the nuances of image optimization tools, highlighting the strengths and weaknesses of both specialized desktop software and generic alternatives. Light Image Resizer stands out for its robust batch processing, customizable presets, and seamless Windows integration, making it an excellent choice for professionals like photographers and web developers who require precise control and high-volume processing. However, its Windows-only nature and potentially overwhelming interface for novices are notable drawbacks. For casual users needing quick, one-off compressions, especially on mobile devices, simpler online tools or built-in device features are often more practical. When considering the broader landscape, tools like UniConverter offer a compelling middle ground, providing comprehensive multimedia capabilities, cross-platform support, and a user-friendly experience that balances quality and efficiency. Ultimately, the best tool depends on your specific operating system, frequency of use, desired output quality, and comfort with technical settings. Always prioritize testing different compression levels to strike the perfect balance between file size reduction and image integrity.
Part 8: FAQs
-
1. What is the main difference between resizing and compressing an image?
Resizing changes the physical dimensions (width and height) of an image, making it appear smaller or larger. Compressing reduces the file size of an image by removing redundant data or applying algorithms that make the data more efficient, without necessarily changing its dimensions.
-
2. Can image compression lead to a loss of quality?
Yes, especially with "lossy" compression methods like JPEG. These methods permanently discard some image data to achieve smaller file sizes, which can result in visible artifacts or a reduction in sharpness if compressed too aggressively. "Lossless" compression, like PNG, reduces file size without losing any data, but typically results in larger files than lossy methods.
-
3. Are online image compressors safe to use for sensitive images?
It depends heavily on the specific service. Many free online compressors may store your images temporarily on their servers, and their privacy policies vary. For sensitive or proprietary images, I always recommend using a reputable desktop application like Light Image Resizer or UniConverter, where your images are processed locally on your computer, minimizing privacy risks.
-
4. How do I choose the right image compression tool for my needs?
Consider your operating system (Windows, Mac, web), the frequency of use (one-off vs. batch processing), the desired output quality (minimal loss vs. aggressive reduction), and your budget (free vs. paid). For comprehensive needs including video and audio, UniConverter is a strong contender, while Light Image Resizer is excellent for Windows-based batch image processing.
-
5. What is the ideal file format for web images after compression?
JPEG is generally ideal for photographs and images with continuous tones due to its efficient lossy compression. PNG is best for images with transparency, sharp edges, or fewer colors (like logos and graphics) because it uses lossless compression. WebP is a modern format that offers superior compression for both lossy and lossless images, making it an excellent choice for modern web optimization if browser compatibility is met.
