
- Value: Cubase's compressor offers precise dynamics control and seamless integration for professional mixing within the DAW.
- Comparison: While integrated, it faces competition from versatile third-party plugins like FabFilter Pro-C 2 and characterful Waves Renaissance Compressor.
- Decision: Ideal for Cubase users seeking deep integration; consider alternatives for specific sonic character or standalone file compression.
- Pitfalls: Beware of over-compression, CPU strain on large projects, and its dependence on the Cubase environment.
- Alternative: UniConverter provides efficient, user-friendly audio/video file compression outside of a DAW, great for sharing and storage.
In this article
- Part 1: What is Cubase Audio Compressor?
- Part 2: Cubase Audio Compressor: Core Features, Pros, and Cons
- Part 3: Cubase Audio Compressor: Target Audience and Use Cases
- Part 4: Cubase Audio Compressor and Alternatives: A Comparative Analysis
- Part 5: Risks and Pitfalls of Using Cubase Audio Compressor
- Part 6: How to Use UniConverter to Compress Audio and Video Efficiently
- Part 7: Conclusion
- Part 8: FAQs
Cubase Audio Compressor: A Comprehensive Review
When I first started producing music, I quickly realized that achieving a professional, polished sound wasn't just about recording great performances; it was also about how I processed those recordings. One of the most fundamental tools in any audio engineer's arsenal is the compressor, and for Cubase users like me, the built-in Cubase Audio Compressor review is often the first port of call. This review will delve into its capabilities, compare it with leading alternatives, and help you understand when it's the right tool for your mix, and when you might need to look elsewhere.
Part 1: What is Cubase Audio Compressor?
The Cubase Audio Compressor is an integrated dynamics processing tool within the Steinberg Cubase Digital Audio Workstation (DAW). It's designed to control the dynamic range of audio signals, making loud parts quieter and quiet parts louder, thereby creating a more consistent and impactful sound. As a core component of the Cubase ecosystem, it offers seamless integration and is readily available to all Cubase users without the need for additional purchases. My journey with it began as a necessity, learning to tame unruly vocals and punch up drums, and it quickly became indispensable for achieving a balanced mix.
Understanding the Need for Audio Compression in Music Production
* Taming Dynamic Peaks: Raw audio often has significant volume fluctuations that can make a mix sound uneven or cause clipping. Compression helps to smooth these out.
* Increasing Perceived Loudness: By reducing the dynamic range, you can raise the overall volume of a track without hitting peak levels, making it sound louder and more present.
* Shaping Transients and Sustain: Compressors can be used creatively to emphasize the attack of a drum or extend the sustain of a guitar, adding character to instruments.
* Achieving Mix Cohesion: Applying compression across multiple tracks or the master bus can help glue elements together, making the entire mix sound more unified.
Part 2: Cubase Audio Compressor: Core Features, Pros, and Cons
The Cubase Audio Compressor is a robust tool offering a comprehensive set of controls for dynamics processing. It provides standard parameters like Threshold, Ratio, Attack, Release, and Make-up Gain, allowing for precise shaping of the audio signal. Beyond the basics, it often includes a sidechain input for frequency-dependent compression or ducking effects, and sometimes a visual display of gain reduction, which is incredibly helpful for understanding its impact.
Pros:
* Precision Dynamics Control for Professional Mixing: I've found its controls to be highly responsive and accurate, allowing me to dial in very specific compression settings for different instruments.
* Seamless Integration within the Cubase Ecosystem: Being a native plugin, it loads instantly, doesn't require any extra authorization, and its parameters are fully integrated with Cubase's automation and project settings.
* Versatile Presets for Various Musical Genres: The included presets are a great starting point, offering quick solutions for vocals, drums, bass, and more, which I often tweak to fit my specific needs.
Cons:
* Steep Learning Curve for Beginners: For someone new to compression, understanding all the parameters and how they interact can be quite daunting. It took me a while to truly grasp its nuances.
* Resource-Intensive, Potentially Affecting System Performance: On larger projects with many instances, I've noticed it can consume a fair amount of CPU, especially when using more advanced features, which can sometimes lead to playback glitches on less powerful systems.
Part 3: Cubase Audio Compressor: Target Audience and Use Cases
The Cubase Audio Compressor is primarily aimed at music producers, audio engineers, and sound designers who are already working within the Cubase environment. Its comprehensive feature set and precise controls make it suitable for detailed audio manipulation, from subtle dynamic shaping to aggressive sound design. If you're serious about your mixes and mastering, and Cubase is your DAW of choice, this compressor is designed for you.
Best Use Case: Professional Studio Mixing and Mastering
I find the Cubase Audio Compressor excels in a professional studio setting. When I'm meticulously crafting a mix, I rely on its transparency and precision to control individual track dynamics, group buses, and even the master output. Its ability to handle complex dynamic changes makes it a go-to for achieving that polished, radio-ready sound. For instance, I frequently use it on lead vocals to ensure they sit consistently in the mix, or on the drum bus to add punch and cohesion.
Limited Use Case: Quick Fixes for Live Performance Audio
While technically capable, I wouldn't recommend the Cubase Audio Compressor for quick, on-the-fly fixes during a live performance. Its detailed controls, while powerful, are not designed for rapid adjustments in a high-pressure live environment. For live sound, simpler, more intuitive hardware compressors or dedicated live sound software with streamlined interfaces are generally preferred due to their immediate feedback and ease of use under pressure.
Part 4: Cubase Audio Compressor and Alternatives: A Comparative Analysis
When it comes to audio compression, the Cubase Audio Compressor is a solid contender, but it's not the only player in the game. I've often compared it to other popular options to see where it stands.
| Feature/Scenario | Cubase Audio Compressor | FabFilter Pro-C 2 | Waves Renaissance Compressor | UniConverter |
| Workflow Integration | Excellent within Cubase | Excellent (DAW agnostic) | Good (DAW agnostic) | Standalone (Excellent for file conversion) |
| Sound Character | Transparent, precise | Transparent, versatile | Warm, musical | Transparent (for file compression) |
| CPU Usage | Moderate to High | Moderate | Low to Moderate | Low (for file compression) |
| Learning Curve | Moderate to High | Moderate | Low to Moderate | Very Low |
| Price Point | Included with Cubase | High | Moderate | Moderate (one-time purchase) |
Key Differentiators: Workflow, Sound Character, and Learning Curve
From my experience, the Cubase Audio Compressor's biggest strength is its deep integration within Cubase, offering a seamless workflow that other plugins can't quite match. However, for a more transparent and versatile sound, FabFilter Pro-C 2 often wins out, especially with its advanced visual feedback and multiple compression styles. If I'm looking for a compressor that imparts a specific warm, musical character, the Waves Renaissance Compressor is a classic choice. For simple, efficient file compression outside of a DAW, UniConverter is incredibly user-friendly and fast. Each has its niche; Cubase's compressor is best for those deeply embedded in the Cubase ecosystem, while FabFilter offers more sonic flexibility, and Waves provides a distinct sonic signature. UniConverter shines for quick, high-quality file compression.
Part 5: Risks and Pitfalls of Using Cubase Audio Compressor
While the Cubase Audio Compressor is a powerful tool, it's not without its potential drawbacks and challenges. I've learned these lessons through trial and error, and it's important to be aware of them to avoid common mistakes that can degrade your audio quality.
Potential for Over-Compression and Loss of Dynamics
One of the biggest risks I've encountered is over-compression. It's easy to get carried away and apply too much gain reduction, which can suck the life out of your audio, making it sound flat, lifeless, and unnatural. You lose the natural dynamic ebb and flow that makes music engaging. Always aim for subtle control rather than extreme processing, and use your ears more than your eyes.
Compatibility Issues with Older Cubase Versions
While generally stable, I've occasionally run into minor compatibility quirks when trying to open projects created in much older Cubase versions, or when sharing projects with collaborators using different Cubase iterations. While rare, it's something to be mindful of, especially if you're working across different studio setups.
CPU Overload on Less Powerful Systems
As I mentioned earlier, the Cubase Audio Compressor, especially when used in multiple instances across a large project, can be quite demanding on your computer's CPU. If you're running an older or less powerful system, you might experience audio dropouts, latency, or even crashes. I've learned to freeze tracks or render audio when CPU usage gets too high to maintain a smooth workflow.
Dependence on Cubase for Optimal Functionality
Being a native Cubase plugin, its optimal functionality is inherently tied to the Cubase environment. While you can technically render tracks with it and use them elsewhere, you can't use the Cubase Audio Compressor as a standalone plugin in another DAW. This means if you ever switch DAWs or collaborate with someone using a different platform, you'll need to find an alternative compressor.
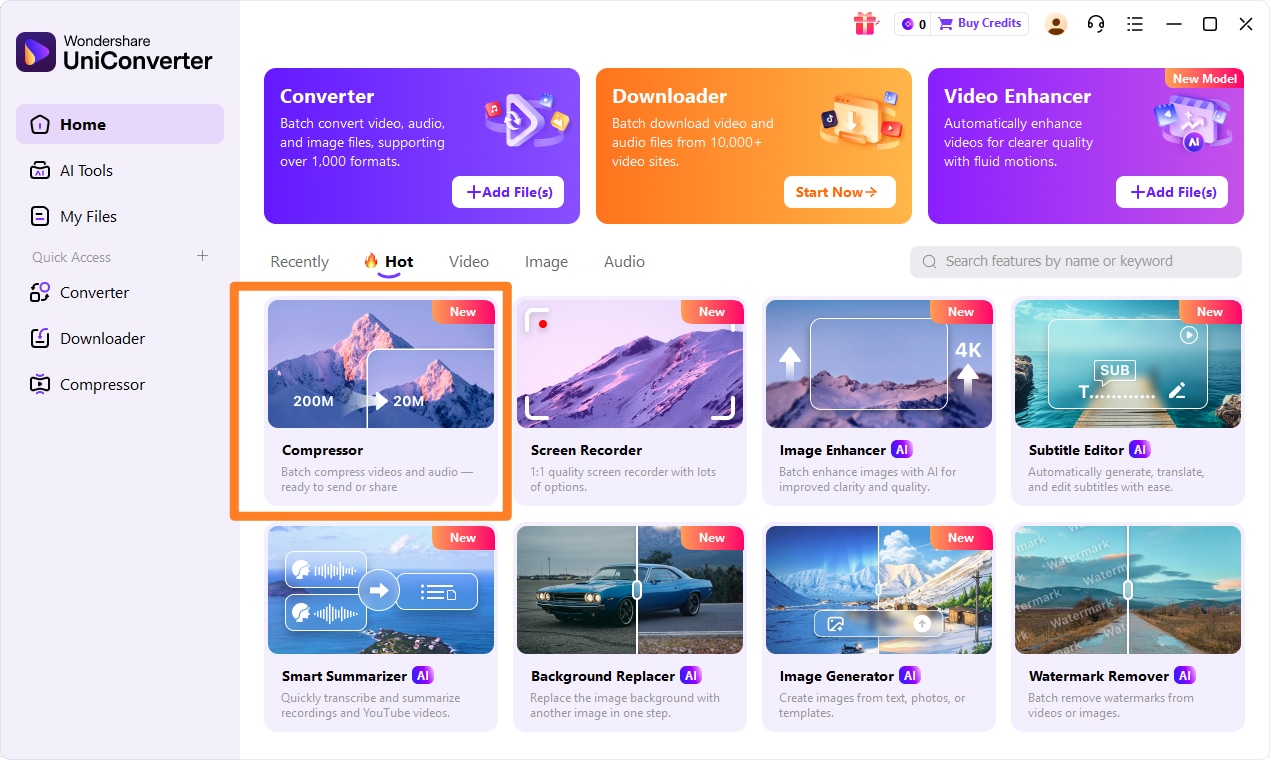
Part 6: How to Use UniConverter to Compress Audio and Video Efficiently
For sharing files online, saving storage space, or preparing media for different devices, having a dependable compressor matters just as much as the original editing workflow. That’s why I often use UniConverter whenever lighter tools struggle with batch jobs, inconsistent output, or noticeable quality loss. It offers a cleaner experience for both audio compression and video compression, with broad format support and GPU acceleration to keep processing fast and efficient. For video files in particular, it can also help compress videos without quality loss as much as possible, making it a practical all-in-one option for everyday media optimization.
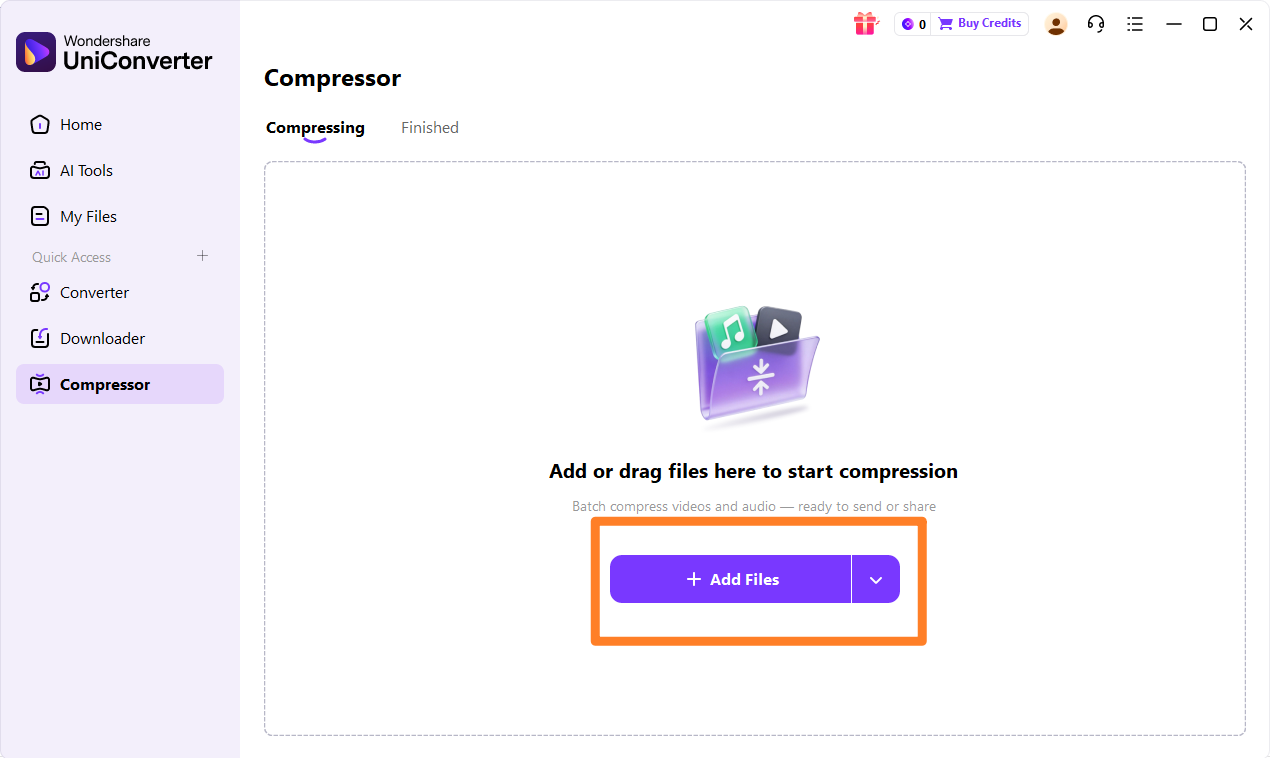
Step 1: Open UniConverter and Choose Compressor
Launch UniConverter on your computer. From the main interface, select the "Compressor" tool.
Step 2: Upload the Video, Audios or Images
Drag and drop your audio, video, or image files into the UniConverter window, or click "Add Files" to browse and select them.
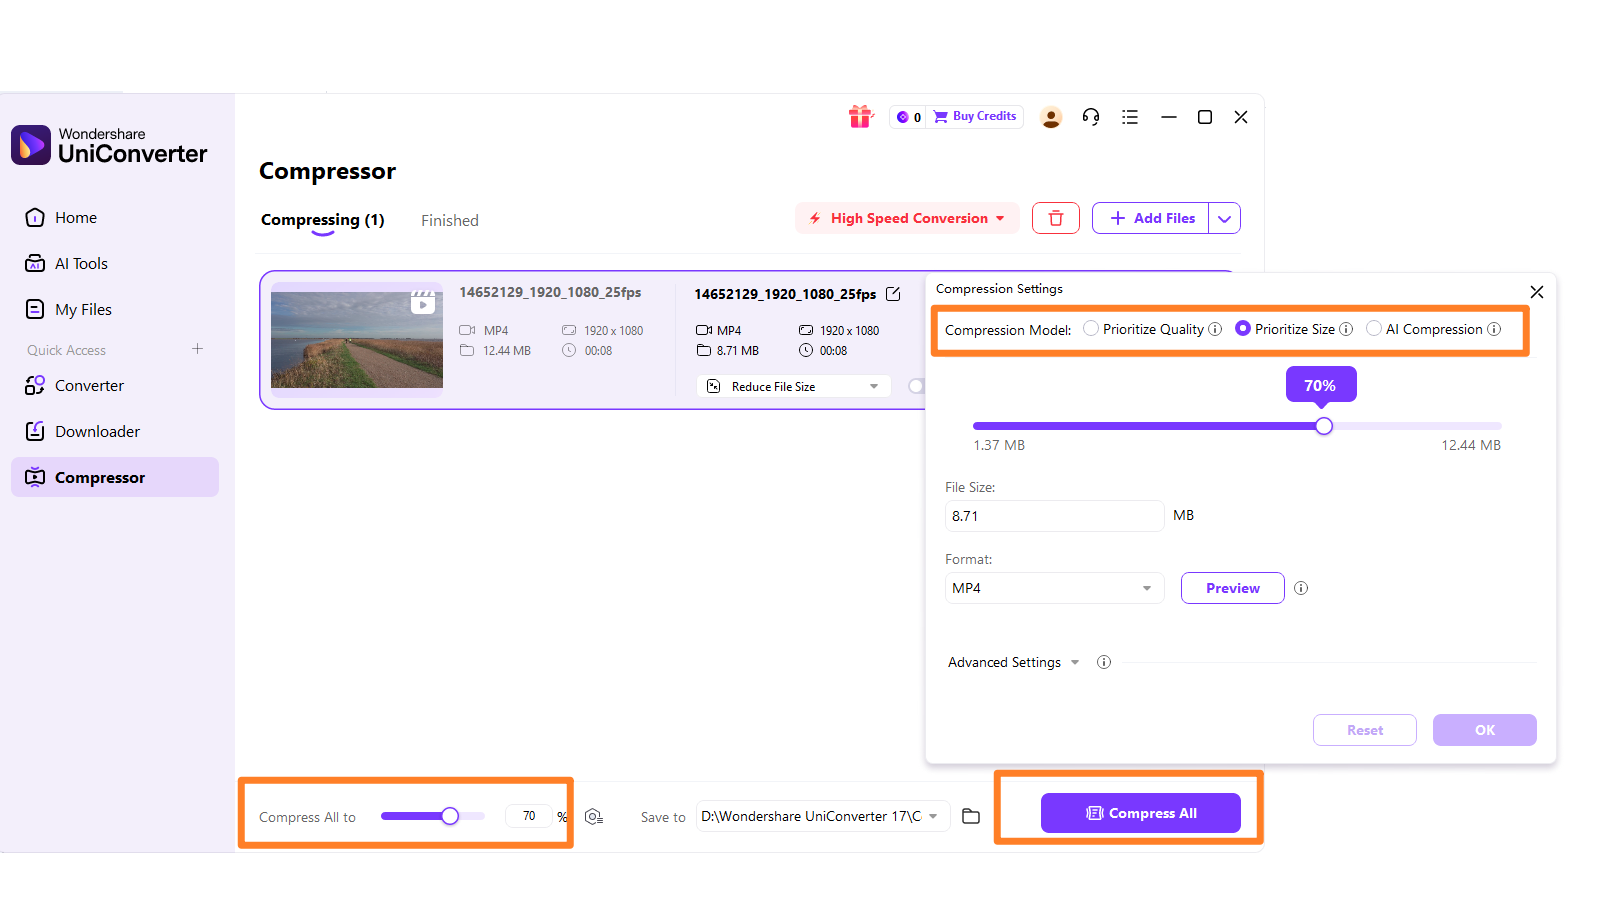
Step 3: Choose Required Parameters
Adjust the compression settings such as output format, resolution, bitrate, and quality. You can preview the changes before applying them.
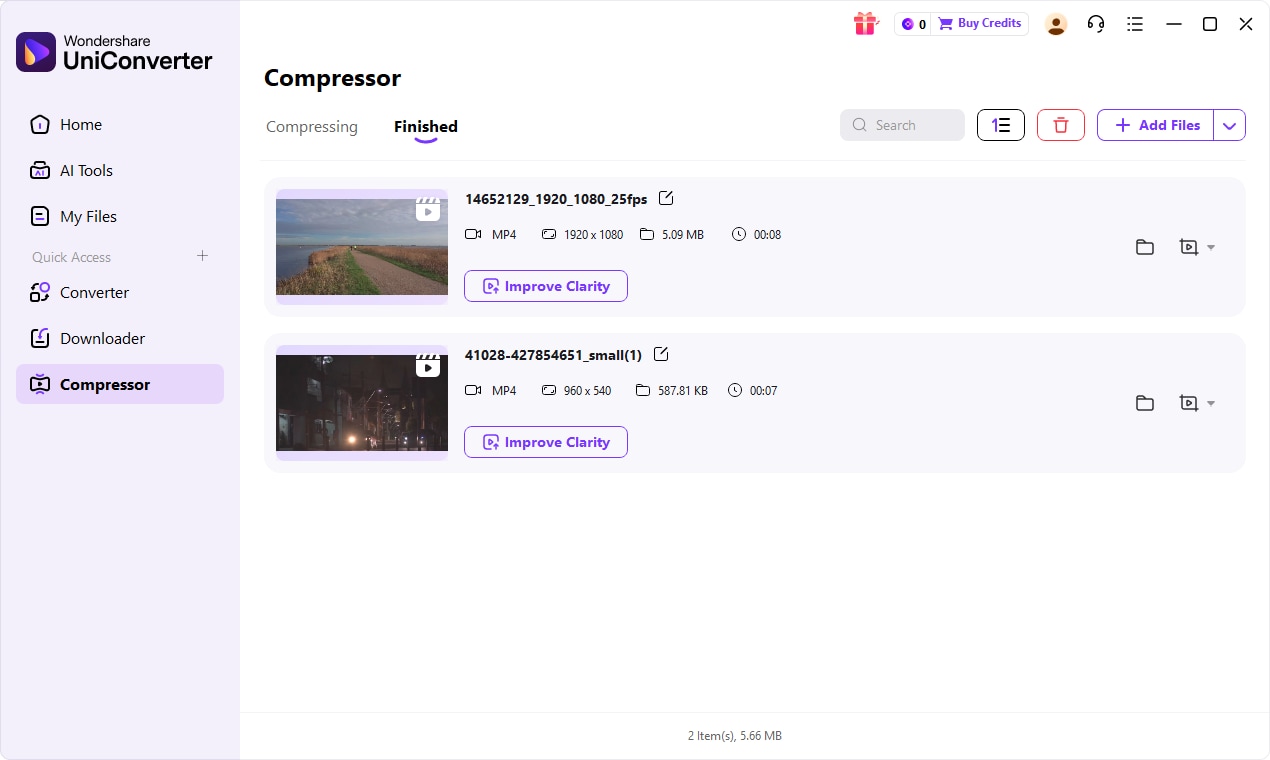
Step 4: Save the Compressed File
Once satisfied with the settings, click the "Compress" button. UniConverter will process your files, and you can then save them to your desired location.

Enhance Audio with a Cubase Compressor Alternative
Part 7: Conclusion
The Cubase Audio Compressor review reveals it to be a powerful and indispensable tool for any Cubase user serious about audio production. Its seamless integration, precise controls, and transparent sound make it an excellent choice for detailed mixing and mastering tasks within the Cubase environment. However, its learning curve and potential CPU demands mean it might not be the best fit for absolute beginners or those with less powerful systems. For professional Cubase users, leveraging its native integration is a no-brainer. Beginners, on the other hand, might benefit from starting with simpler, more visual compressors to grasp the fundamentals before diving into its complexities. For standalone audio processing needs, especially for efficient file compression without the intricacies of a DAW plugin, dedicated tools like UniConverter offer a user-friendly and highly effective alternative. Ultimately, the best compressor depends on your specific workflow, technical proficiency, and the sonic character you're aiming to achieve.
Part 8: FAQs
-
1. What is the primary function of an audio compressor in Cubase?
An audio compressor in Cubase primarily reduces the dynamic range of an audio signal, making loud parts quieter and quiet parts louder, resulting in a more consistent and controlled sound. It helps to even out performances and make instruments sit better in a mix.
-
2. Is the Cubase Audio Compressor suitable for mastering?
While the Cubase Audio Compressor can be used in mastering, many mastering engineers prefer dedicated mastering compressors. These specialized plugins often offer more advanced features, different sonic characteristics, and finer control tailored specifically for the mastering stage, where even subtle changes have a significant impact.
-
3. How does Cubase's compressor compare to third-party plugins?
Cubase's compressor offers excellent integration and solid performance, making it highly convenient for Cubase users. However, third-party plugins often provide unique sonic flavors, advanced features like multi-band compression or specific emulation modes, and different user interfaces that might appeal to various production styles. For simple, efficient audio file compression outside of a DAW, UniConverter is a great alternative.
-
4. Can I use the Cubase Audio Compressor on individual tracks and the master bus?
Yes, the Cubase Audio Compressor is versatile and can be applied to individual tracks (like vocals or drums), groups (like a drum bus or vocal stack), and the master bus. This allows you to control dynamics at various stages of your mix, from individual elements to the overall stereo output.
-
5. What are some common mistakes to avoid when using an audio compressor in Cubase?
Common mistakes include over-compressing, which can make audio sound lifeless; using incorrect attack/release settings, leading to pumping or dull transients; and not understanding the impact of ratio and threshold on the audio signal. Always use your ears, make subtle adjustments, and bypass the compressor frequently to compare the processed and unprocessed sound.
