
- Ableton Compressor Value: Master Ableton's compressor for professional mixes; it's versatile and integrated.
- Feature Comparison: Ableton offers versatile modes, but dedicated plugins like FabFilter provide deeper control.
- Use Cases: Ideal for individual track dynamics; less for audiophile mastering where specialized tools excel.
- Avoid Pitfalls: Prevent over-compression and misuse of settings to maintain dynamic, musical sound.
- UniConverter Advantage: Use UniConverter for efficient, high-quality audio/video compression outside of DAW production.
In this article
- Part 1: What is Ableton Live's Audio Compressor?
- Part 2: Ableton Live Audio Compressor: Core Features, Pros, and Cons
- Part 3: Ableton Live Audio Compressor: Ideal Use Cases and Limitations
- Part 4: Ableton Live Audio Compressor vs. Competitors
- Part 5: Potential Pitfalls and Considerations
- Part 6: How to Use UniConverter for Efficient Audio/Video Compression
- Part 7: Final Verdict and Recommendations
- Part 8: FAQs
Ableton Live Audio Compressor: In-Depth Review and Comparison
For any music producer, understanding and effectively utilizing compression is paramount to achieving a professional-sounding mix. Ableton Live, a powerhouse in digital audio workstations, comes equipped with its own suite of native effects, including a versatile audio compressor. This Ableton Live Audio Compressor review aims to dissect its core functionalities, compare it against leading third-party alternatives, and guide you through its optimal use cases and potential pitfalls. Whether you're a seasoned Live user or considering it for your production needs, this comprehensive analysis will help you leverage Live's compressor to its full potential and understand where other tools might better serve specific demands.
Part 1: What is Ableton Live's Audio Compressor?
Ableton Live's Audio Compressor is a dynamic range processor integrated directly into the Ableton Live digital audio workstation. It's designed to reduce the dynamic range of an audio signal, making the quiet parts louder and the loud parts quieter, resulting in a more consistent and controlled sound. This native device is a fundamental tool for mixing and mastering within the Live environment, offering various modes and controls to shape the character of your audio. My goal in this review is to explore how well it stands up to the demands of modern music production and where it truly shines or falls short compared to its competitors.
The Role of Compression in Modern Music Production
* Achieving Sonic Consistency: Compression helps to smooth out volume fluctuations, making tracks sit better in a mix.
* Adding Punch and Impact: Strategic compression can enhance the attack of drums or bass, giving them more presence.
* Tonal Shaping and Character: Different compressor types impart unique sonic characteristics, from transparent leveling to warm saturation.
* Controlling Transients: It's essential for managing sharp peaks that can otherwise cause clipping or muddy a mix.
Part 2: Ableton Live Audio Compressor: Core Features, Pros, and Cons
The Ableton Live Audio Compressor is a robust tool offering a range of features that make it highly adaptable for various mixing scenarios. Its core capabilities include multiple compression modes like Opto, Glue, and FET, each emulating different hardware compressor characteristics. I find the visual feedback particularly helpful, with real-time gain reduction meters and a clear display of the compression curve, which greatly aids in understanding the effect of parameter adjustments. It also offers standard controls such as Threshold, Ratio, Attack, Release, and Makeup Gain, alongside a useful "Lookahead" function for more precise transient control.
* Intuitive Visual Feedback for Parameter Adjustments: The graphical interface makes it easy to see what's happening to your audio.
* Versatile Modes (Opto, Glue, FET, etc.) for Diverse Tonal Shaping: These modes allow for a wide range of sonic textures, from smooth and transparent to punchy and aggressive.
* Seamless Integration within the Ableton Live Workflow: Being a native device, it works flawlessly with Live's automation and routing.
* Sidechain Input for Creative Dynamics Processing: Essential for ducking, pumping, and other advanced compression techniques.
* Adjustable Knee for Soft or Hard Compression: Provides flexibility in how gradually compression is applied.
- Pros:
- Intuitive Visual Feedback for Parameter Adjustments
- Versatile Modes (Opto, Glue, FET, etc.) for Diverse Tonal Shaping
- Seamless Integration within the Ableton Live Workflow
- Cons:
- Can be Overwhelming for Beginners with its Depth of Control
- Lacks Some Advanced Sidechain Filtering Options Found in Dedicated Plugins
Part 3: Ableton Live Audio Compressor: Ideal Use Cases and Limitations
From my experience, the Ableton Live Audio Compressor is an incredibly versatile tool, but like any piece of gear, it has its sweet spots and limitations. I find it shines brightest when I'm shaping the dynamics of individual tracks within a Live project. For instance, I frequently use it on vocals to ensure they sit consistently in the mix, or on drums to add punch and control unruly transients. The different modes, especially "Glue" for bus compression on drum groups, allow me to achieve a cohesive sound without ever leaving Live.
- Best Use Case: Shaping the Dynamics of Individual Tracks (e.g., vocals, drums, bass) within a Live Project for a Cohesive Mix. I use it extensively to tame dynamic peaks on a lead vocal, making it sit perfectly without sounding overly processed. The visual feedback makes it easy to dial in the right attack and release times.
- Limited Use Case: Mastering Bus Compression for Highly Demanding Audiophile Productions Where Ultra-Transparent or Specific Vintage Emulations are Required. While the "Glue" compressor is good, for a truly pristine or character-rich mastering chain, I often reach for specialized third-party plugins that offer more detailed control or specific analog emulations.
Part 4: Ableton Live Audio Compressor vs. Competitors
When comparing the Ableton Live Compressor to other options on the market, it's clear that each has its strengths. My choice often depends on the specific task and the level of detail I need.
| Feature/Competitor | Ableton Live Compressor | FabFilter Pro-C 2 | Waves Renaissance Compressor | UniConverter |
| Interface Clarity | Excellent | Excellent | Good | Excellent |
| Tonal Versatility | High | Very High | High | Basic |
| CPU Usage | Low | Moderate | Low | Very Low |
| Sidechain Options | Good | Excellent | Good | N/A |
| Price | Included with Live | Premium | Moderate | Moderate (Subscription/Lifetime) |
| Processing Speed | Real-time | Real-time | Real-time | Very Fast |
| Output Quality | Professional | Professional | Professional | High (for file prep) |
| Ease of Use | Good | Moderate | Good | Excellent |
| Customer Support | Ableton Support | FabFilter Support | Waves Support | Wondershare Support |
| Security | DAW Integrated | Plugin Standard | Plugin Standard | High |
Key Differentiators:
Ableton's compressor excels in workflow integration and visual feedback for Live users. For quick, effective compression within my DAW, it's my go-to. FabFilter Pro-C 2 offers unparalleled control and advanced sidechain capabilities, making it ideal for surgical compression or complex mixing tasks where I need absolute precision. Waves Renaissance Compressor provides a classic, warm sound with low CPU impact, perfect for adding a vintage vibe without bogging down my system. UniConverter, on the other hand, isn't a DAW compressor but an excellent tool for quick and easy audio file compression for distribution or storage, offering a much simpler approach for non-production tasks.
Part 5: Potential Pitfalls and Considerations
Using compressors, especially one as versatile as Ableton Live's, comes with its own set of challenges and potential missteps. I've learned these lessons the hard way, and I want to share them so you can avoid common pitfalls.
Over-Compression Leading to Loss of Dynamics
This is probably the most common mistake I see. It's easy to get carried away and squash your audio, making it sound lifeless and flat. The goal of compression isn't always to make everything loud, but to control dynamics musically. Always listen for the natural movement and breath in your audio.
Misunderstanding Attack and Release Times for Musicality
Attack and release times are crucial for how the compressor reacts to your audio's transients and sustains. Setting them incorrectly can lead to pumping, dulling of transients, or a lack of sustain. I always try to set these parameters in time with the groove of the track, letting the compressor "breathe" with the music.
Relying Solely on Presets Without Understanding Their Impact
While presets can be a good starting point, they are rarely perfect for your specific audio. I've found that blindly applying presets often leads to suboptimal results. Take the time to understand what each parameter does and how it affects your sound. Presets are a guide, not a solution.
Not Utilizing Sidechain for Creative or Functional Pumping Effects
The sidechain feature in Ableton's compressor is incredibly powerful. Neglecting it means missing out on creative possibilities like ducking a bassline under a kick drum for a cleaner low-end, or creating rhythmic pumping effects. It's not just for functional mixing; it's a creative tool.
Ignoring the "Make Up" Gain for Proper Level Matching
After compressing, your signal will be quieter. It's essential to use the "Make Up" gain to bring the level back up, but critically, you should match the perceived loudness to the uncompressed signal. This allows for an accurate A/B comparison to ensure your compression is actually improving the sound, not just making it louder.
Part 6: How to Use UniConverter for Efficient Audio/Video Compression
Compressing media for upload, sharing, or storage often calls for something more practical than a DAW-centered workflow. In those situations, UniConverter is usually the tool I rely on, especially when other options struggle with batch processing, unstable output, or noticeable quality loss. It works smoothly for both audio compression and video compression, while broad format support and GPU acceleration help keep larger jobs efficient. For video files, it can also help compress videos without quality loss as much as possible. With an ad-free workflow and solid batch features, it’s a practical all-in-one solution for everyday media compression.
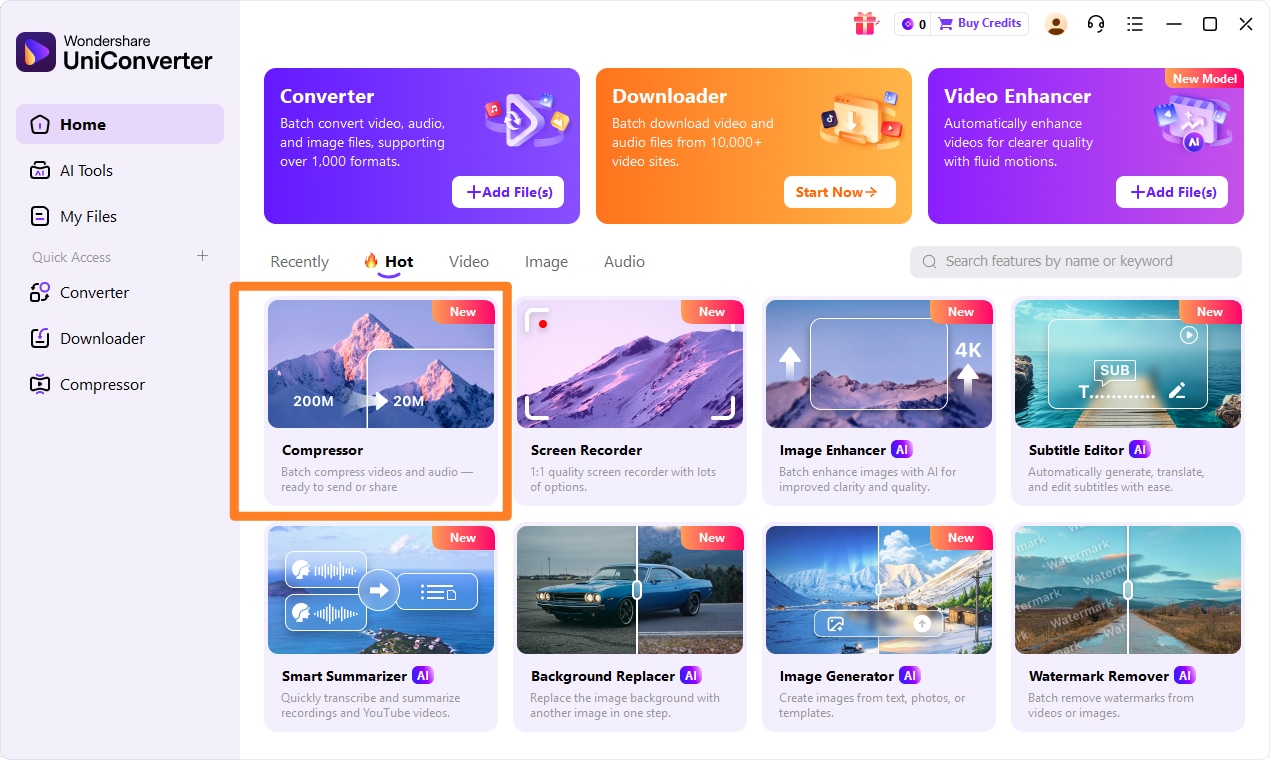
Step 1: Open UniConverter and Choose Compressor
Launch UniConverter and navigate to the "Compressor" tool from the main interface.
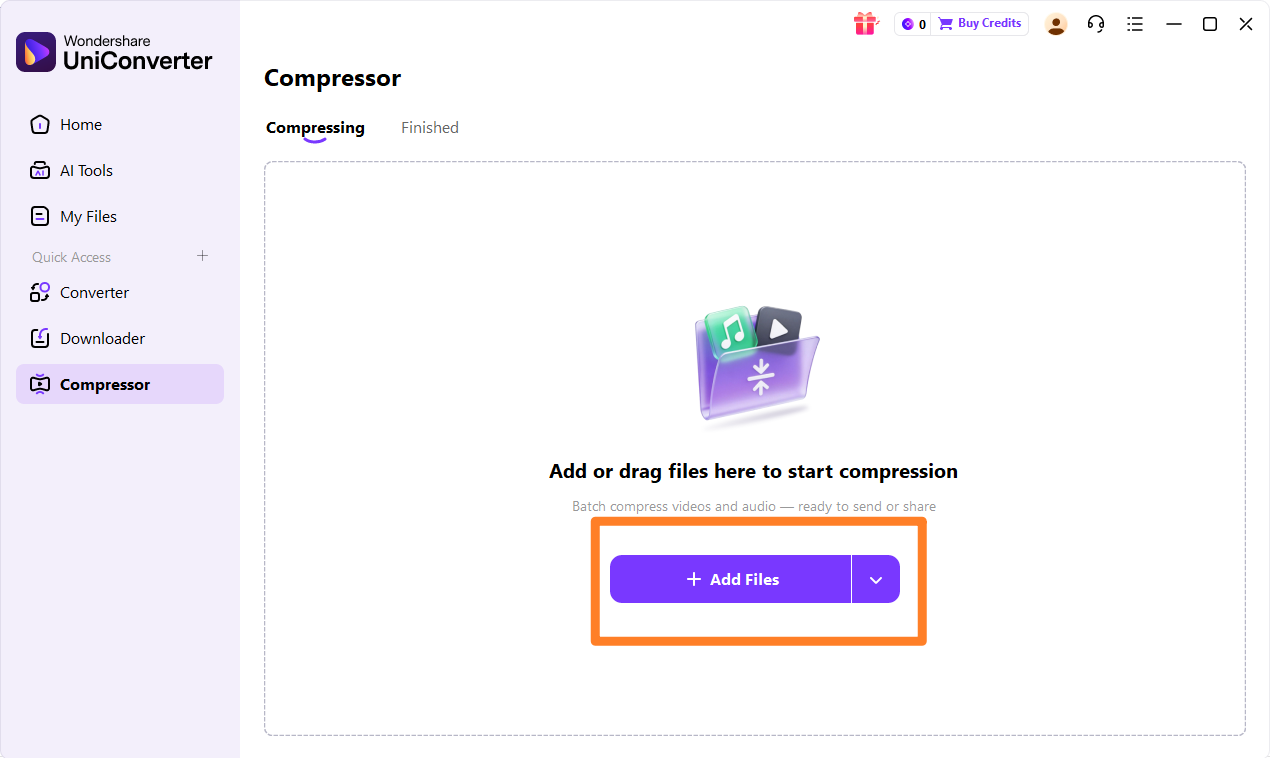
Step 2: Upload the Video, Audios or Images
Drag and drop your audio or video files into the UniConverter window, or use the "Add Files" button to select them.
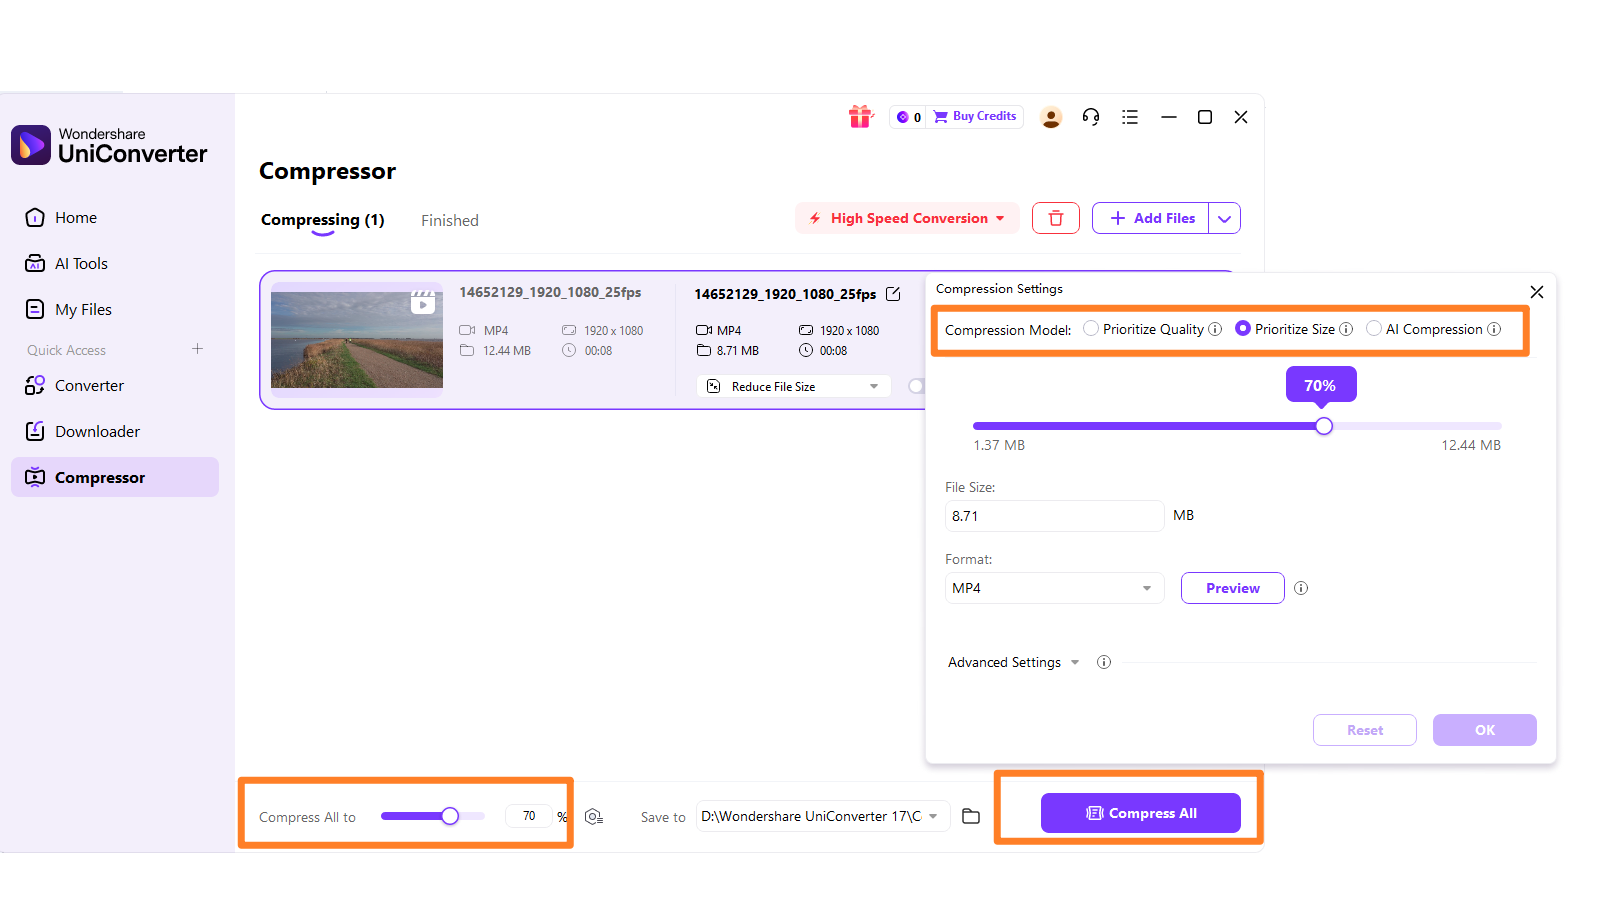
Step 3: Choose Required Parameters
Adjust the compression settings such as output format, resolution, bitrate, and quality to your desired specifications. UniConverter provides presets for various platforms and devices.
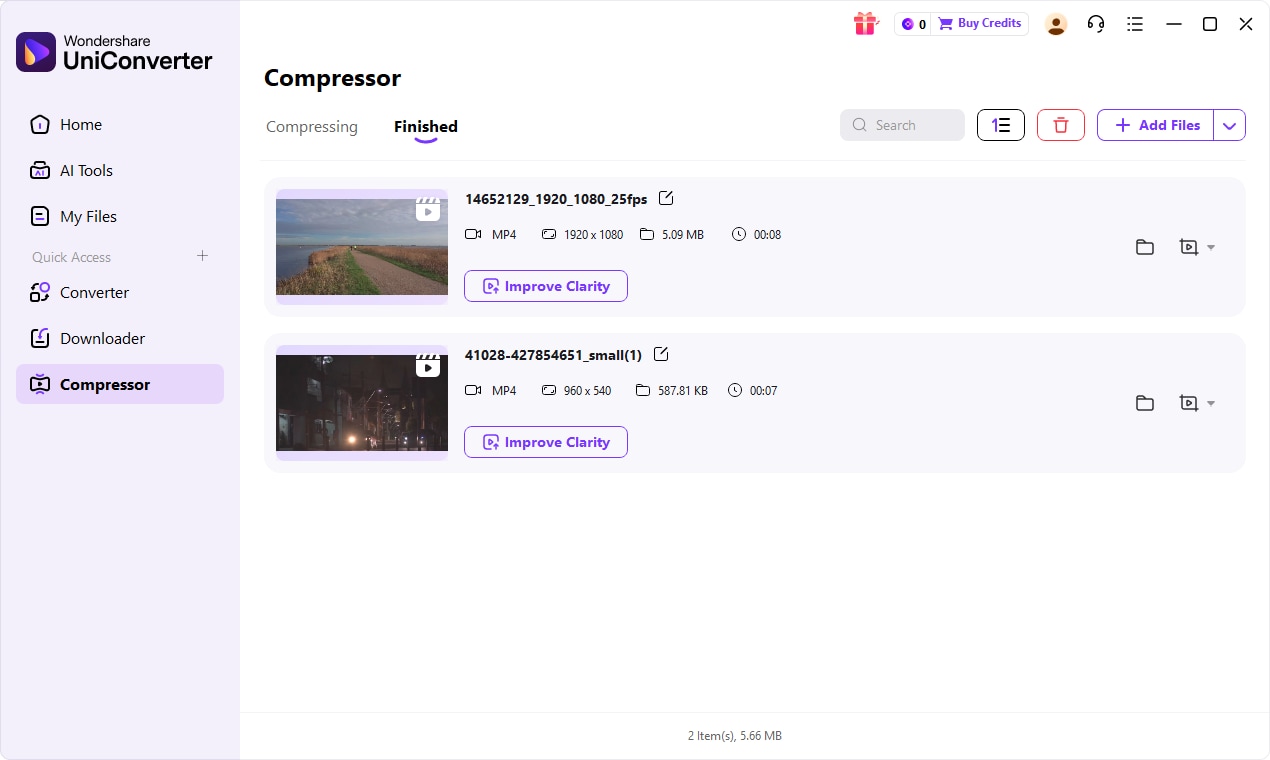
Step 4: Save the Compressed File
Click the "Compress" button to start the process. Once complete, you can find your compressed files in the designated output folder.

Enhance Your Audio: Beyond Ableton's Compressor
Part 7: Final Verdict and Recommendations
After extensive use and comparison, my final verdict is that Ableton Live's native compressor is a highly capable and versatile tool for any Live user. Its seamless integration, intuitive visual feedback, and diverse modes make it an indispensable part of my mixing workflow for individual tracks and bus processing. For those deeply embedded in the Ableton Live ecosystem, mastering this compressor will yield professional results. However, it's important to recognize its limitations; for highly specialized mastering tasks or when seeking very specific analog emulations, external third-party plugins often offer a deeper level of control and unique sonic characteristics that the native compressor doesn't fully replicate. My recommendation is to prioritize understanding the fundamental principles of compression first, as this knowledge is transferable across all tools. For everyday mixing within Live, the native compressor is more than sufficient. For those moments where absolute surgical precision or a distinct vintage flavor is required, consider investing in specialized alternatives. And for quick, efficient audio file compression outside of production, UniConverter stands out as an excellent, user-friendly option.
Part 8: FAQs
-
1. Is Ableton Live's compressor good enough for professional mixing?
Yes, it is highly capable for professional mixing, especially when understood and used effectively within the Ableton Live ecosystem. Many professional producers achieve excellent results solely with Live's native effects.
-
2. What's the difference between the "Glue" compressor and the standard compressor in Ableton Live?
The "Glue" compressor is modeled after a classic bus compressor, offering a smoother, more cohesive sound, often used to "glue" elements of a mix together. The standard compressor is more versatile for individual track dynamics, with more control over attack, release, and knee settings.
-
3. Can I use third-party compressor plugins in Ableton Live?
Absolutely. Ableton Live supports VST and AU plugins, allowing you to expand your compression options significantly with a vast array of third-party compressors, from transparent to character-rich emulations.
-
4. How do I avoid over-compressing my audio?
Listen carefully, use your ears more than your eyes, and aim for subtle, musical compression rather than extreme dynamic reduction. Always A/B compare your compressed signal with the uncompressed one, level-matched, to ensure you're improving the sound.
-
5. When should I use sidechain compression?
Sidechain compression is useful for creating space in a mix (e.g., ducking bass for kick drum), creative pumping effects, or de-essing vocals. If you're looking for a simple and effective way to manage audio file sizes for sharing or storage without diving into complex DAW settings, UniConverter offers a straightforward solution for quick sidechain-like effects on overall file dynamics.
