
In the world of professional video production, the format you choose to shoot in has profound implications for your entire workflow, from on-set data management to the final color grade. For filmmakers seeking maximum quality and flexibility, the conversation often centers on RAW video. However, with Apple's introduction of a high-performance alternative, the debate has become more nuanced. The choice between RAW vs ProRes RAW is a critical decision that balances ultimate image fidelity against workflow efficiency.
Understanding the fundamental differences between these two powerful formats is essential for any creator looking to elevate their work in 2026. Whether you're a seasoned cinematographer, an independent filmmaker, or a content creator aiming for a cinematic look, this guide will break down everything you need to know to make an informed decision.
In this article, we will cover:
- The core definitions of generic RAW and Apple's ProRes RAW.
- A quick comparison table highlighting their key differences.
- An in-depth analysis of image quality, file size, performance, and compatibility.
- Practical use cases to help you decide when to use each format.
- A step-by-step guide on how to convert RAW files for a smoother workflow.
Part 1. What is RAW? What is ProRes RAW?
Before we can compare these formats, it's crucial to understand what each one is at a technical level. While they share the "RAW" name, they represent different philosophies in capturing and handling image data.
What is RAW Video?
RAW video is not a single, universal format. Instead, it's a general term for a category of formats that capture data directly from a camera's image sensor with minimal to no in-camera processing. Think of it as a digital negative. Each camera manufacturer has its own proprietary RAW format, such as Blackmagic RAW (BRAW), REDCODE RAW (R3D), and ArriRAW.
The defining characteristic of true RAW is that it preserves the vast majority of the sensor's data. Information like white balance, ISO, sharpening, and color space are not "baked into" the image. Instead, they are stored as metadata, giving you unparalleled flexibility to adjust these parameters in post-production without degrading the image quality. This makes RAW the gold standard for projects that demand the highest possible fidelity and the most extensive color grading latitude.
What is ProRes RAW?
ProRes RAW is a proprietary codec developed by Apple. It was designed to bridge the gap between the incredible quality of RAW and the excellent real-time editing performance of the standard Apple ProRes family. It aims to give you the best of both worlds: the flexibility and depth of RAW data with the speed and efficiency of a traditional editing codec.
However, there's a key technical difference. ProRes RAW is not fully unprocessed. To achieve its remarkable performance, some of the initial image processing, specifically the debayering process (interpreting the color data from the sensor's grid), is offloaded to the camera hardware itself. This reduces the computational strain on your computer during editing. The result is a format that offers an excellent balance of image quality, more manageable file sizes compared to most true RAW formats, and superior editing performance, especially within the Apple hardware and software ecosystem (like Final Cut Pro).
Part 2. Quick Comparison Table
For a clear, at-a-glance summary, this table breaks down the essential differences between generic RAW formats and Apple's ProRes RAW.
| Feature | RAW (e.g., BRAW, R3D) | ProRes RAW |
| Data Type | Unprocessed Sensor Data | Partially Processed and Compressed |
| Post-Production Flexibility | Maximum Control | High Control, but less than true RAW |
| File Size | Very Large | Large, but smaller than most RAW |
| Editing Performance | Hardware Intensive | Highly Optimized for Apple hardware |
| Software Support | Wide (but format-specific, e.g., BRAW in Resolve) | Primarily Final Cut Pro; limited in others |
| Primary Advantage | Ultimate Quality and Control | Performance and Efficiency |
Part 3. RAW vs ProRes RAW: Which One Is Better?
The question of "which is better" doesn't have a single answer. The best format depends entirely on your project's specific needs, budget, and workflow. Let's dive deeper into the key areas of comparison.
Image Quality and Color Grading Flexibility
This is where the "digital negative" nature of true RAW shines. By capturing the unprocessed sensor data, RAW formats provide the absolute pinnacle of image information. This gives colorists the power to make extreme adjustments in post-production. You can recover seemingly blown-out highlights, lift deep shadows to reveal hidden detail, and make drastic changes to white balance and tint with minimal image degradation. For pixel-perfect results in high-end cinema or VFX-heavy work, the uncompromising quality of RAW is unmatched.
ProRes RAW, while not a true RAW format, is still a massive leap above conventional codecs like H.264 or even standard 10-bit ProRes. Apple markets it as "visually lossless," and it provides significantly more latitude for color grading. You can still push and pull the image extensively. However, because the initial debayering happens in-camera, some of the raw sensor data is interpreted and set before you ever access the file. This means you have slightly less fundamental control over the image compared to a true RAW file. For most projects, this difference is academic, but for productions demanding the absolute maximum data, true RAW holds the edge.
File Size and Storage Management
There's no way around it: traditional RAW files are enormous. The sheer amount of data being captured results in file sizes that can quickly fill up even the largest hard drives. A project shot in 4K or 6K RAW can easily run into many terabytes of data. This requires a significant investment in fast, high-capacity storage solutions (like RAID arrays or SSDs) and a robust data management strategy for backup and archiving.
This is one of the primary areas where ProRes RAW offers a compelling advantage. Through its intelligent compression, ProRes RAW files are significantly smaller than most uncompressed or lightly compressed RAW formats. While still larger than standard codecs, the reduction in file size makes a tangible difference. It means you can record for longer on a single media card, data transfer times are faster, and your overall storage costs are lower. This makes it a much more practical option for productions with tighter budgets or less extensive IT infrastructure.
Performance and Editing Workflow
Editing true RAW footage can be incredibly demanding on your computer's hardware. The process of debayering and decoding these massive files in real-time requires a powerful CPU and GPU. On all but the most high-end workstations, you'll often experience choppy playback, forcing you to work with lower-resolution playback settings or spend time creating proxy files—smaller, more manageable versions of your footage used just for editing.
Performance is the headline feature of ProRes RAW. The codec is heavily optimized for speed, especially on Macs equipped with Apple silicon (M1, M2, M3 series chips) which have dedicated media engines. This optimization allows for incredibly smooth, real-time, full-resolution playback of 4K and even 8K ProRes RAW files without the need for rendering or creating proxies. This streamlined "shoot-to-edit" workflow can save an immense amount of time and frustration, making it a favorite among creators who need to turn projects around quickly.
Software and Hardware Compatibility
The RAW ecosystem is fragmented. Support for a specific RAW format depends heavily on your camera and your non-linear editor (NLE). For instance, Blackmagic RAW (BRAW) is designed to work seamlessly within DaVinci Resolve but has limited support elsewhere. REDCODE RAW (R3D) is more widely supported across NLEs like Premiere Pro and Final Cut Pro, but often requires specific plugins and can still be performance-intensive.
ProRes RAW, being an Apple technology, has its own compatibility landscape. It is best and most deeply supported in Apple's own Final Cut Pro, where users get access to all available image parameters. While support has been added to other NLEs like Adobe Premiere Pro and DaVinci Resolve, the integration can be less seamless, and some controls (like white balance and ISO adjustments) may be limited or unavailable depending on the software version and operating system. Furthermore, camera support is a critical factor; only specific cameras and external recorders (primarily from Atomos) are licensed to capture ProRes RAW.
Part 4. Use Cases for RAW and ProRes RAW
Understanding the technical differences is one thing; knowing when to apply them is another. Here are some practical scenarios for choosing each format.
When to Choose RAW
- High-End Cinematic Productions: For feature films, major television series, and big-budget commercials where image fidelity is the absolute top priority and no compromise is acceptable.
- VFX-Heavy Projects: When footage needs to be seamlessly integrated with computer-generated imagery, the maximum data from a RAW file is essential for keying, tracking, and compositing.
- Unpredictable Lighting Conditions: If you're shooting in a situation where you might need to make extreme exposure corrections in post (e.g., recovering a sky or pulling detail from dark shadows), RAW provides the most latitude.
- Archival and Future-Proofing: When you have a robust post-production infrastructure, including powerful computers and ample storage, and you want to ensure the project is preserved at the highest possible quality for future remasters.
When to Choose ProRes RAW
- Fast-Paced Productions: Ideal for documentaries, event coverage, weddings, and news gathering where turnaround times are tight and you need to move from shooting to editing as quickly as possible.
- Apple-Centric Workflows: If you and your team are primarily working on Mac computers and using Final Cut Pro, ProRes RAW offers an unparalleled high-performance, streamlined workflow.
- High-End Online and Corporate Content: For creators producing top-tier YouTube content, branded videos, or corporate films who need more flexibility than standard 8-bit or 10-bit codecs but want to avoid the massive storage and performance overhead of traditional RAW.
- Single Operators and Small Teams: When you are a solo filmmaker or part of a small crew, the more manageable file sizes and efficient editing of ProRes RAW can significantly simplify your entire production process.
Part 5. Step-by-Step Guide to Convert RAW to ProRes Using UniConverter
Even if you shoot in a true RAW format, you may not always want to edit with it directly. Converting your files can be a crucial step in optimizing your workflow.
Why Convert Your RAW Video Files?
For certain projects, your original RAW files (like BRAW or R3D) may be too large or computationally intensive for smooth editing on your system. Converting them to a high-quality editing codec like Apple ProRes (e.g., ProRes 422 HQ) can drastically improve performance without a significant loss in visual quality. This process is also essential for creating "proxy" files for editing or for delivering files to collaborators who may not have the specific software or plugins to handle your camera's native RAW format. For these critical conversion tasks, a reliable and powerful tool like Wondershare UniConverter is invaluable.
How to Convert RAW to ProRes in 4 Simple Steps with UniConverter
Here's how you can easily convert your RAW files to standard ProRes for a smoother editing experience.
Step 1: Launch Wondershare UniConverter
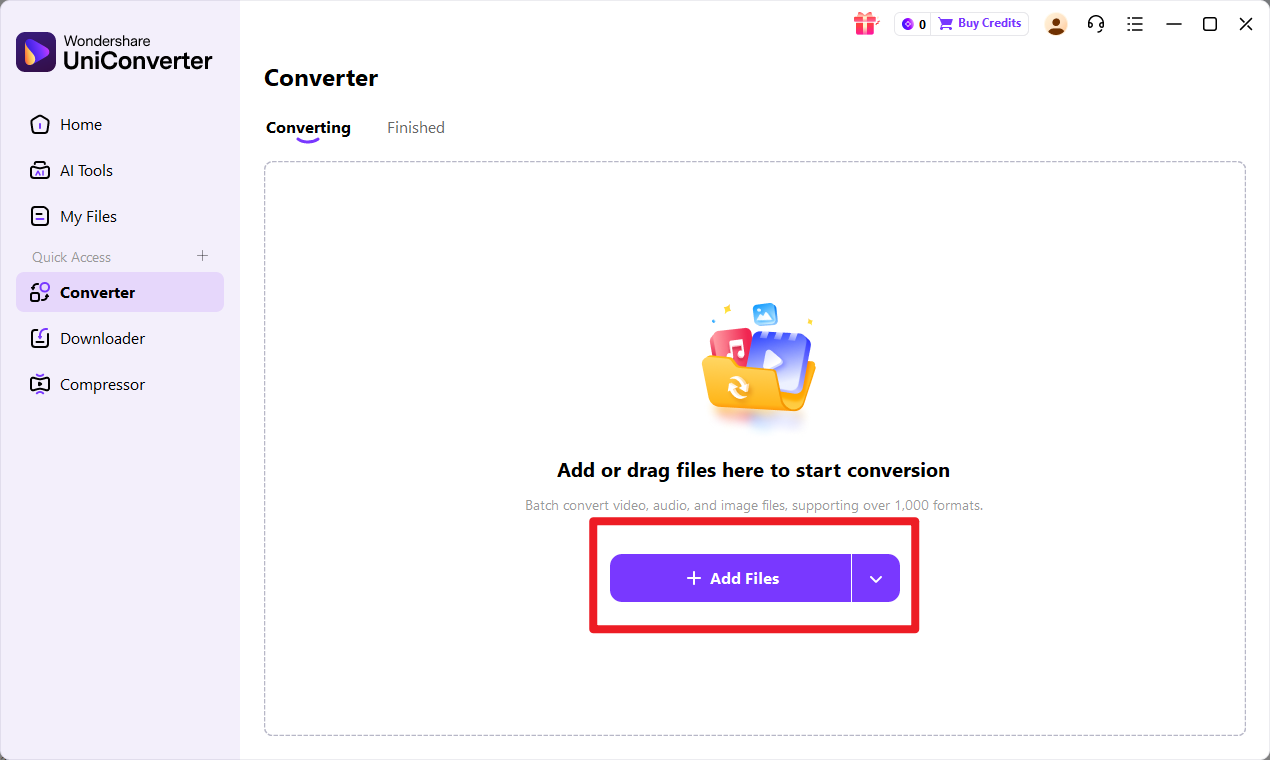
Launch Wondershare UniConverter on your computer. In the main interface, select the Converter tool from the left-hand menu.

Step 2: Add Files to UniConverter
You can then either click the Add Files button to browse for your RAW video files or simply drag and drop them directly into the program window.
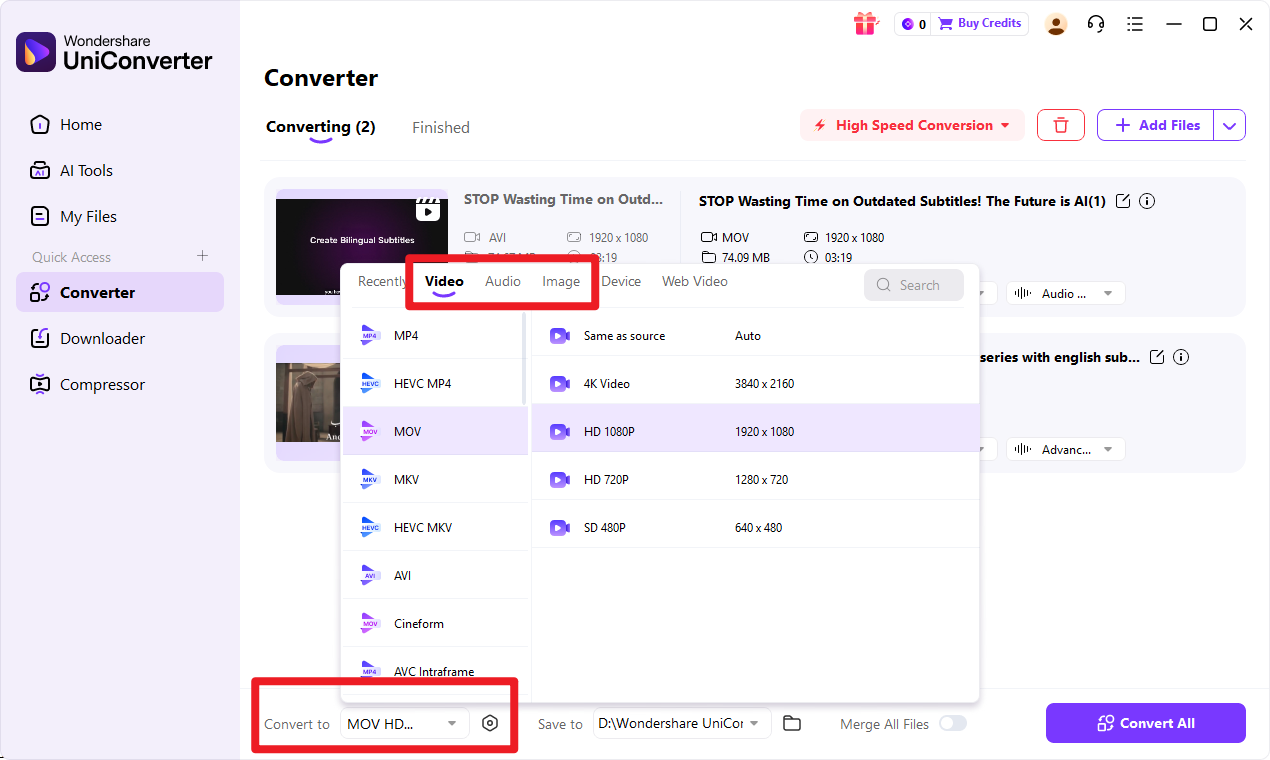
Step 3: Choose Output Format
Once your files are loaded, click on the Output Format menu at the bottom of the window. This will open a new dialog box. Navigate to the Editing tab. From the list of codecs on the left, select ProRes. On the right, you can then choose a specific preset, such as ProRes 422 HQ, which is an excellent choice for high-quality editing.
Step 4: Start the Conversion
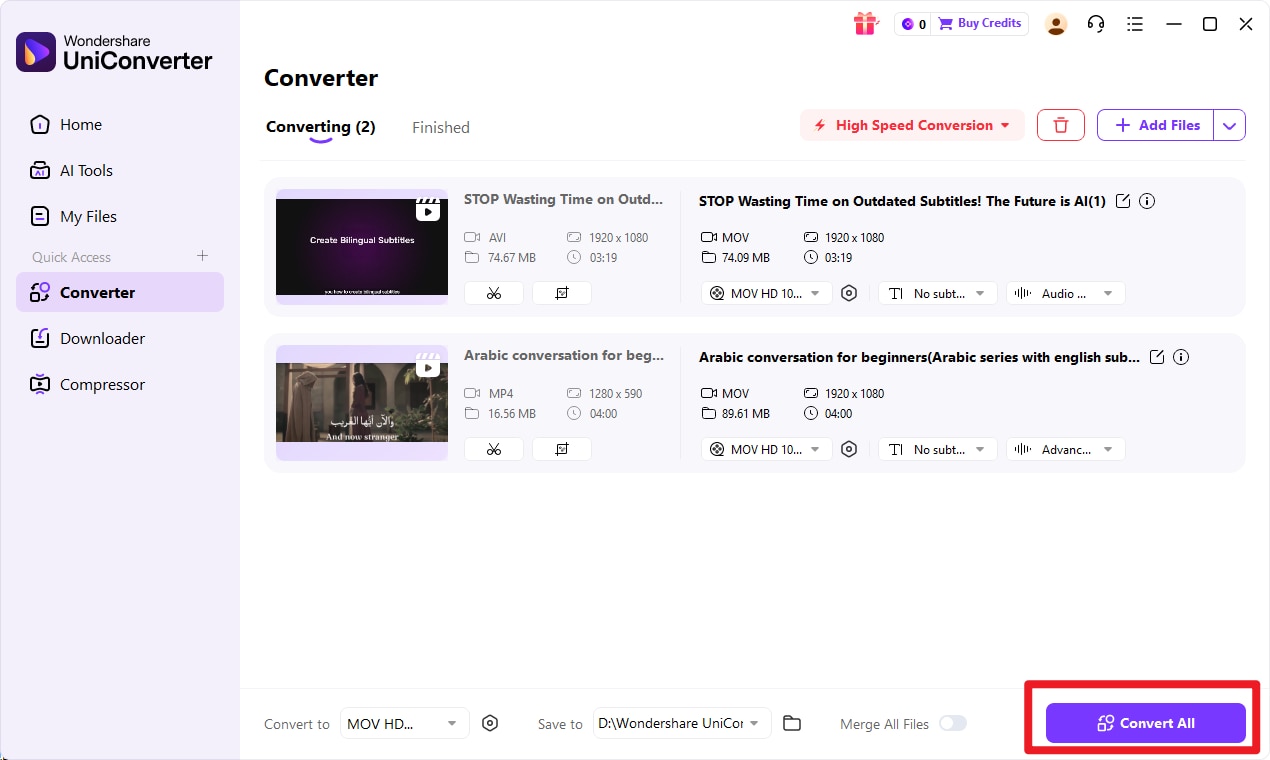
Before converting, you can click the small gear icon next to your chosen format to make any final adjustments to resolution or frame rate if needed. Next, at the bottom of the main window, use the File Location field to select the folder where you want to save your converted files. When you are ready, click the Convert button for a single file or hit the Start All button in the bottom-right corner to begin batch converting all your videos.

Your Complete Video Workflow Solution
Conclusion
The debate surrounding RAW vs ProRes RAW is not about finding a single winner, but about understanding which tool is right for the job. True RAW formats like BRAW and R3D remain the undisputed champions for projects that demand the ultimate in image quality and post-production control, making them the standard for high-end cinema and VFX. On the other hand, ProRes RAW presents a brilliant and practical compromise. It delivers outstanding, near-RAW quality and significant grading flexibility in a format that is far more efficient to store and edit, making it a game-changer for fast-paced productions, especially for creators embedded in the Apple ecosystem.
Ultimately, the best choice depends on your project's budget, timeline, available hardware, and creative ambitions. By understanding the strengths and weaknesses of each, you can optimize your workflow for success. And for those moments when you need to bridge the gap between different formats, tools like Wondershare UniConverter provide the essential, reliable functionality to keep your project moving forward smoothly.
FAQs
-
1. Is ProRes RAW a true RAW format?
Not in the strictest technical sense. A true RAW file contains the completely unprocessed data from the camera's sensor. ProRes RAW is partially processed (the sensor data is debayered in-camera) and then compressed. This is the key to its high-performance nature. While it retains much of the flexibility and quality of RAW, some initial image decisions are "baked in" by the camera before you get the file. -
2. Can DaVinci Resolve edit ProRes RAW?
As of recent versions in 2026, DaVinci Resolve has added support for decoding and editing ProRes RAW files. However, the level of integration and performance may not match its native, seamless support for its own Blackmagic RAW (BRAW) format. Similarly, the experience may not be as fluid as editing ProRes RAW within Apple's Final Cut Pro, which is its intended home. -
3. Is ProRes RAW better than BRAW?
Neither format is objectively "better"; they are designed for different ecosystems. BRAW is deeply integrated with Blackmagic Design cameras and the DaVinci Resolve software, offering fantastic control, small file sizes, and excellent performance within that closed system. ProRes RAW excels in a workflow centered around Final Cut Pro and Atomos recorders. The choice between them often comes down to your preferred camera and editing software. -
4. Do I always need to shoot in a RAW format?
Absolutely not. Many professional projects do not require the immense data overhead and flexibility of a RAW workflow. High-quality 10-bit codecs, such as standard ProRes 422 HQ or Avid DNxHR, are more than sufficient for a vast range of broadcast, corporate, and online content. These formats offer a fantastic balance of quality and manageability and are often the more practical choice.
