
Navigating the world of video codecs can feel like learning a new language. Two terms you'll frequently encounter are Apple ProRes and H.265 (HEVC). While both are essential to modern video production, they serve vastly different purposes. Choosing the wrong one at the wrong time can lead to massive, unmanageable files, choppy editing performance, and frustrating bottlenecks in your workflow. If you're struggling to decide between ProRes vs H.265, you've come to the right place. This guide will demystify these two powerful codecs, helping you understand their unique strengths and weaknesses.
Many video creators face common pain points: ProRes files consume terabytes of expensive storage, while editing H.265 footage directly can bring even powerful computers to a standstill. There's widespread confusion about which format is best for shooting, which is ideal for editing, and which should be used for final delivery. This article will provide clear, practical answers to these questions, empowering you to build a more efficient and professional video workflow from start to finish.
In this article:
- What Are ProRes and H.265?
- A Quick Comparison Table
- Detailed Breakdown: File Size, Editing, and Quality
- Practical Use Cases for Each Codec
- How to Convert ProRes to H.265
- Frequently Asked Questions
Part 1. What is ProRes? What is H.265?
Before we can compare them, it's crucial to understand what each codec is and what it was designed to do. They are not direct competitors but rather tools for different stages of the video production journey.
What is ProRes?
Apple ProRes is a family of high-quality, "intermediate" video codecs. Developed by Apple, its primary purpose is for use during post-production (editing, color grading, and effects). The magic of ProRes lies in its compression method: intra-frame compression. This means that every single frame of video is compressed and stored as a complete, individual image.
Think of it like a digital flipbook where every page is a fully detailed drawing. This makes it incredibly easy for a computer's processor to read and display the footage, resulting in exceptionally smooth playback and scrubbing performance in editing software. This performance comes at a cost: file sizes are very large. However, the quality is considered "visually lossless," meaning it retains a vast amount of image data, making it perfect for intensive tasks like color grading.
Common versions include:
- ProRes 422: A great balance of quality and file size for general post-production.
- ProRes 422 HQ: A higher-bitrate version for even better quality.
- ProRes 4444 / 4444 XQ: The highest-quality versions, supporting alpha channels (transparency) and offering maximum color fidelity.
What is H.265 (HEVC)?
H.265, also known as High Efficiency Video Coding (HEVC), is a modern delivery or distribution codec. Its main goal is to deliver high-quality video in the smallest possible file size. It achieves this through a highly advanced compression method called inter-frame compression.
Unlike ProRes, H.265 doesn't store every frame as a complete image. Instead, it analyzes a "Group of Pictures" (GOP). It saves one full frame (an I-frame) and then for subsequent frames, it only records the differences or changes between them. For example, in a shot of a person talking against a static background, H.265 efficiently records the moving mouth and face while using very little data for the unchanging background.
This incredible efficiency makes H.265 the standard for 4K/8K streaming (Netflix, YouTube), drone footage, and modern smartphones. The trade-off is that it's computationally intensive. To play back an H.265 file, your computer has to work hard to decompress and reconstruct each frame on the fly, which is why editing it directly can be a laggy and frustrating experience.
Part 2. Quick Comparison Table
For a quick overview, here's a direct comparison of the key attributes of ProRes and H.265.
| Feature | Apple ProRes | H.265 (HEVC) |
| File Size | Very Large | Small |
| Editing Performance | Excellent, smooth playback | Poor, can be laggy without proxies |
| Video Quality | Visually Lossless | Lossy, but high quality at low bitrates |
| Compression Type | Intra-frame (Each frame is complete) | Inter-frame (Records changes between frames) |
| Primary Use | Editing and Mastering (Post-Production) | Delivery and Streaming (Final Output) |
Part 3. ProRes vs H.265: Which One Is Better?
The question isn't about which codec is "better" overall, but which is better for a specific task. Let's break down the comparison based on the factors that matter most to video professionals.
File Size and Storage Efficiency
This is the most dramatic difference between the two. ProRes files are massive because intra-frame compression prioritizes editing performance over file size. Each frame is a high-quality image, resulting in very high bitrates. A few minutes of 4K ProRes 422 HQ footage can easily consume hundreds of gigabytes. This is a major concern for anyone with limited storage.
H.265 is the undisputed champion of efficiency. Its advanced inter-frame compression algorithms are designed to squeeze video into the smallest possible package while retaining impressive visual quality. An H.265 file can be 50% smaller than an equivalent quality H.264 file, and exponentially smaller than a ProRes file.
Winner for Storage: H.265
Editing and Post-Production Performance
When you're in your video editor, performance is paramount. This is where ProRes shines. Because every frame is a self-contained unit, the CPU doesn't have to do complex calculations to display the video. You can scrub through the timeline, make cuts, and play back your footage smoothly, even with multiple layers and effects. It's designed to be an editor's best friend.
H.265, on the other hand, is an editor's nightmare. To display a single frame in the middle of a GOP, the computer must first find the previous I-frame and then calculate all the changes leading up to the frame you want to see. This process happens thousands of times per second, putting immense strain on the CPU. The result is often dropped frames, laggy playback, and a frustratingly slow editing experience, especially on systems that aren't top-of-the-line.
Winner for Editing: ProRes
Video Quality and Color Grading Flexibility
For professionals, maintaining maximum image quality is non-negotiable, especially during color correction and grading. ProRes was built for this. It typically uses a 10-bit color depth (or higher in ProRes 4444), capturing over a billion colors. This rich color information provides tremendous flexibility to push and pull colors, adjust exposure, and recover detail in highlights and shadows without the image falling apart or showing ugly banding artifacts.
H.265 is a lossy codec, meaning some data is permanently discarded during compression to save space. While it can also support 10-bit color, the heavy compression can introduce subtle artifacts (like blocking in complex scenes) that become more apparent during aggressive color grading. You simply have less data to work with, which limits how far you can manipulate the image in post-production.
Winner for Quality and Grading: ProRes
Part 4. Use Cases for ProRes and H.265
Understanding the right time and place to use each codec is the key to a smooth and professional video workflow.
When to Use ProRes
ProRes is your go-to codec for the "middle" part of your workflow, where quality and performance are the top priorities.
- For Acquisition: If your camera supports it (like a Blackmagic, ARRI, or RED camera), recording directly to ProRes gives you a high-quality, edit-ready file straight from the source. This saves you the step of transcoding later.
- For Post-Production: This is the primary use case. Whether you shot in H.265 or another compressed format, transcoding your footage to ProRes before you start editing will guarantee a smooth, responsive experience in your NLE (Non-Linear Editor) like Final Cut Pro, Adobe Premiere Pro, or DaVinci Resolve. It is the ideal "intermediate" or "mezzanine" codec.
- For Archiving: After you've completed your project, exporting a master file in ProRes (like ProRes 422 HQ or 4444) creates a future-proof, high-quality archive of your work. This is your "digital negative" that you can use to create other deliverables in the future.
When to Use H.265
H.265 is your final step, the codec you use when your project is finished and ready to be seen by the world.
- For Final Delivery: This is the perfect format for exporting your video for upload to streaming platforms. YouTube, Vimeo, and others love H.265 because it allows them to stream high-quality 4K video to viewers without requiring massive bandwidth.
- For Sharing: Need to send a preview of your edit to a client for review? An H.265 export will create a small, easy-to-share file that can be played on almost any device, without forcing the client to download a multi-gigabyte file.
- For Storage-Conscious Archiving: If you have vast amounts of footage (e.g., hours of event coverage) and creating a full ProRes archive is not feasible due to storage costs, archiving the H.265 source files can be a practical compromise.
Part 5. Step-by-Step Guide to Convert ProRes to H.265 Using UniConverter
The most common workflow involves editing in ProRes and delivering in H.265. To bridge this gap, you need a reliable and efficient converter. Wondershare UniConverter is an excellent tool that simplifies the process of converting large, high-quality ProRes master files into small, efficient H.265 files for delivery, all without a steep learning curve.
How to Convert ProRes to H.265 with UniConverter
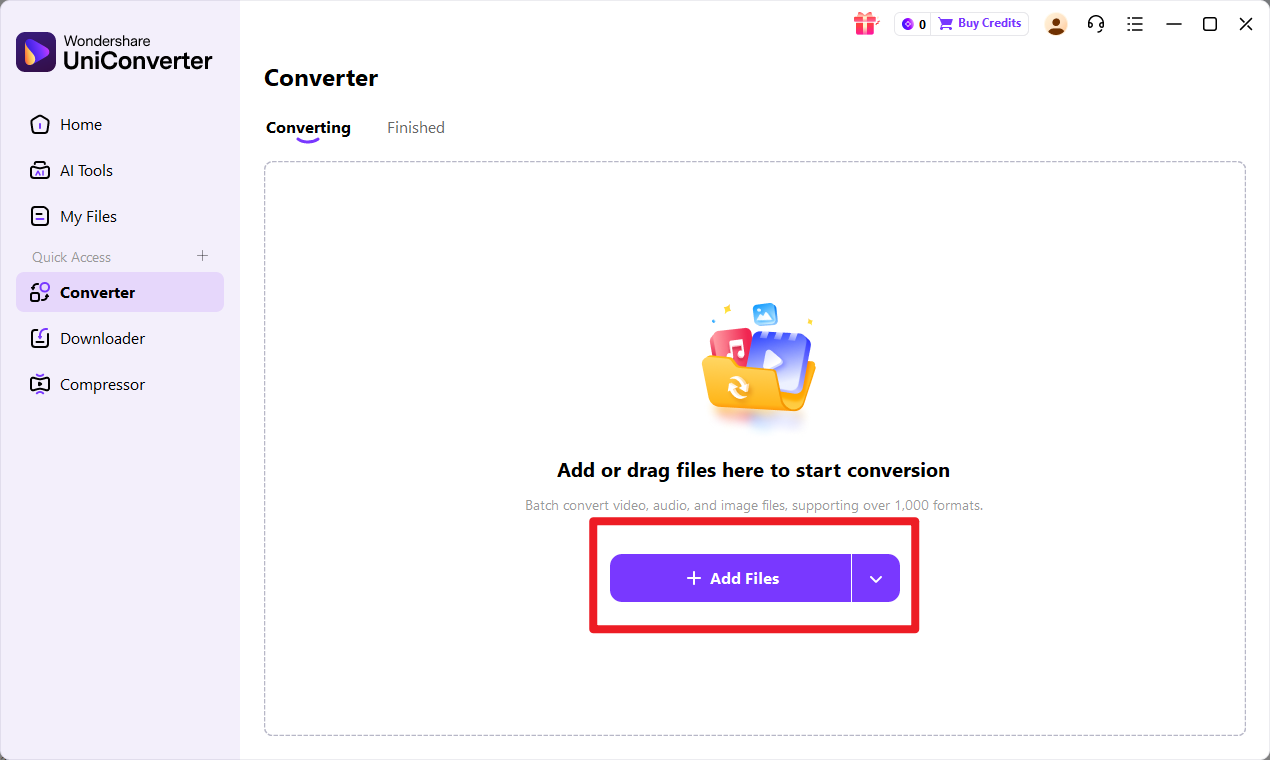
Step 1 Launch Wondershare UniConverter
Launch Wondershare UniConverter on your computer. In the main interface, ensure you are on the Converter tab on the left-hand side.

Step 2 Launch Wondershare UniConverter
You can now drag and drop your ProRes video file directly into the program window or click the central folder icon or the "Add Files" button to browse and import your file.
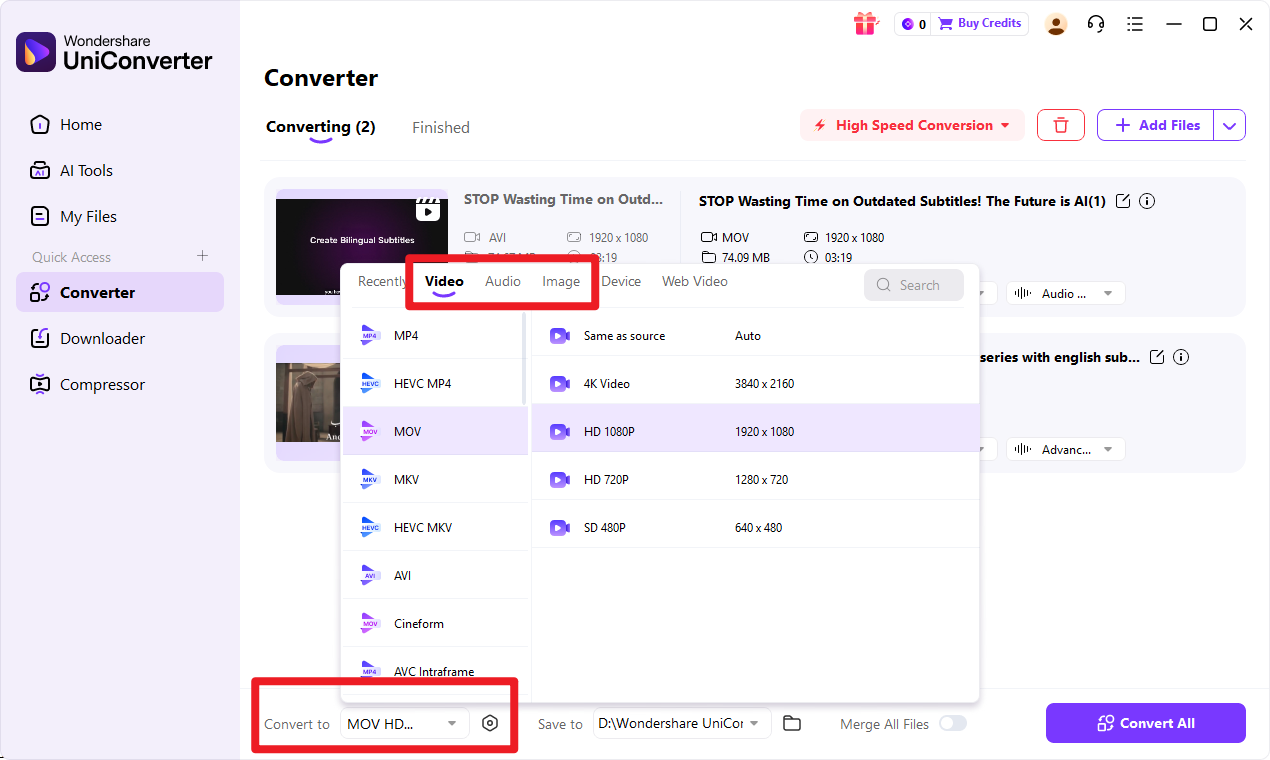
Step 3 Choose the Output Format
Once your file is loaded, click on the Output Format menu located at the bottom of the window. This will open a new panel with format options. Go to the Video tab, select a suitable container format like MP4 or MOV from the list on the left, and then choose your desired resolution on the right. To select H.265, click the small edit/pencil icon next to the resolution to open the detailed settings, and from the Encoder dropdown menu, select HEVC.
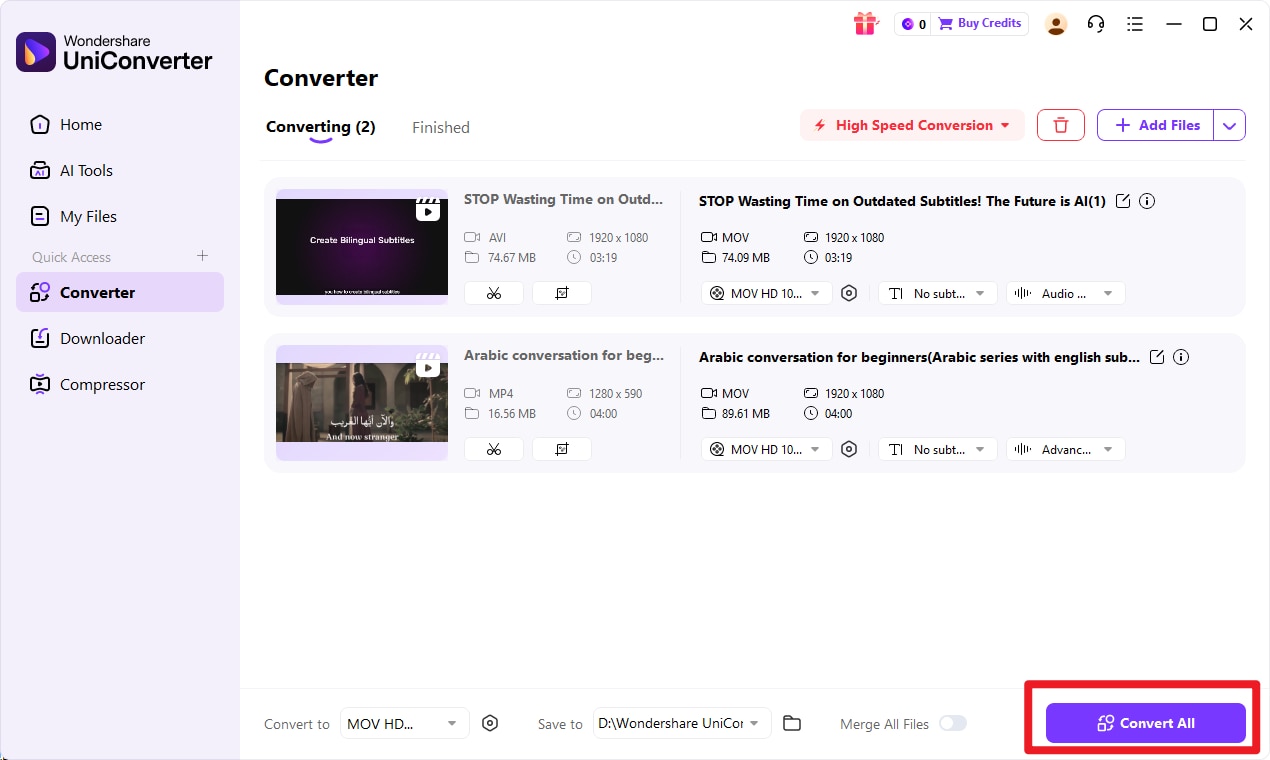
Step 4 Convert Files
After selecting your output format, you need to tell UniConverter where to save the converted file. Look for the File Location field at the bottom of the interface and click it to choose a destination folder on your computer. With your output format and location set, simply click the Convert button to start the process for a single file, or click Start All if you have loaded multiple files for batch conversion.

More Than Just a ProRes to H.265 Converter
Conclusion
In the ProRes vs H.265 debate, it's clear there is no single winner. They are not rivals but rather complementary partners in a professional video workflow. The key is to use the right tool for the right job. Use ProRes when you need maximum quality and smooth performance during editing and color grading. Use H.265 when you need maximum efficiency for streaming, sharing, and final delivery.
A seamless workflow often requires moving from one to the other—specifically, converting your ProRes master into an H.265 delivery file. This crucial step can be complex and time-consuming, but a powerful and intuitive tool like Wondershare UniConverter makes the transition fast, simple, and reliable, ensuring your creative vision reaches your audience in the best possible quality.
FAQs
-
1. Can I edit H.265 files directly in my video editor?
Yes, you can, and most modern editors support it. However, it is generally not recommended for complex or long projects. The high computational demand of decoding H.265 in real-time can cause poor performance, laggy playback, and dropped frames. For a smoother experience, it is best practice to create proxy files or transcode the footage to an editing-friendly codec like ProRes. -
2. Will I lose quality when converting ProRes to H.265?
Yes, technically there will always be some data loss when converting from a visually lossless format (ProRes) to a lossy one (H.265). However, the goal of a good conversion is to make this quality loss practically imperceptible to the human eye. By using a high-quality converter like UniConverter and selecting an appropriate bitrate, you can create an H.265 file that looks virtually identical to the ProRes source for all viewing purposes. -
3. Is H.265 the same as HEVC?
Yes, H.265 and HEVC are two different names for the exact same video compression standard. HEVC stands for High Efficiency Video Coding, which is its official engineering name. H.265 is the more common name used in software and marketing. -
4. Why is UniConverter a good choice for video conversion?
Wondershare UniConverter is highly recommended for several reasons. It features a very user-friendly interface that is easy for beginners to grasp. It offers incredibly fast conversion speeds by utilizing GPU hardware acceleration. It supports a vast range of formats, including professional codecs like Apple ProRes, and provides powerful features like batch conversion, file compression, and basic editing tools, making it an all-in-one video toolkit.
