
In the world of professional video post-production, the codec you choose can make or break your workflow. It impacts everything from editing performance and image quality to storage needs and collaboration. Two of the most dominant intermediate codecs are Apple ProRes and Avid DNxHR. The debate over ProRes vs DNxHR is a constant topic among editors, colorists, and cinematographers. While both are designed to provide a high-quality, edit-friendly format, they have fundamental differences rooted in their origins and intended ecosystems.
Choosing the right one isn't just a matter of preference; it's a strategic decision that affects your project's efficiency from start to finish. Are you working in a Mac-exclusive environment? Are you collaborating with a team on different operating systems? What are your final delivery requirements? Answering these questions is key to navigating this complex choice. This guide will provide a detailed, head-to-head comparison to help you make an informed decision for your specific needs.
In this article:
Part 1. What is Apple ProRes? What is Avid DNxHR?
Before we dive into a direct comparison, it's essential to understand what each of these codecs is and what it was designed to do. They are both "intermediate" or "mezzanine" codecs, meaning they are not intended for final delivery to consumers but for use during the editing and post-production process.
What is Apple ProRes?
Apple ProRes is a family of high-quality, lossy video compression formats developed by Apple Inc. It was introduced in 2007 with Final Cut Pro 6 and quickly became the industry standard for post-production within the Apple ecosystem. Its primary purpose is to maintain the highest possible image quality while offering significantly better real-time editing performance than highly compressed camera-native formats like H.264 or H.265.
ProRes codecs are designed to be computationally efficient, leveraging the power of modern multi-core processors for smooth playback and rendering. They come in several versions, each offering a different balance between data rate and quality:
- ProRes Proxy: For offline editing workflows.
- ProRes 422 LT: A good balance for general-purpose editing.
- ProRes 422: The workhorse of the family, offering excellent quality.
- ProRes 422 HQ: A higher data-rate version for visually lossless results.
- ProRes 4444: Supports 12-bit color and an alpha channel for transparency.
- ProRes 4444 XQ: The highest-quality version for demanding visual effects and color grading.
ProRes files are almost exclusively wrapped in a QuickTime `.mov` container.
What is Avid DNxHR?
Avid DNxHR, which stands for 'Digital Nonlinear Extensible High Resolution,' is Avid Technology's answer to Apple ProRes. It is the high-resolution successor to the older DNxHD codec, which was limited to HD resolutions. DNxHR was specifically engineered to be a cross-platform intermediate codec, performing exceptionally well on Windows, macOS, and Linux systems.
This cross-platform compatibility is its single biggest advantage. While ProRes is deeply integrated into macOS, DNxHR was built to facilitate seamless collaboration between editors using different operating systems. It is also an open standard, standardized as SMPTE ST 2073, which has encouraged its widespread adoption across various software and hardware.
Similar to ProRes, DNxHR offers different quality levels to suit various production needs:
- DNxHR LB: Low Bandwidth, suitable for offline editing.
- DNxHR SQ: Standard Quality, for general editing.
- DNxHR HQ: High Quality.
- DNxHR HQX: A 12-bit version for high-end grading and mastering.
- DNxHR 444: A 12-bit version with full chroma resolution, comparable to ProRes 4444.
DNxHR files can be found in both `.mov` (QuickTime) and `.mxf` (Material Exchange Format) containers, with MXF being particularly common in broadcast and Avid-centric workflows.
Part 2. Quick Comparison Table
To get a clear overview, let's break down the core differences between these two powerhouse codecs in a simple table.
Key Differences at a Glance
| Feature | Apple ProRes | Avid DNxHR |
| Developer | Apple Inc. | Avid Technology |
| Primary Platform | macOS-optimized | Cross-platform (Windows, macOS, Linux) |
| Container | .mov | .mov, .mxf |
| Common NLE | Final Cut Pro, DaVinci Resolve on Mac | Avid Media Composer, Adobe Premiere Pro on Windows |
| Open Standard | No (Proprietary) | Yes (SMPTE ST 2073) |
Part 3. ProRes vs DNxHR: Which One Is Better?
The question of which codec is "better" is nuanced. The best choice depends entirely on your specific hardware, software, and collaborative environment. Let's explore the comparison across four critical areas.
Performance and Editing Smoothness
Performance is where the home-field advantage becomes clear. On a Mac, especially one with Apple Silicon (M1/M2/M3 chips) and when using Final Cut Pro, ProRes is unmatched. The hardware includes dedicated media engines with accelerators for ProRes encoding and decoding, resulting in incredibly smooth timeline scrubbing, multi-stream playback, and fast rendering. Adobe Premiere Pro and DaVinci Resolve also perform very well with ProRes on macOS.
Conversely, Avid DNxHR is the performance champion on Windows-based systems. For editors using Adobe Premiere Pro or Avid Media Composer on a PC, DNxHR provides a smoother, more responsive editing experience than ProRes. While modern PCs can decode ProRes files for playback, the process is less optimized than on a Mac. Encoding to ProRes on Windows is notoriously difficult and often requires third-party tools. Therefore, for a native Windows workflow, DNxHR is the clear winner for performance.
Image Quality and Color Fidelity
At the highest quality levels, both ProRes and DNxHR are considered visually lossless. This means that for most practical purposes, the human eye cannot distinguish between the original uncompressed source and a file encoded in ProRes 422 HQ or DNxHR HQX.
When you move into the realm of high-end color grading and visual effects, the top-tier versions come into play. ProRes 4444 XQ and DNxHR 444 both support 12-bit color depth and 4:4:4 chroma subsampling, preserving the maximum amount of color information from the camera sensor. This makes them ideal for intensive color work, keying (green screen), and compositing.
In terms of generational loss (re-encoding a file multiple times), both codecs hold up remarkably well. Any quality difference between ProRes 4444 XQ and DNxHR 444 is largely academic and unlikely to be visible in a final product. The choice here is less about a discernible quality difference and more about which codec fits the rest of your workflow.
Platform Compatibility and Workflow
This is the most significant differentiating factor. Apple ProRes is, by design, a Mac-centric codec. While you can decode and edit ProRes files on Windows using NLEs like Premiere Pro and DaVinci Resolve, the ability to encode or export to ProRes is severely restricted. This creates a major bottleneck for cross-platform collaboration. If a Mac-based editor sends a ProRes file to a Windows-based colorist, the colorist can work on it but cannot easily render a new ProRes file to send back.
This is where DNxHR shines. As a truly cross-platform, open-standard codec, it can be read and written on macOS, Windows, and Linux without issue. This makes it the default choice for teams where members use different operating systems. If your project involves collaboration between a Final Cut Pro user on a Mac and a Premiere Pro user on a PC, using DNxHR as the common intermediate format is the most efficient and headache-free solution.
File Size and Storage Requirements
Both ProRes and DNxHR are designed for quality, not for small file sizes. They are significantly larger than camera-native H.264/H.265 files. However, within their respective families, you can choose a version that balances quality and storage.
Comparing equivalent tiers, the file sizes are often very similar. For example, a file encoded in ProRes 422 HQ will have a comparable data rate and file size to one encoded in DNxHR HQX. Both codecs offer lower-bitrate "proxy" or "low bandwidth" versions (ProRes Proxy, DNxHR LB) that create much smaller files, ideal for offline editing where the editor works with lightweight files and later relinks to the high-quality source for final color and export.
Your choice should be based on your project's needs. If you are shooting in 8K and need to master in the highest possible quality, you'll need the storage for ProRes 4444 XQ or DNxHR 444. If you're editing a 1080p corporate video, ProRes 422 LT or DNxHR SQ will likely be more than sufficient and will save considerable drive space.
Part 4. Use Cases for ProRes and DNxHR
Based on the differences we've discussed, here are some practical scenarios to help you decide which codec to use.
When to Choose ProRes
- Apple-Centric Workflows: If you and your entire team are using Macs and your primary NLE is Final Cut Pro, ProRes is the native and most efficient choice. The hardware and software are perfectly optimized for it.
- Final Cut Pro Projects: FCP is built around ProRes. Using it as your intermediate codec will guarantee the smoothest possible performance.
- Mandatory Delivery Specs: Some clients, particularly in the broadcast and film industry, may specifically require final delivery in an Apple ProRes format. In this case, you have no choice but to master in ProRes.
- Mastering on a Mac: If you are creating a final master archive of your project on a Mac, ProRes 4444 XQ is one of the best formats you can choose for future-proofing your work.
When to Choose DNxHR
- Cross-Platform Collaboration: This is the number one reason to choose DNxHR. If your team includes editors, colorists, and VFX artists on both Mac and Windows, DNxHR is the universal language that everyone can speak fluently.
- Windows-Based Editing: If you are a video editor working primarily on a Windows PC with Adobe Premiere Pro or DaVinci Resolve, DNxHR will provide superior editing performance compared to ProRes.
- Avid Media Composer Workflows: As the name implies, Avid DNxHR is the native high-resolution codec for Avid Media Composer, the NLE of choice in many feature film and broadcast television environments.
- Creating Proxies for a PC: If you've received ProRes footage to edit on a PC, transcoding it to a DNxHR format is a standard workflow to ensure smooth editing.
Solving the Compatibility Problem
The most common workflow headache is receiving a ProRes file on a Windows machine. While you can edit it, you can't export it in the same format, which breaks collaborative round-tripping. This forces editors to find workarounds that can be time-consuming and complex.
To maintain a seamless and efficient post-production pipeline, a reliable video converter is an indispensable tool. It acts as the bridge between these two ecosystems. For this critical task, Wondershare UniConverter is a highly recommended solution. It can convert ProRes files to DNxHR (and vice versa) with GPU-accelerated speed, preserving the pristine image quality required for professional work. This allows you to easily overcome compatibility barriers and focus on your creative edit.
Part 5. Step-by-Step Guide to Convert ProRes to DNxHR Using UniConverter
If you're a Windows user who has just received a batch of ProRes files, don't worry. With UniConverter, you can convert them to the edit-friendly DNxHR format in just a few clicks.
How to Convert ProRes to DNxHR in 4 Simple Steps
Step 1:
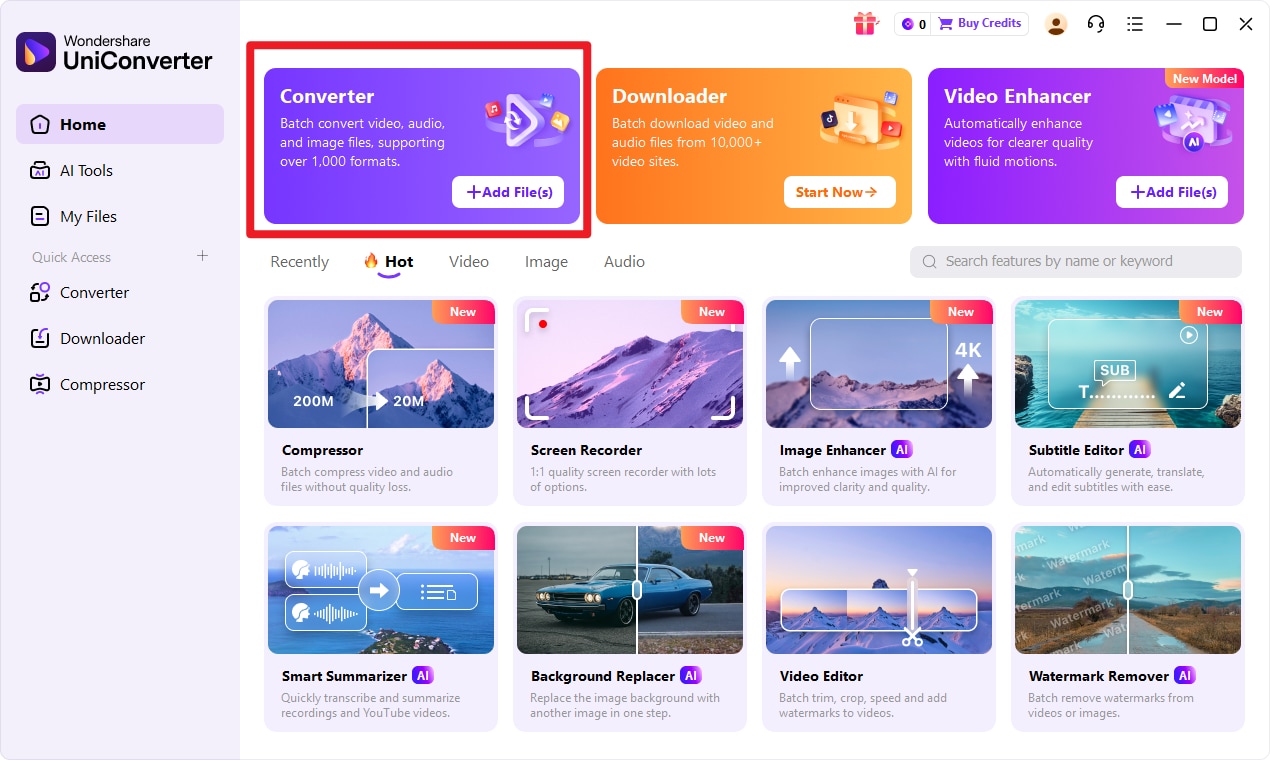
Launch Wondershare UniConverter on your computer. Select the Converter tool from the left-hand menu.
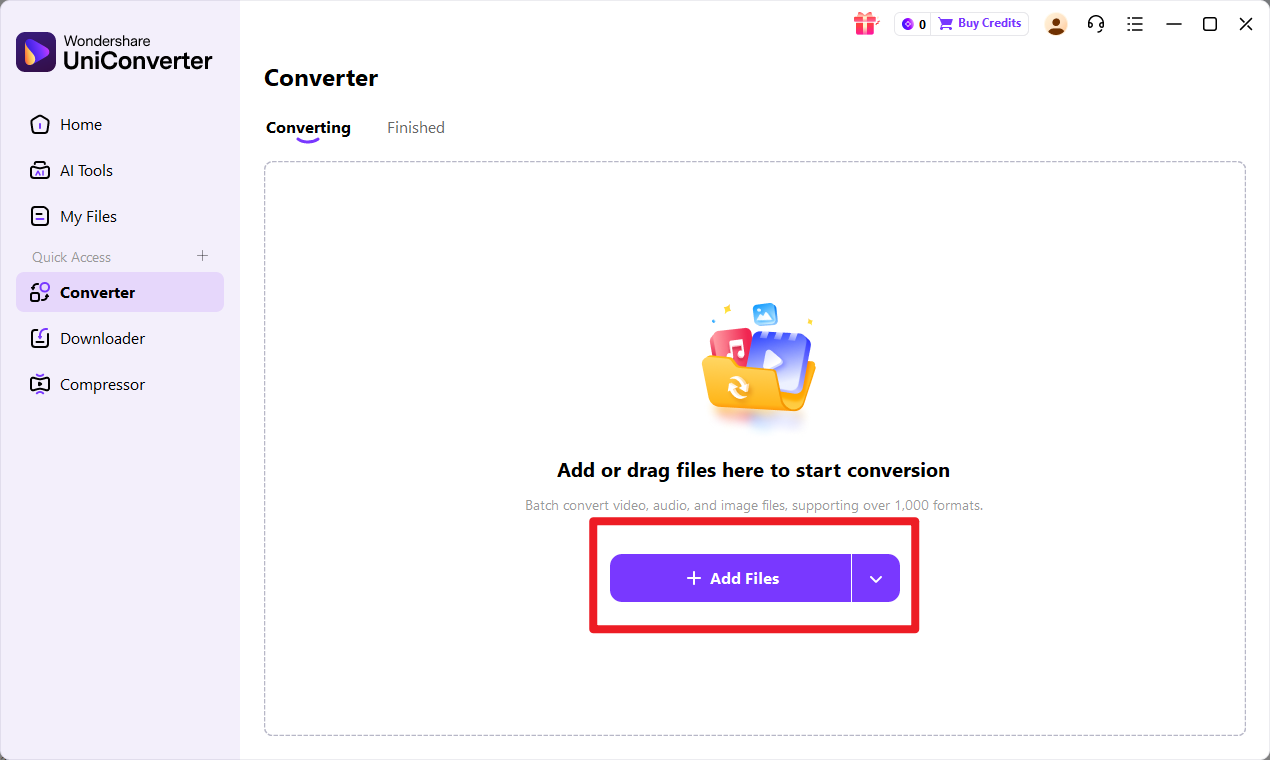
Step 2: Add Files to UniConverter
You can either drag and drop your ProRes `.mov` files directly into the interface or click the Add Files button to browse and import them from your hard drive.
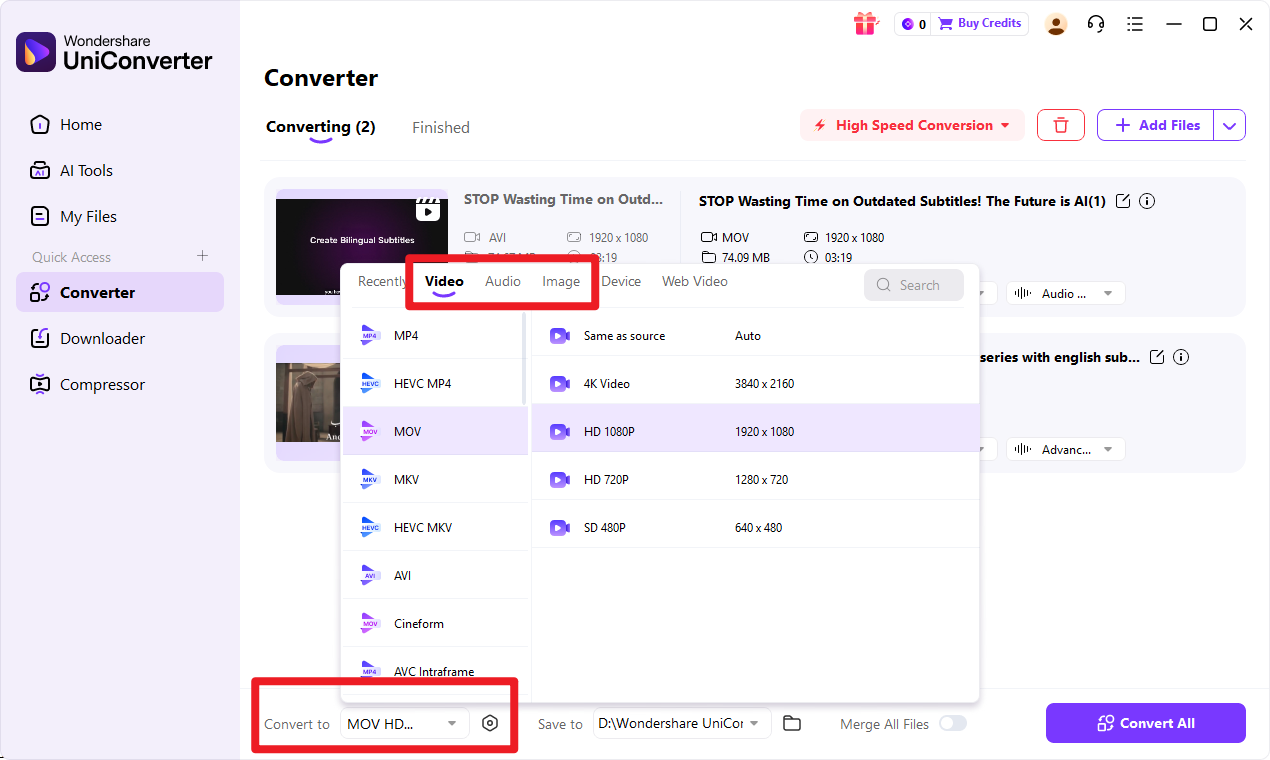
Step 3: Choose Output Format
Click on the Output Format menu at the bottom of the window. In the new dialog box, go to the Editing tab. From the list of codecs on the left, select Avid DNxHR. On the right, you can choose a specific quality preset. For maintaining quality, selecting "Same as source" or a high-quality option like DNxHR HQX is recommended. While here, you can also set the destination for your converted file using the File Location field at the bottom.
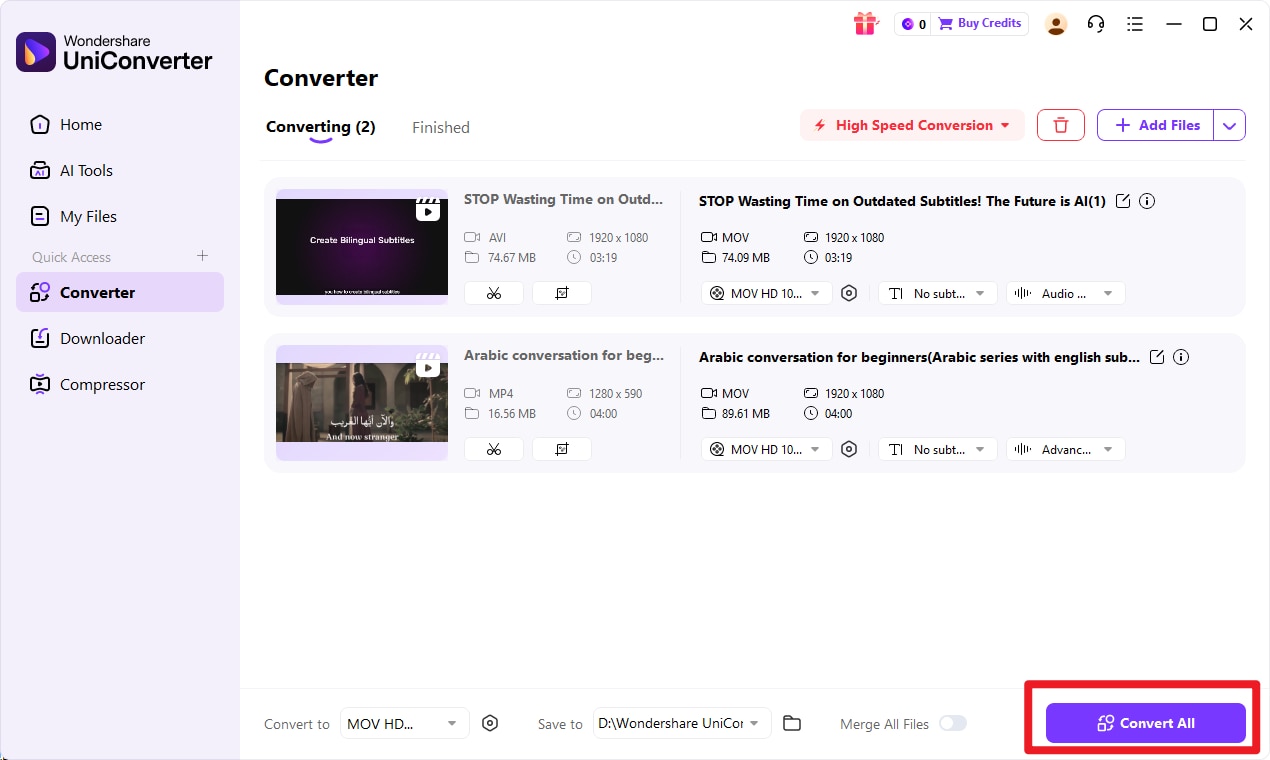
Step 4: Start the Conversion
Once you have configured your output format, you are ready to convert. Simply click the Convert button next to the individual file. If you have loaded multiple files for a batch conversion, you can click the Start All button in the bottom-right corner to process them all at once.
UniConverter will use its high-speed conversion engine to process your files quickly. Once the conversion is complete, you can find your new DNxHR files by clicking on the Finished tab at the top of the window. From there, you can open the file location to import them directly into your NLE.

More Than Just a Professional Video Converter
Conclusion
The ProRes vs DNxHR debate doesn't have a single winner. The "better" codec is the one that aligns with your specific needs. ProRes remains the undisputed king within the Apple ecosystem, offering unparalleled performance on Macs, especially with Final Cut Pro. In contrast, DNxHR stands as the champion of cross-platform compatibility, providing a robust and open-standard solution for collaborative teams and Windows-based editors. Understanding the strengths and weaknesses of each is crucial for building an efficient and frustration-free post-production workflow.
Ultimately, the limitations of codec compatibility should never stifle creativity. With powerful and intuitive tools like Wondershare UniConverter, the technical barriers between operating systems and proprietary formats are easily overcome. By enabling quick, high-quality conversions, UniConverter empowers editors to use the best footage and collaborate with anyone, regardless of the software or hardware they use.
FAQs
-
1. Can I edit ProRes files on a Windows PC?
Yes, you can. Most modern professional NLEs like Adobe Premiere Pro and DaVinci Resolve can decode and play back ProRes files on a Windows PC. However, the performance may not be as smooth as on a Mac. The main limitation is encoding; you cannot easily export or render new files in the ProRes format on Windows. For a smooth editing experience and to facilitate round-trip collaboration, it is highly recommended to convert ProRes files to an edit-friendly format like DNxHR using a tool like UniConverter. -
2. Is DNxHR the same as DNxHD?
No, they are not the same. DNxHD is an older Avid codec that is limited to HD resolutions (e.g., 1920x1080, 1280x720). DNxHR was developed as its successor to support a much wider range of high-resolution formats, including 2K, UHD (4K), and beyond. Essentially, DNxHR is the modern, resolution-independent version of DNxHD. -
3. Will I lose quality when converting from ProRes to DNxHR?
When you convert between comparable high-bitrate versions of these two professional intermediate codecs (for example, from ProRes 422 HQ to DNxHR HQX), the conversion is considered "visually lossless." This means that while there is a mathematical change in data during the transcode, any degradation in image quality is so minimal that it is imperceptible to the human eye. This makes it a perfectly safe and standard practice in professional post-production workflows.
