
In the world of professional video production, the codec you choose to record in is one of the most critical decisions you'll make. It impacts everything from image quality and post-production flexibility to storage costs and editing performance. Apple's ProRes family of codecs has long been an industry standard, but the introduction of ProRes RAW has created a new point of consideration for filmmakers and videographers. The decision between ProRes 422 vs ProRes RAW isn't just a technical one; it's a choice that defines your entire workflow.
Understanding the fundamental differences between these two powerful formats is key to optimizing your production pipeline. One is a universally compatible, high-quality finishing codec, while the other offers the ultimate flexibility of RAW sensor data. This guide will break down everything you need to know to make an informed decision for your next project.
In this article, we will cover:
- An introduction to Apple ProRes 422 and Apple ProRes RAW.
- A quick comparison table highlighting their key differences.
- A detailed analysis of which codec is better for flexibility, workflow, and performance.
- Specific use cases for both ProRes 422 and ProRes RAW.
- A step-by-step guide on how to convert video formats for maximum compatibility.
Part 1. What is Apple ProRes 422? What is Apple ProRes RAW?
Before we can compare them, it's essential to understand what each codec is and how it functions. They may share the "ProRes" name, but they operate on fundamentally different principles.
What is Apple ProRes 422?
Apple ProRes 422 is a high-quality, intermediate video codec designed for use during post-production. It uses lossy compression, but it's visually lossless, meaning it retains a very high level of image detail that is virtually indistinguishable from the uncompressed source.
The key characteristic of ProRes 422 is that it records processed video data. When you shoot in this format, your camera's image processor "bakes in" critical settings like white balance, ISO, noise reduction, and the specific color science of the camera manufacturer. This means the image you see on your monitor is the image you get in your editing software. While you can still perform color correction and grading, your ability to make drastic changes to these core parameters is limited.
The ProRes 422 family includes several variants, each offering a different balance between quality and data rate:
- ProRes 422 Proxy: For offline editing workflows.
- ProRes 422 LT: A good balance for projects where storage is a concern.
- ProRes 422: The workhorse standard for many professional productions.
- ProRes 422 HQ: Offers higher quality and data rates for demanding post-production work.
Its greatest strength is its universal compatibility. For over a decade, ProRes 422 has been the go-to codec for editing, and as a result, it is supported by virtually every professional non-linear editing (NLE) software, including Final Cut Pro, Adobe Premiere Pro, and DaVinci Resolve.
What is Apple ProRes RAW?
Apple ProRes RAW is a revolutionary codec that aims to deliver the quality and workflow advantages of RAW recording with the real-time performance of traditional ProRes. Unlike ProRes 422, ProRes RAW captures minimally processed data directly from the camera's sensor.
This means that crucial image information—like white balance, ISO, and exposure—is not permanently baked into the file. Instead, this data is stored as metadata, giving you the freedom to adjust and fine-tune these settings non-destructively in post-production. It's like having a digital negative; you can "re-develop" your footage after the shoot to correct errors or make creative choices.
The process of converting this raw sensor data into a viewable image is called "debayering" or "demosaicing," and it is handled by your editing software. This process is computationally intensive but unlocks incredible flexibility. ProRes RAW also comes in two variations: ProRes RAW and ProRes RAW HQ, with the latter offering higher data rates and even better quality.
However, this power comes with a significant trade-off: limited software and hardware support. It is primarily designed to work within Apple's ecosystem, with the best support found in Final Cut Pro.
Part 2. Quick Comparison Table
For a quick overview, here is a side-by-side comparison of the key attributes of ProRes 422 and ProRes RAW.
| Feature | ProRes 422 | ProRes RAW |
| Data Type | Processed Video Data | Raw Sensor Data |
| Post-Production Flexibility | Limited | High |
| White Balance/ISO Adjust | No (Baked-in) | Yes (Adjustable via Metadata) |
| File Size | Moderate to High | Variable, often smaller than ProRes 422 HQ |
| Editing Performance | Excellent | Good, but more CPU/GPU intensive |
| Software Compatibility | Universal | Limited (Best with Final Cut Pro) |
Part 3. ProRes 422 vs ProRes RAW: Which One Is Better?
The question of "which is better" depends entirely on your priorities. Let's break down the comparison across three critical areas: flexibility, workflow, and performance.
Flexibility and Color Grading
This is where ProRes RAW truly shines and presents its most compelling advantage. Because it captures data directly from the sensor, ProRes RAW gives the colorist or editor an extraordinary amount of control. You can fundamentally alter the look of your footage in post-production without degrading the image quality.
- Exposure: If a shot is slightly over or underexposed, ProRes RAW allows you to recover significant detail in the highlights and shadows.
- White Balance: You can completely change the white balance after the fact, correcting for mixed lighting or creating a specific mood.
- ISO: The ISO can be adjusted in post, effectively changing the "digital gain" applied to the image. This gives you another tool for managing noise and exposure.
- Color Space/Gamma: You have control over the color space and gamma curve transformations, allowing for a more precise and flexible color grading workflow.
In contrast, ProRes 422 footage has these settings already applied. While you can still push and pull the colors and exposure, you are working with a finished image. Attempting to make major corrections, like fixing an incorrect white balance, can lead to image degradation, banding, or other artifacts. For projects that demand the highest level of creative control in the color grade, ProRes RAW is the undisputed winner.
Workflow and Compatibility
Workflow and compatibility are the areas where ProRes 422 holds a massive advantage. It is the industry's lingua franca. You can shoot on a Sony camera, record to an Atomos device in ProRes 422, hand the files to an editor on Premiere Pro, and then send them to a colorist using DaVinci Resolve without a single hiccup. This seamless integration makes it the safest and most reliable choice for collaborative projects or when you're unsure of the entire post-production pipeline.
ProRes RAW, on the other hand, exists in a more exclusive club. Its native support is largely limited to Apple's Final Cut Pro. While other NLEs like Adobe Premiere Pro and Avid Media Composer have added support, it often requires specific plugins and may not be as performant. The most significant compatibility issue is with Blackmagic Design's DaVinci Resolve, one of the industry's leading platforms for color grading, which currently offers no native support for ProRes RAW.
This forces editors and colorists into a difficult position. To work with ProRes RAW footage in Resolve, you must first transcode it into a different format, such as ProRes 422 HQ or an open-standard RAW format. This extra step adds time, requires significant storage space, and can be a major bottleneck in a professional workflow. This compatibility hurdle is a primary reason why many professionals stick with ProRes 422. Fortunately, this problem can be easily solved by using a professional video converter to bridge the gap between formats.
Performance and File Size
When it comes to editing performance, the comparison is nuanced. On paper, ProRes 422 is less demanding on your computer's hardware. Since the image is already processed, your computer can focus solely on playback and applying effects. This results in a smooth, real-time editing experience on a wide range of systems.
ProRes RAW requires your computer to perform the debayering process in real-time. This is a CPU and GPU-intensive task that can strain less powerful machines, potentially leading to dropped frames or sluggish performance, especially with 4K or higher resolution footage. However, modern computers, particularly Apple Silicon Macs, are highly optimized for this task, making ProRes RAW editing surprisingly fluid.
The file size comparison often surprises people. One might assume that RAW files are always larger, but that's not necessarily the case. ProRes RAW uses a very efficient compression algorithm. As a result, ProRes RAW files are often significantly smaller than their ProRes 422 HQ counterparts while containing far more image information. For example, a clip shot in ProRes RAW might be smaller than the same clip shot in ProRes 422 HQ, but larger than one shot in standard ProRes 422. This makes ProRes RAW a compelling option for capturing maximum quality without completely overwhelming your storage budget.
Part 4. Use Cases for ProRes 422 and ProRes RAW
The best way to choose is to match the codec to the specific needs of your project.
When to Use ProRes 422
ProRes 422 is the ideal choice for projects where speed, reliability, and compatibility are the top priorities.
- Quick Turnaround Projects: For corporate videos, event coverage, or broadcast news, where you need to edit and deliver content quickly, ProRes 422 is perfect. The "what you see is what you get" nature of the footage means less time is needed for extensive color correction.
- Collaborative Workflows: If you are working with a team of editors, colorists, and VFX artists who may be using different software (e.g., a mix of Premiere Pro and DaVinci Resolve), ProRes 422 ensures that everyone can work with the files without issue.
- Proxy and Delivery Files: It's an excellent format for creating high-quality proxy files for offline editing from higher-resolution source material. It's also a standard for final delivery masters for broadcast and streaming platforms.
- When You Trust Your In-Camera Look: If you are confident in your ability to nail exposure and white balance in-camera and love the color science of your camera, ProRes 422 reliably captures that look.
When to Use ProRes RAW
ProRes RAW is for productions where creative control and maximum image fidelity are non-negotiable.
- Narrative Films, Commercials, and Music Videos: These projects often involve heavy color grading to create a specific mood or style. The flexibility of ProRes RAW is invaluable for achieving a unique cinematic look and allows for extensive manipulation in post.
- VFX-Heavy Projects: The extra data captured in a ProRes RAW file provides more information for keying, tracking, and compositing, which can lead to cleaner and more realistic visual effects.
- Challenging Lighting Conditions: When shooting in situations with high dynamic range (e.g., a bright sky and deep shadows in the same frame), ProRes RAW captures the maximum possible range from the sensor, giving you the best chance to recover detail in both extremes.
- Final Cut Pro-Centric Workflows: If your entire post-production pipeline is built around Final Cut Pro, using ProRes RAW is a seamless and incredibly powerful experience.
Part 5. Step-by-Step Guide to Convert Video Formats Using UniConverter
Why You Might Need to Convert Video Formats
In professional video workflows, converting between codecs like ProRes is common. You might need to convert ProRes RAW to ProRes 422 for compatibility with software like DaVinci Resolve, or you may have other conversion needs to standardize your project files. For these tasks, a reliable tool is essential. Wondershare UniConverter stands out as a fast and powerful solution that supports a vast range of professional formats, including the entire ProRes family. It simplifies the transcoding process, ensuring your files are ready for any editing or grading software in your pipeline.
How to Convert Files with UniConverter
Step 1: Choose Converter in UniConverter
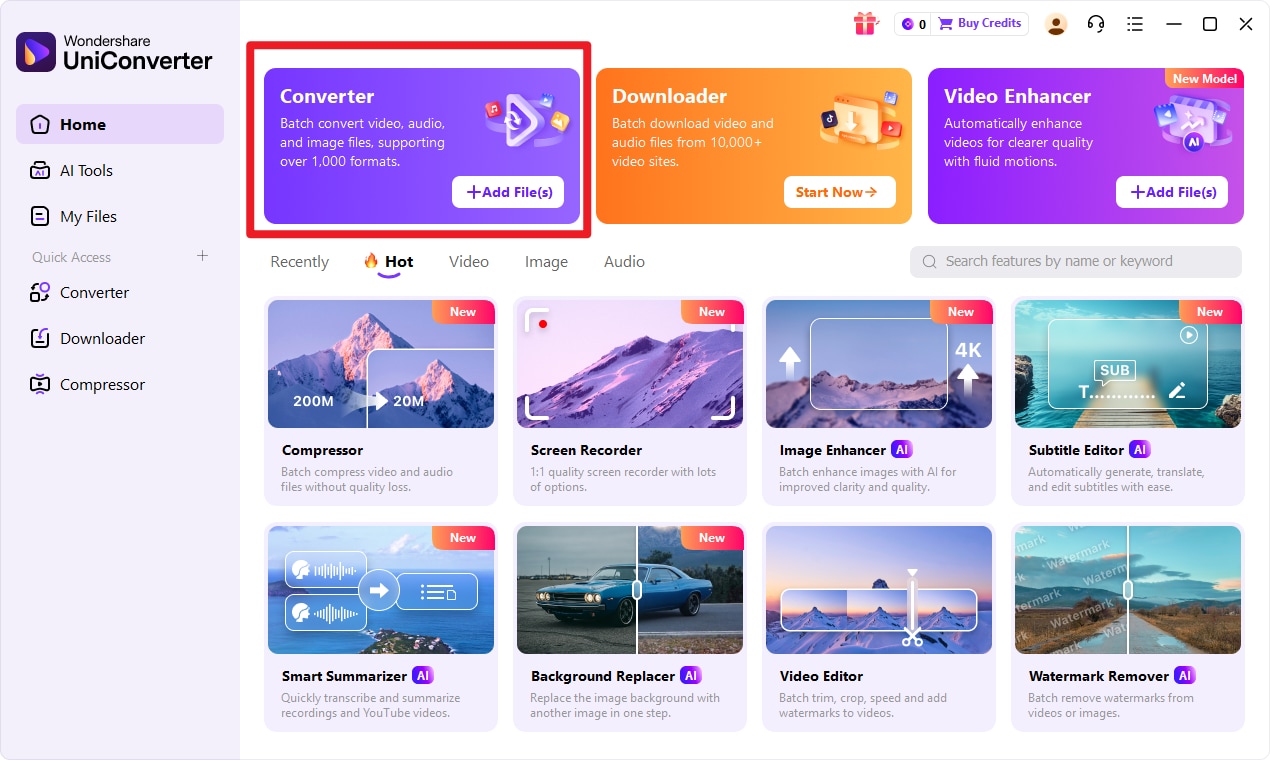
Launch Wondershare UniConverter on your computer. On the main screen, you will see a list of tools on the left. Select the Converter option to open the video conversion module.
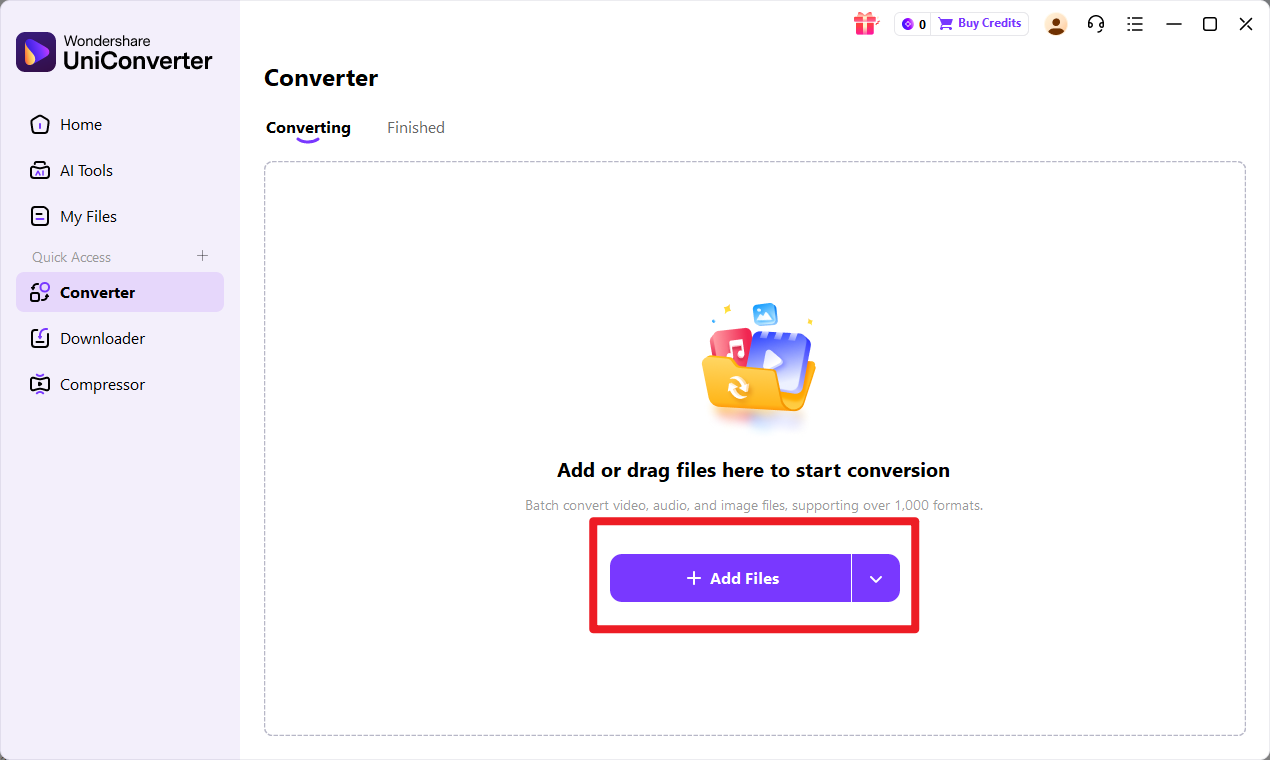
Step 2: Add Files to UniConverter
Drag your input format video files directly from your folder and drop them into the UniConverter window. Alternatively, you can click the Add Files icon in the top-left corner to browse your computer's storage and import your source files.
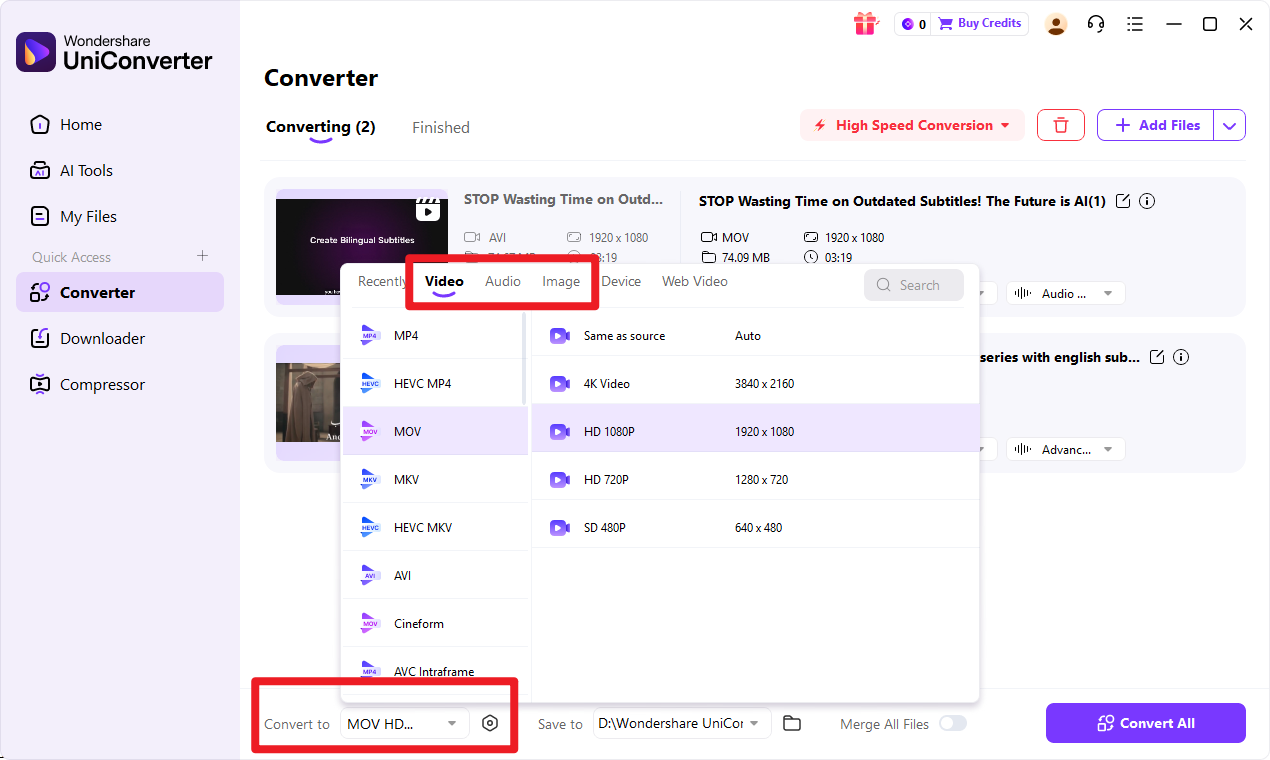
Step 3: Choose Output Format
Click on the Output Format menu located at the bottom of the window. This will open a new dialog box. Navigate to the Video tab, select your desired target format (like ProRes) from the list on the left, and then choose a specific resolution or preset on the right.
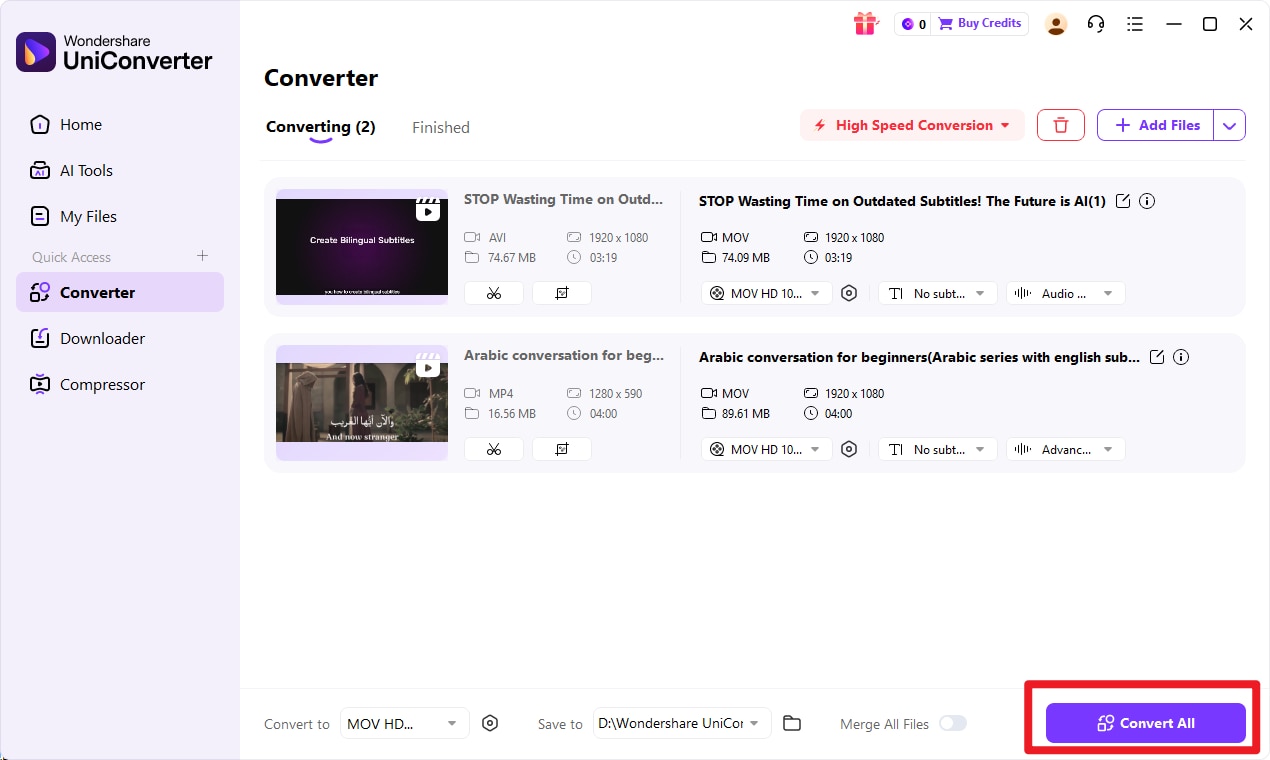
Step 4: Start the Conversion
Before starting, you can choose a destination for your converted files by using the File Location menu at the bottom. Once you are ready, click the Start All button in the bottom-right corner to begin the conversion process for all your imported files.

Go Beyond Simple Video Conversion
Conclusion
Ultimately, the choice between ProRes 422 and ProRes RAW is not about finding a single "better" codec, but about selecting the right tool for the job at hand. Each format serves a distinct purpose and excels in different scenarios. Your decision should be guided by the specific demands of your project, your post-production workflow, and your hardware capabilities.
Choose ProRes 422 when your priorities are speed, universal compatibility, and a straightforward, reliable workflow. It remains the industry workhorse for a reason and is the safest bet for collaborative projects and quick-turnaround content.
Choose ProRes RAW when you need the absolute maximum in image quality and post-production flexibility. It is the superior choice for cinematic projects that involve intensive color grading and VFX, provided your workflow is equipped to handle its specific compatibility requirements.
When you inevitably encounter those compatibility hurdles or need to transcode footage from one professional format to another, a powerful and versatile tool is essential. Wondershare UniConverter proves to be an indispensable part of any modern video workflow, effortlessly bridging the gaps between different codecs and ensuring your creative vision is never limited by technical barriers.
FAQs
-
1. Is ProRes RAW a true RAW format?
Yes, it is a RAW format because it contains unprocessed or minimally processed data captured directly from the camera's sensor. This is what allows you to adjust settings like ISO and white balance in post. However, it's important to note that it applies a proprietary, visually lossless compression to achieve its manageable file sizes, which is why it's often referred to as a "compressed RAW" format, similar to Blackmagic RAW. -
2. Can I edit ProRes RAW in DaVinci Resolve?
No, as of 2026, DaVinci Resolve does not offer native support for Apple ProRes RAW. This is a major consideration for many professionals, as Resolve is a leading platform for color grading. To use ProRes RAW footage in Resolve, you must first transcode it to a compatible format, such as ProRes 422 HQ or an open-source format like CinemaDNG. This can be done efficiently using a dedicated tool like Wondershare UniConverter. -
3. Is ProRes 422 high enough quality for professional delivery?
Absolutely. Apple ProRes 422, and particularly its higher-bitrate variant ProRes 422 HQ, has been an industry standard for acquisition, editing, and final broadcast delivery for well over a decade. It provides excellent image quality that holds up to professional scrutiny and is accepted by virtually all major broadcast networks and streaming platforms. For most delivery purposes, its quality is more than sufficient.
